Summary
The Prequalified Buyer Campaign is an automated drip campaign that lets you choose which reports and assets to send, powered by MBS Highway’s most insightful tools that educate and engage your prequalified buyers. Keep reading to get started using this powerful tool!
Please note: Before creating a campaign, you will need to setup your branding. Click here to learn how.
Navigating to the Prequalified Buyer Campaign
You can find your Prequalified Buyer Campaign report within Client Manager as well as within the Marketing tab in the left-hand navigation menu.
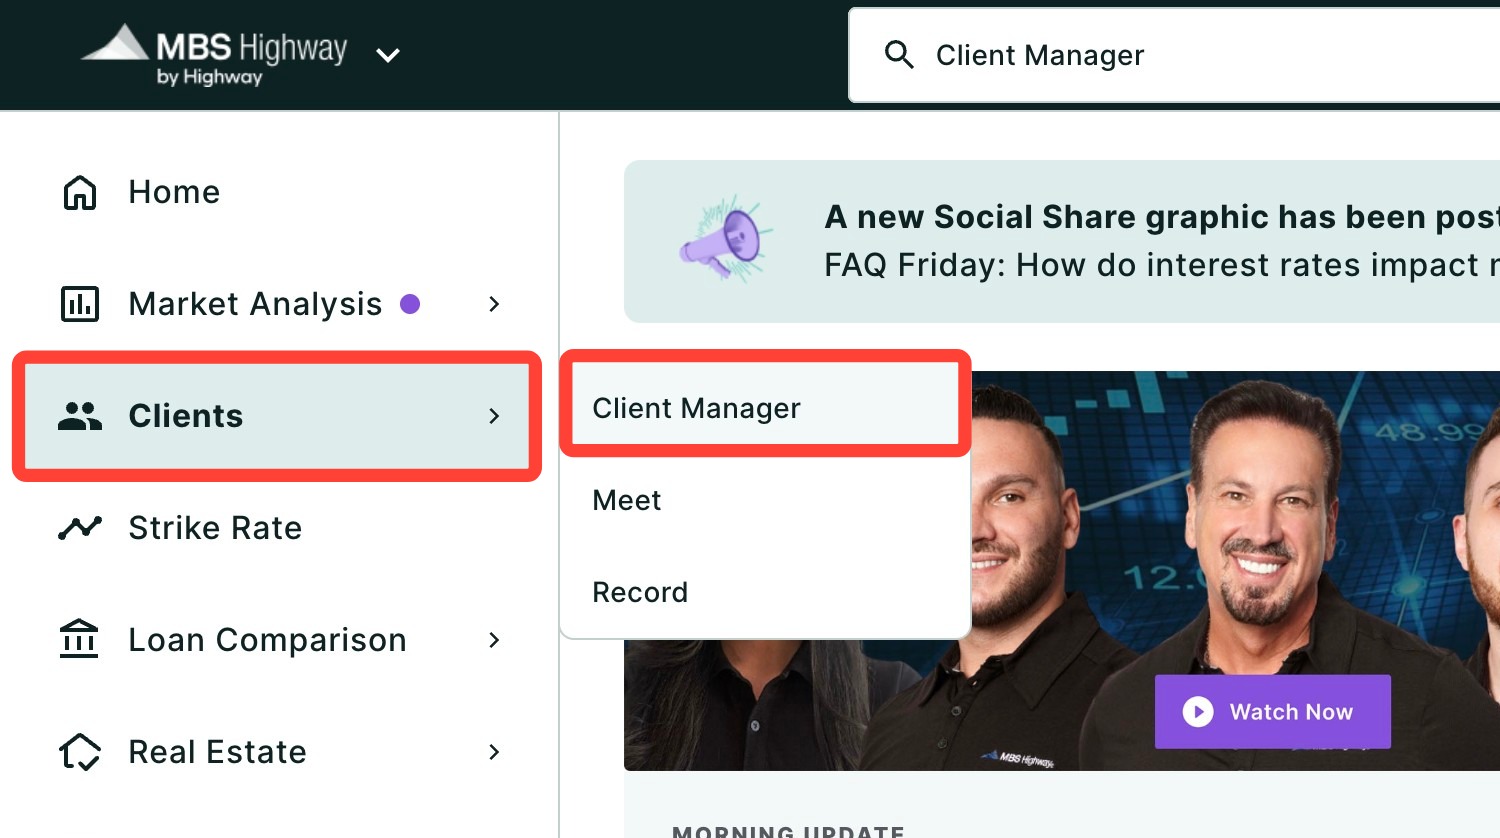
Navigating through the Client Manager
Client Manager allows you to create reports for your clients using previously saved loan and property details, saving you time when building new scenarios. To learn more, click here.
Navigating through the Marketing Menu
To access the Prequalified Buyer Campaign using the left-hand sidebar menu, click Marketing, then click Prequalified Buyer Campaign.
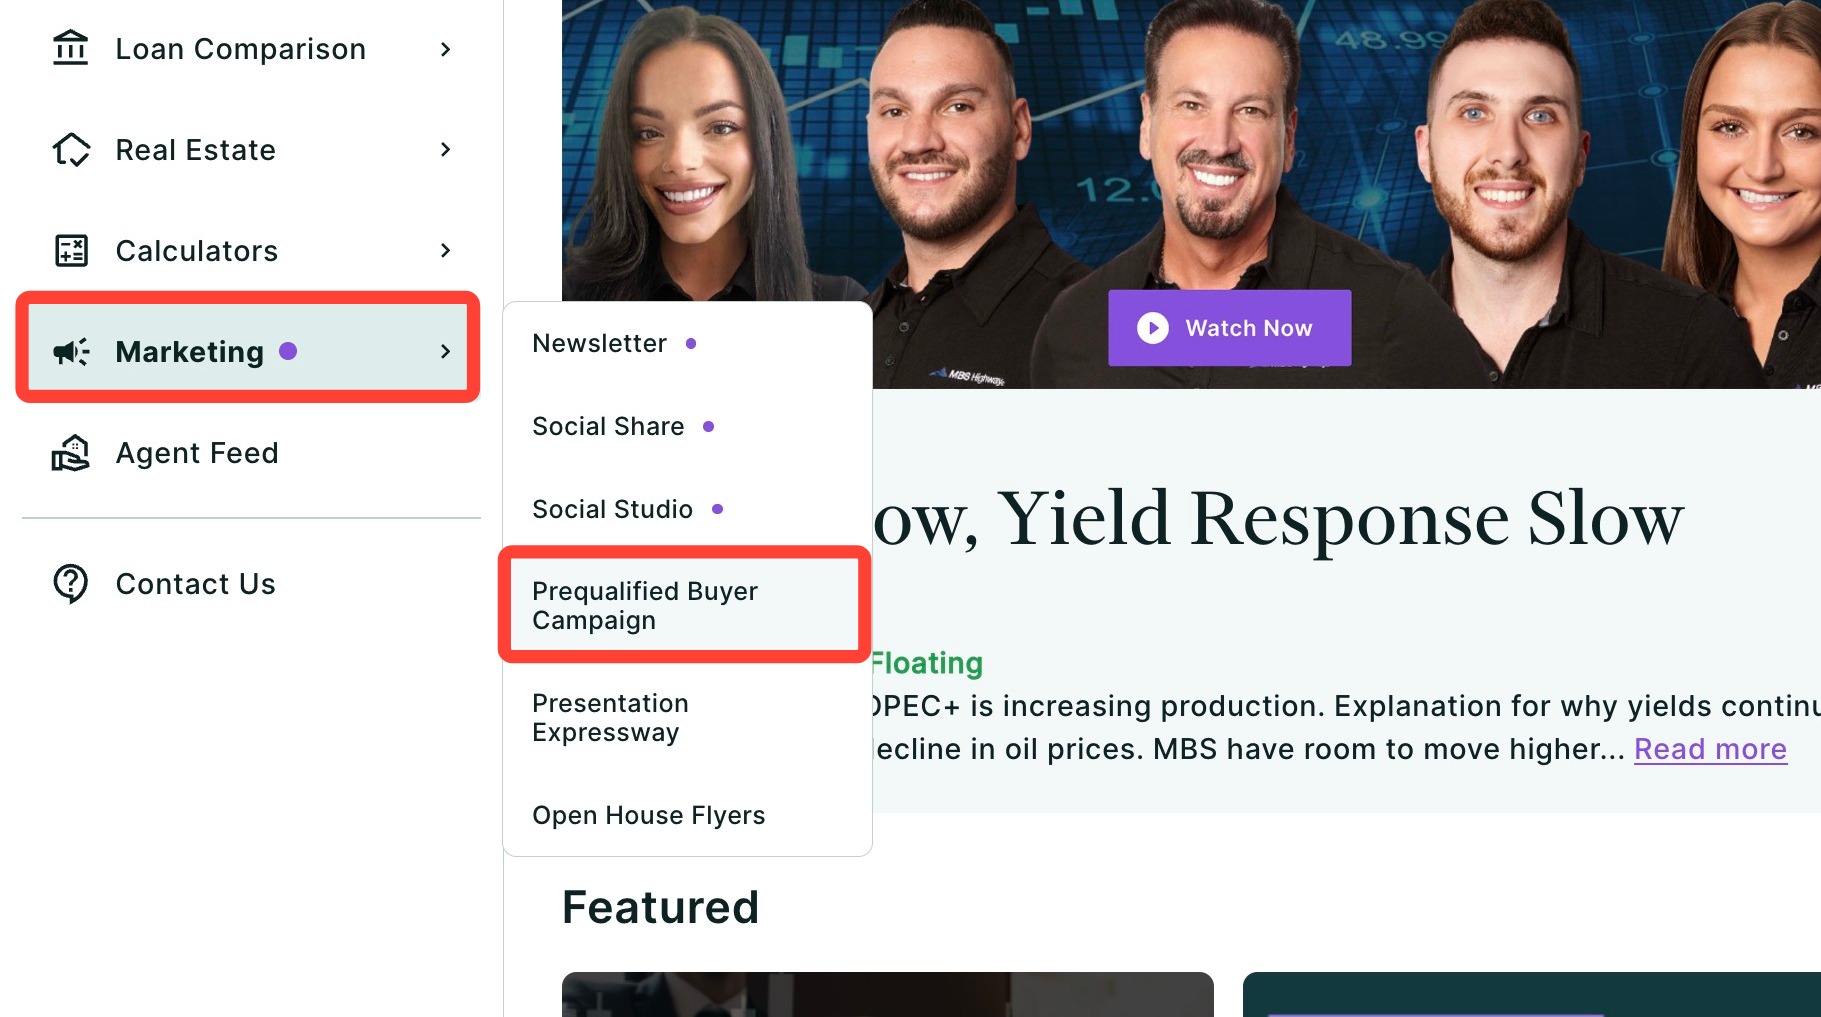
Helpful Tip: You can also search and favorite reports, tools, and calculators. Click here to learn how.
Choosing a Client and Assets
1. Add or select your client. Email is required.

2. Use the checkbox to remove any reports you would not like to include in your drip campaign (you can always change this later). The available reports include:
- Cost of Waiting
- Buy vs Rent
- Real Estate Report Card
- Appreciation
- Housing Supply and Demand
- Amortization
- Equity Gained
- National House Price Index
- Home Values Remain Resilient through Recession
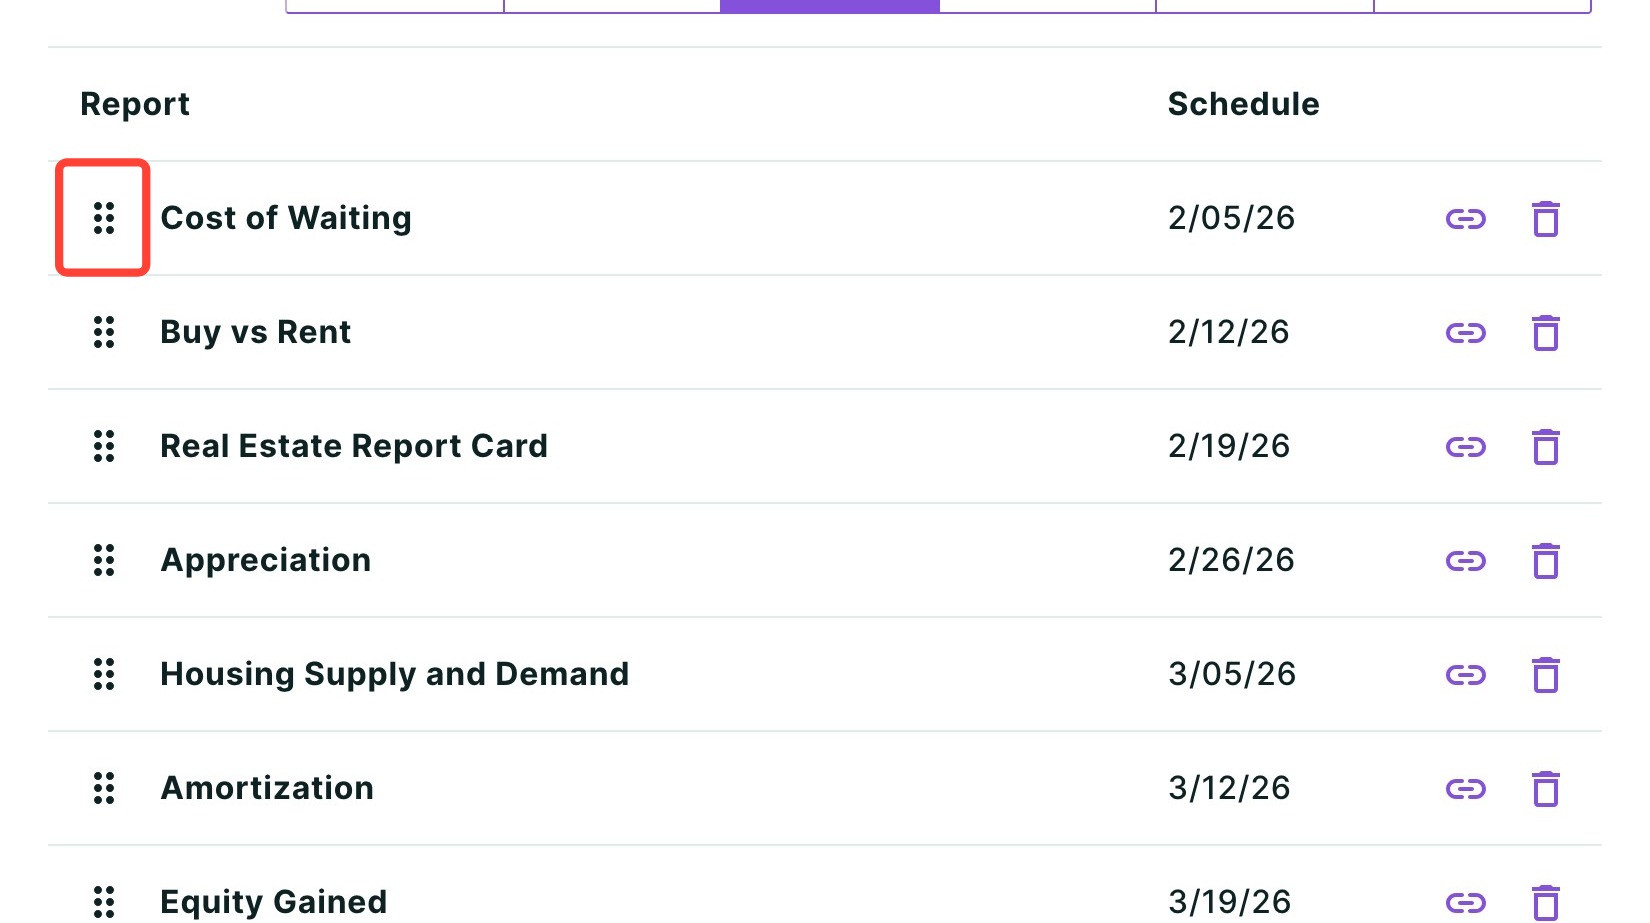
You can also change the order in which they will be sent by clicking on the 6-dot drag-and-drop icon highlighted below and dragging the tile to the desired location.

3. Click Next.
Adding Property and Loan Details
1.. Enter the property's details including:
- Location (address, city, county, or ZIP code)
- Price
- Annual Property Tax and Monthly Home Insurance will automatically calculate but are editable.
- Monthly Association Fee
2. Choose an Appreciation Calculation.

3. Enter loan information including:
- Loan Amount (can choose from drop down payments on down payment)
- Term
- Loan Program
- Loan Type
- Rate
- APR (will automatically calculate)
- Points
- Monthly Mortgage Insurance (will automatically calculate, but can be edited by entering a dollar amount or using a worksheet)
- Closing Costs (enter a dollar amount or use a worksheet)
- Credits (enter a dollar amount or use a worksheet)
- Prepaid & Escrows (enter a dollar amount or use a worksheet)
4. If generating a Buy vs Rent report, the section seen below will appear. It will automatically generate the Monthly Rent, Monthly Repairs, Annual Property Tax Increase and Cost to Sell, however these fields are editable.

5. Click Next.
Setting up Your Campaign Schedule
Next, you will be able to set up the start date, cadence and file format of the assets in your campaign.
1. Click the calendar button to change the start date.

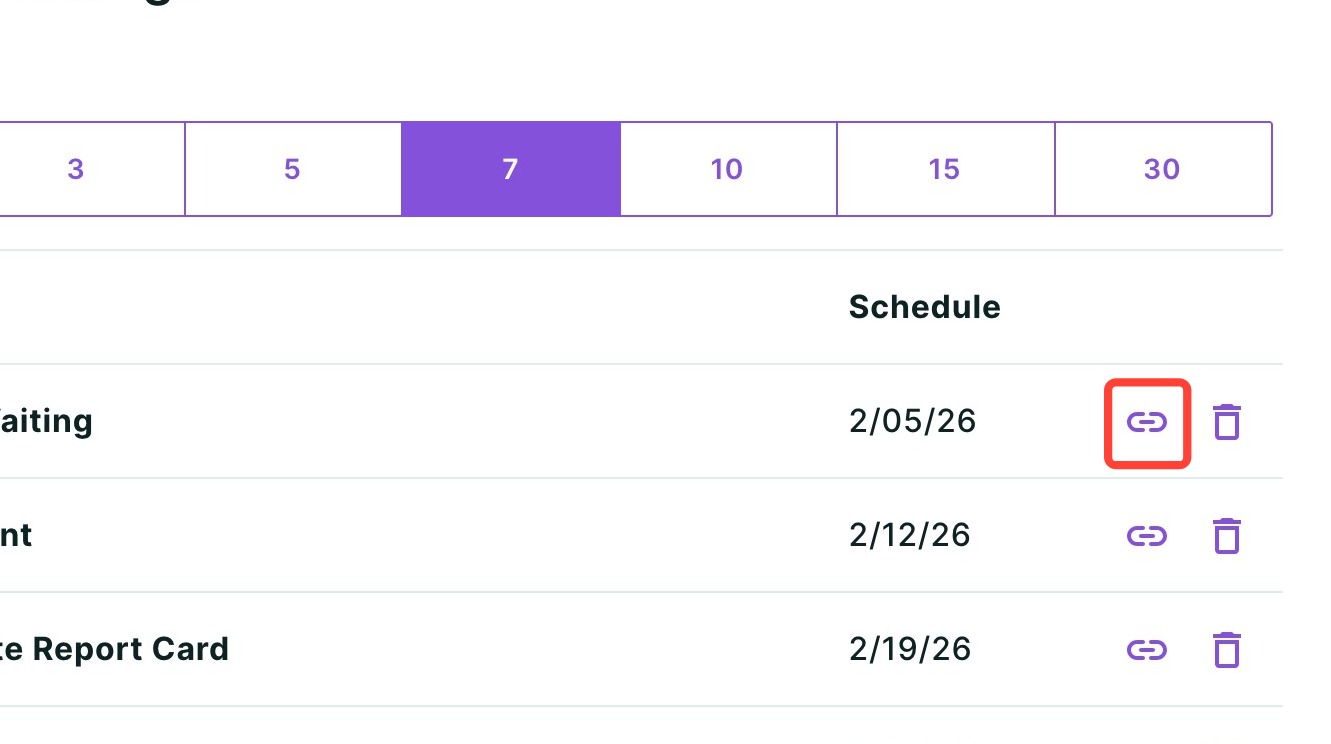
2. You can also change the interval of days for which each asset is sent. The default is every 7 days.

3. To rearrange, preview, or remove assets from your marketing campaign, click View campaign schedule.

4. Use the grab-and-drop icon highlighted below to rearrange the order of the assets sent.
5. Use the link icon to preview the asset.
6. Click the trash icon to delete the asset from your campaign.
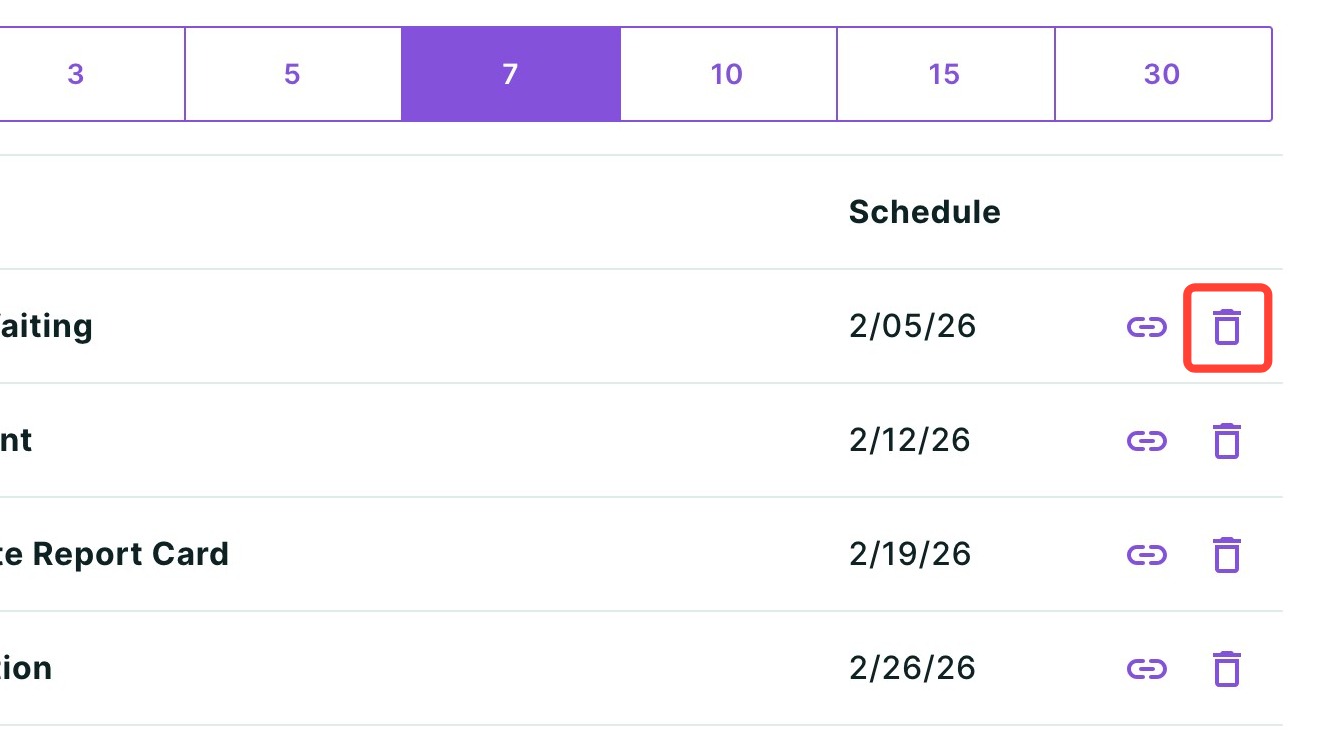
7. Click Save.
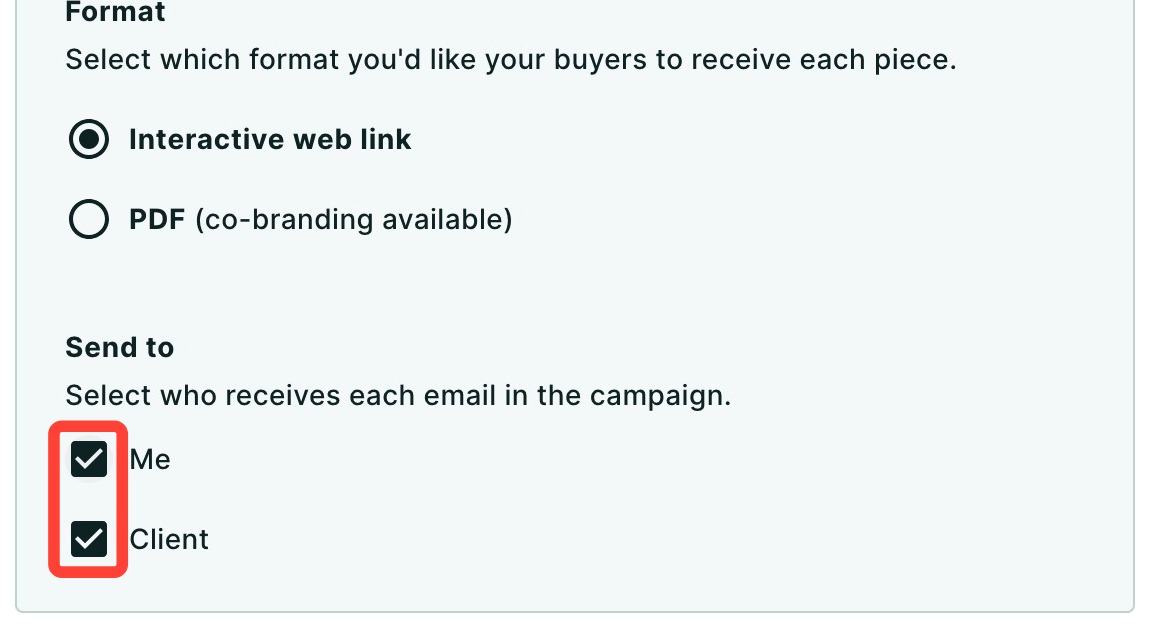
8. You can change the format of the asset to either an interactive webpage or static PDF.
9. If you select the PDF format, the option to Co-brand with an agent partner will appear. To co-brand, leave the checkbox selected, then choose an existing agent or add a new one from the dropdown below. To learn more about co-branding, click here.

10. To continue with creating your campaign without co-branding with an agent, uncheck the box
11. Use the checkboxes to select if you would like the campaign to be sent to both you and/or your client. Both boxes are checked by default.
12. Once you have made all of your desired adjustments to the campaign, click Schedule campaign.
Managing Your Campaigns within Client Manager
Once created, you can access your clients' campaigns within Client Manager. From here, you can review information and make edits to your campaign.
Accessing Prequalified Buyer Campaigns
1. To access these reports in the future, hover over your headshot and click Client Manager.

2. Next, click on your client's name.

3. To quickly find your marketing campaigns, use the Filter button and check the Prequalified Buyer Campaign checkbox.

4. You can further drill down by filtering for their current status and checking Active, Paused and/or Complete.

Some key information you will be able to see for each campaign include:
- Last Sent: Shows which asset was last sent and the date it was sent.
- Next Scheduled: Shows which asset will be sent next and the date it will be sent.
- Last Client Activity: Displays the last date your client interacted with a weblink asset, (PDF activity is not tracked.)
-
Report Status: Indicates whether a campaign is in Draft or Complete status.
- Draft means the campaign has not yet been finalized and initiated.
- Complete means the campaign has been finalized and initiated. It does not mean the drip campaign has completed.
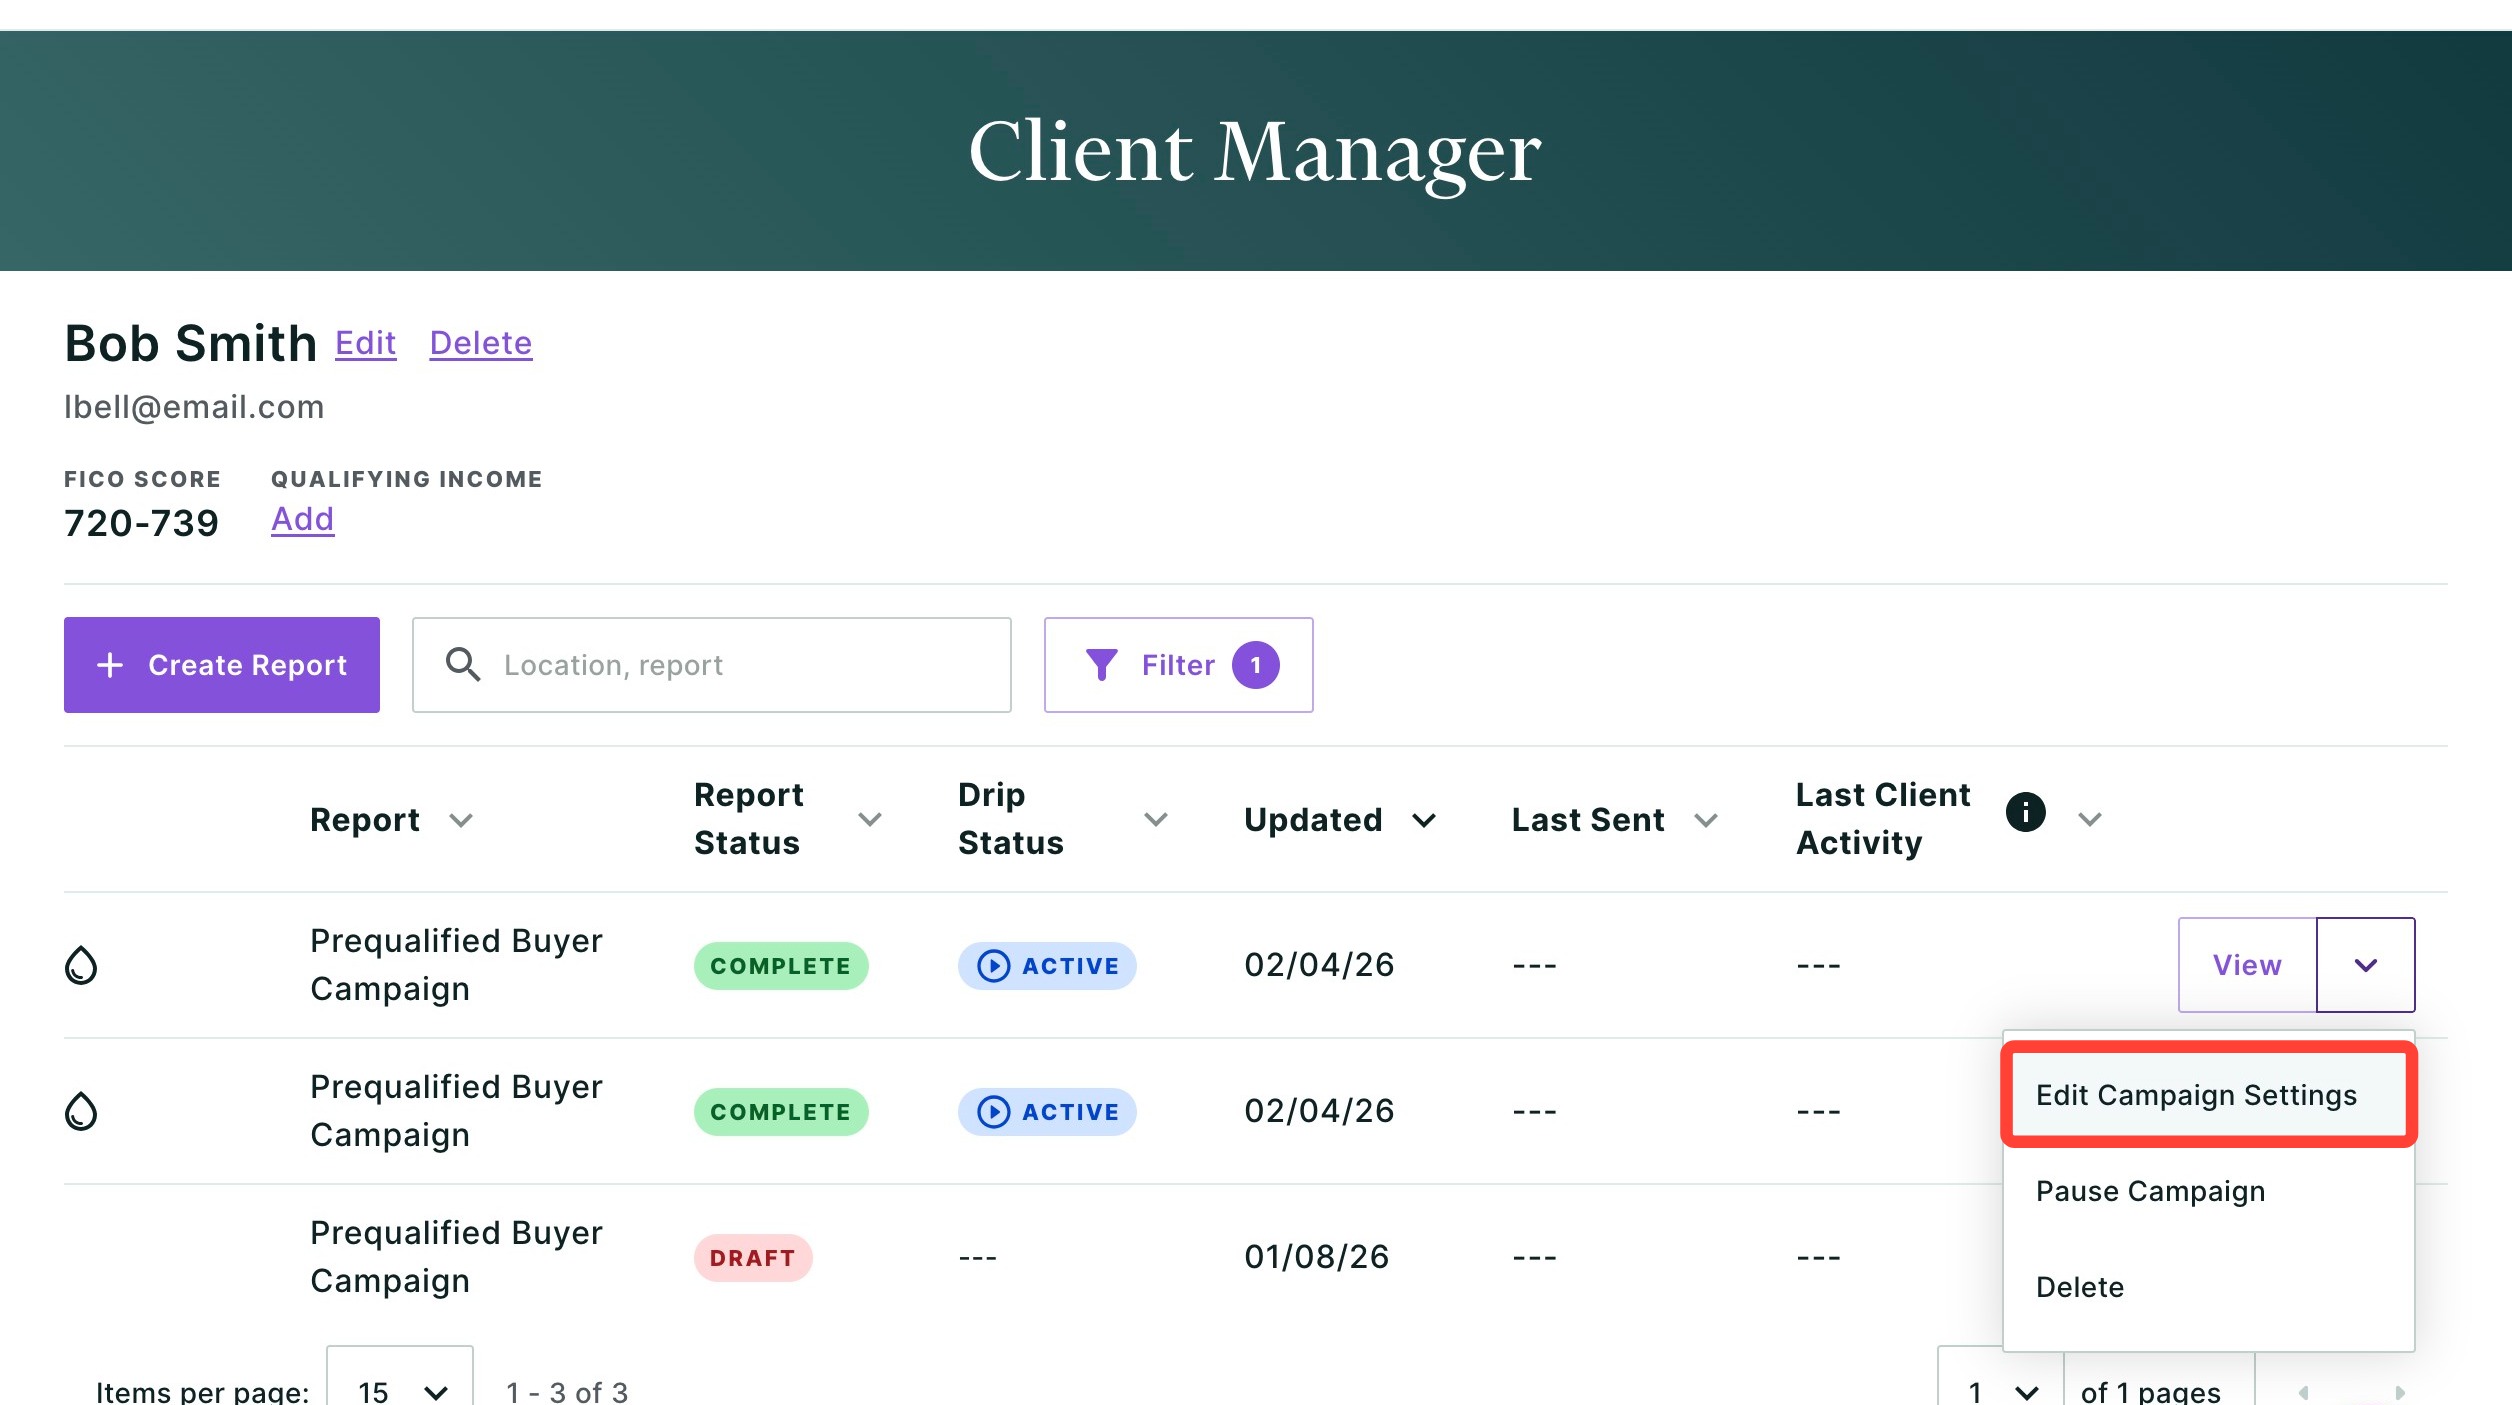
Making Changes to Your Campaign
1. To make quick edits to your client's campaign such as the interval, pausing the campaign, or order/selection of marketing assets, click Edit Campaign Settings. Once you make your updates, click Save.
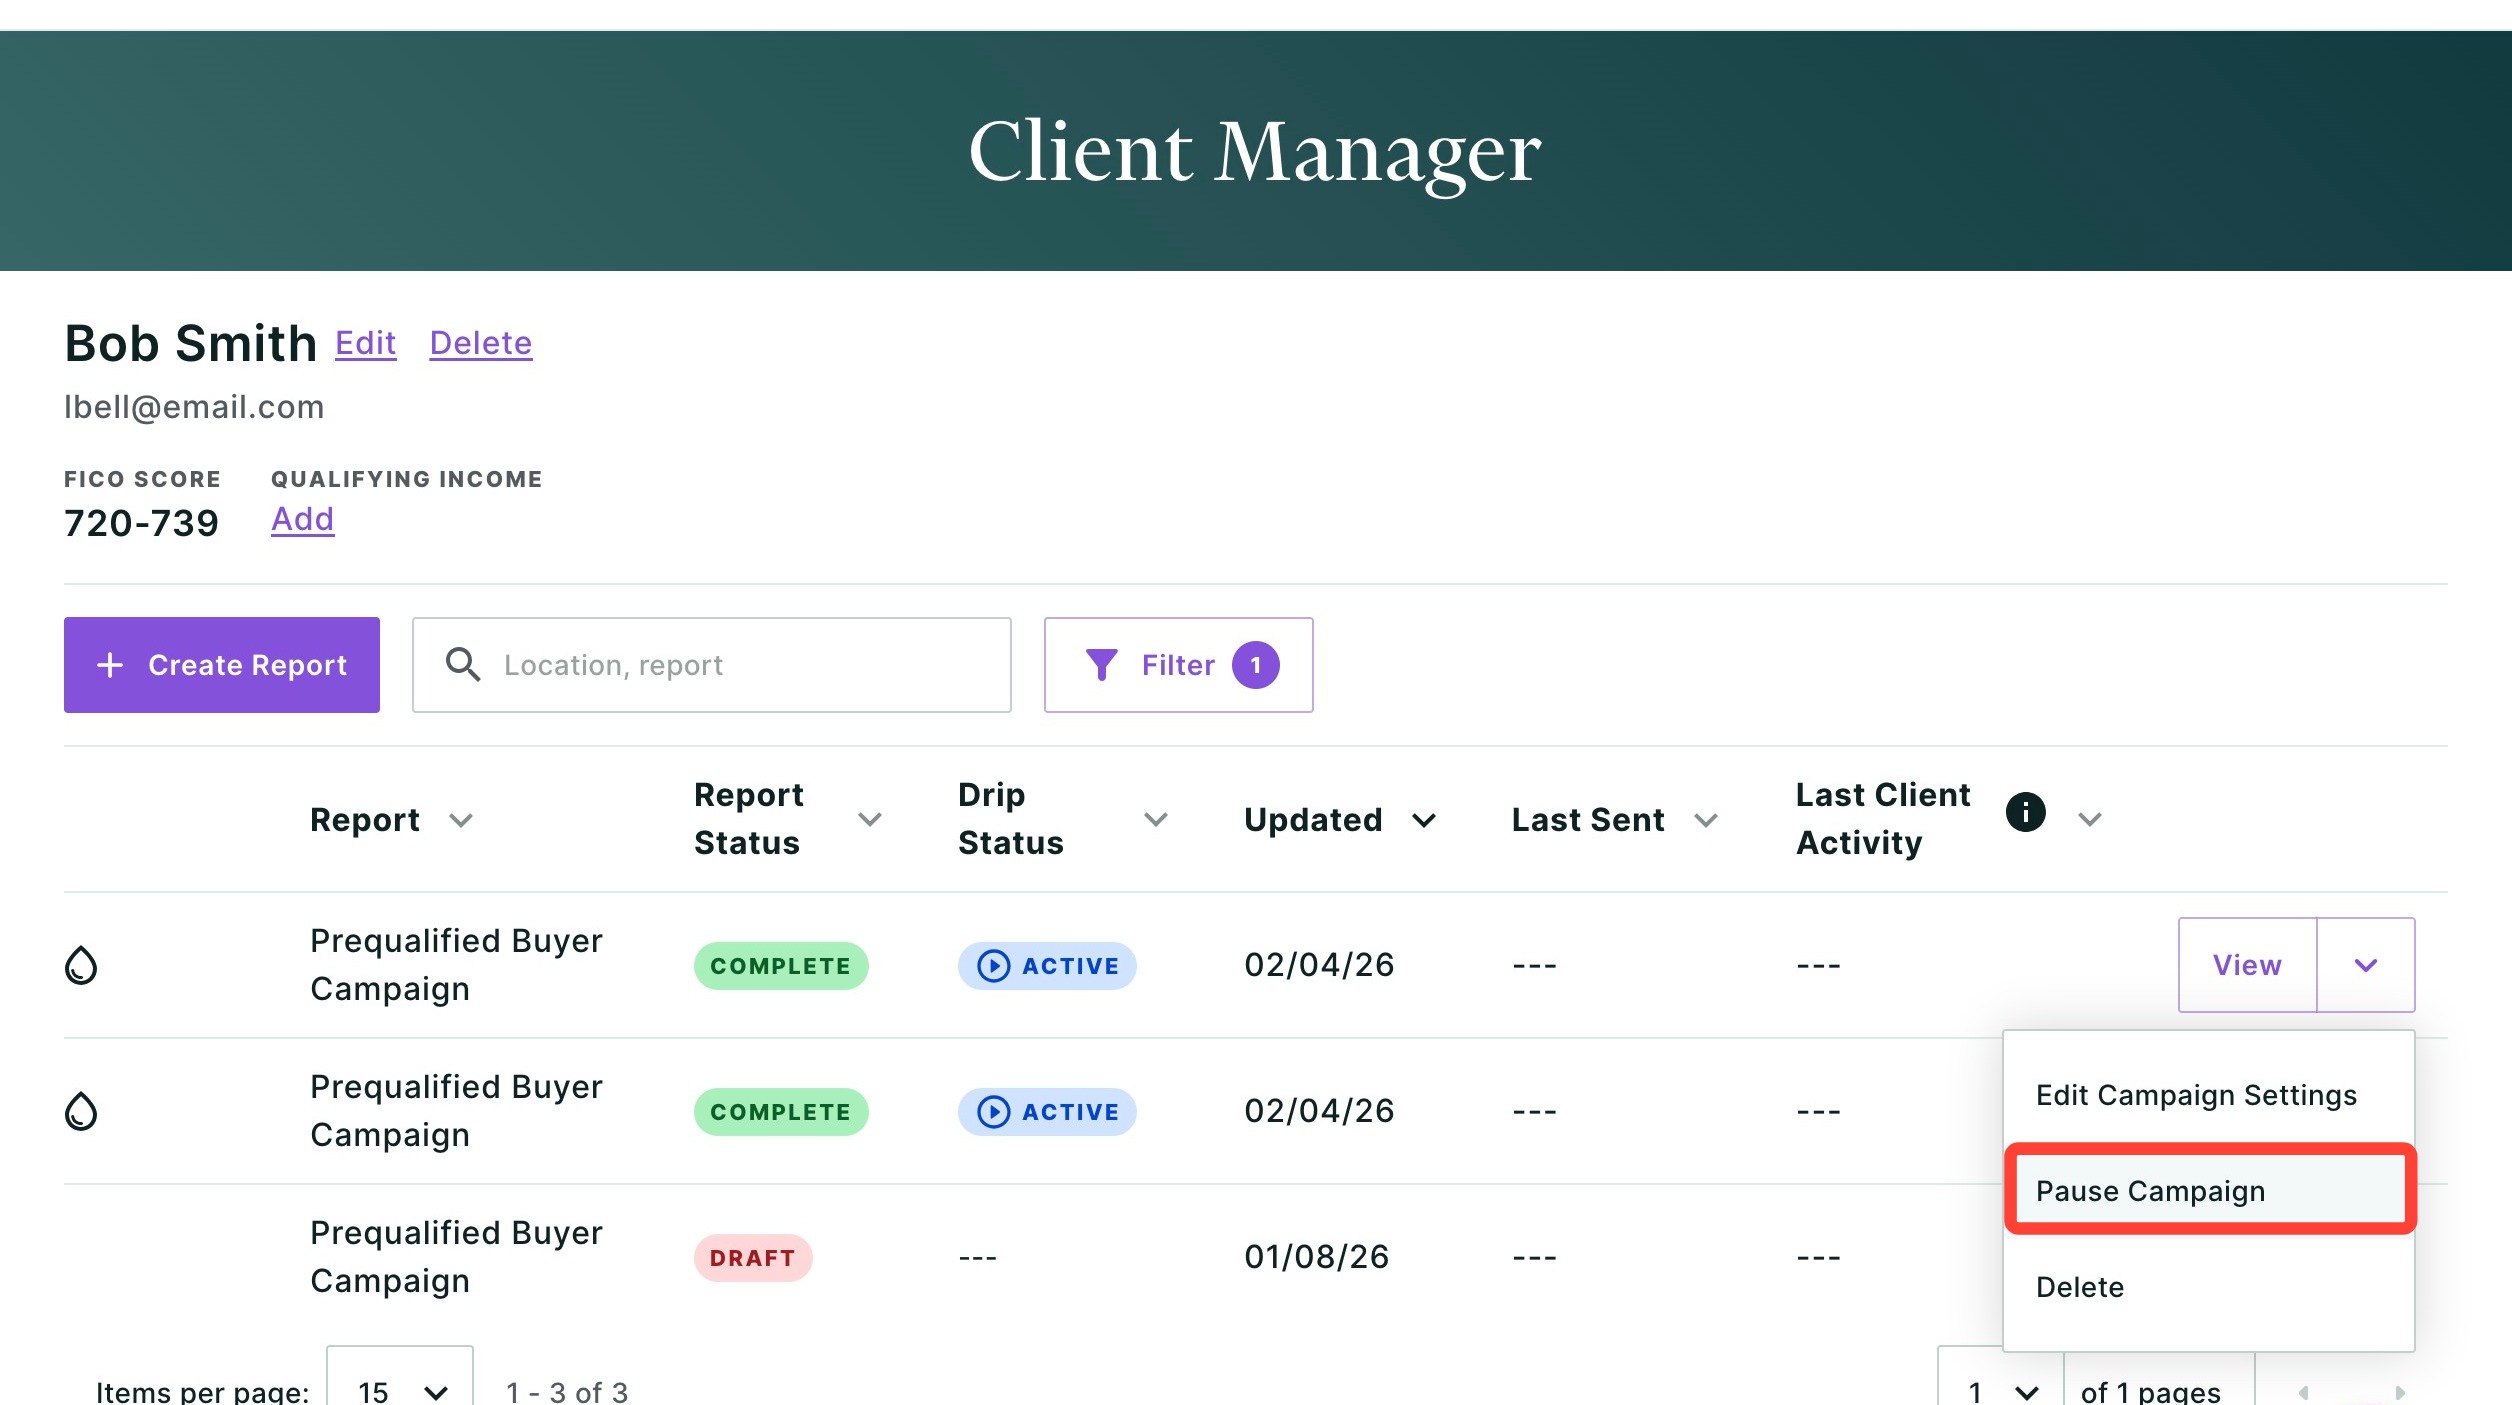
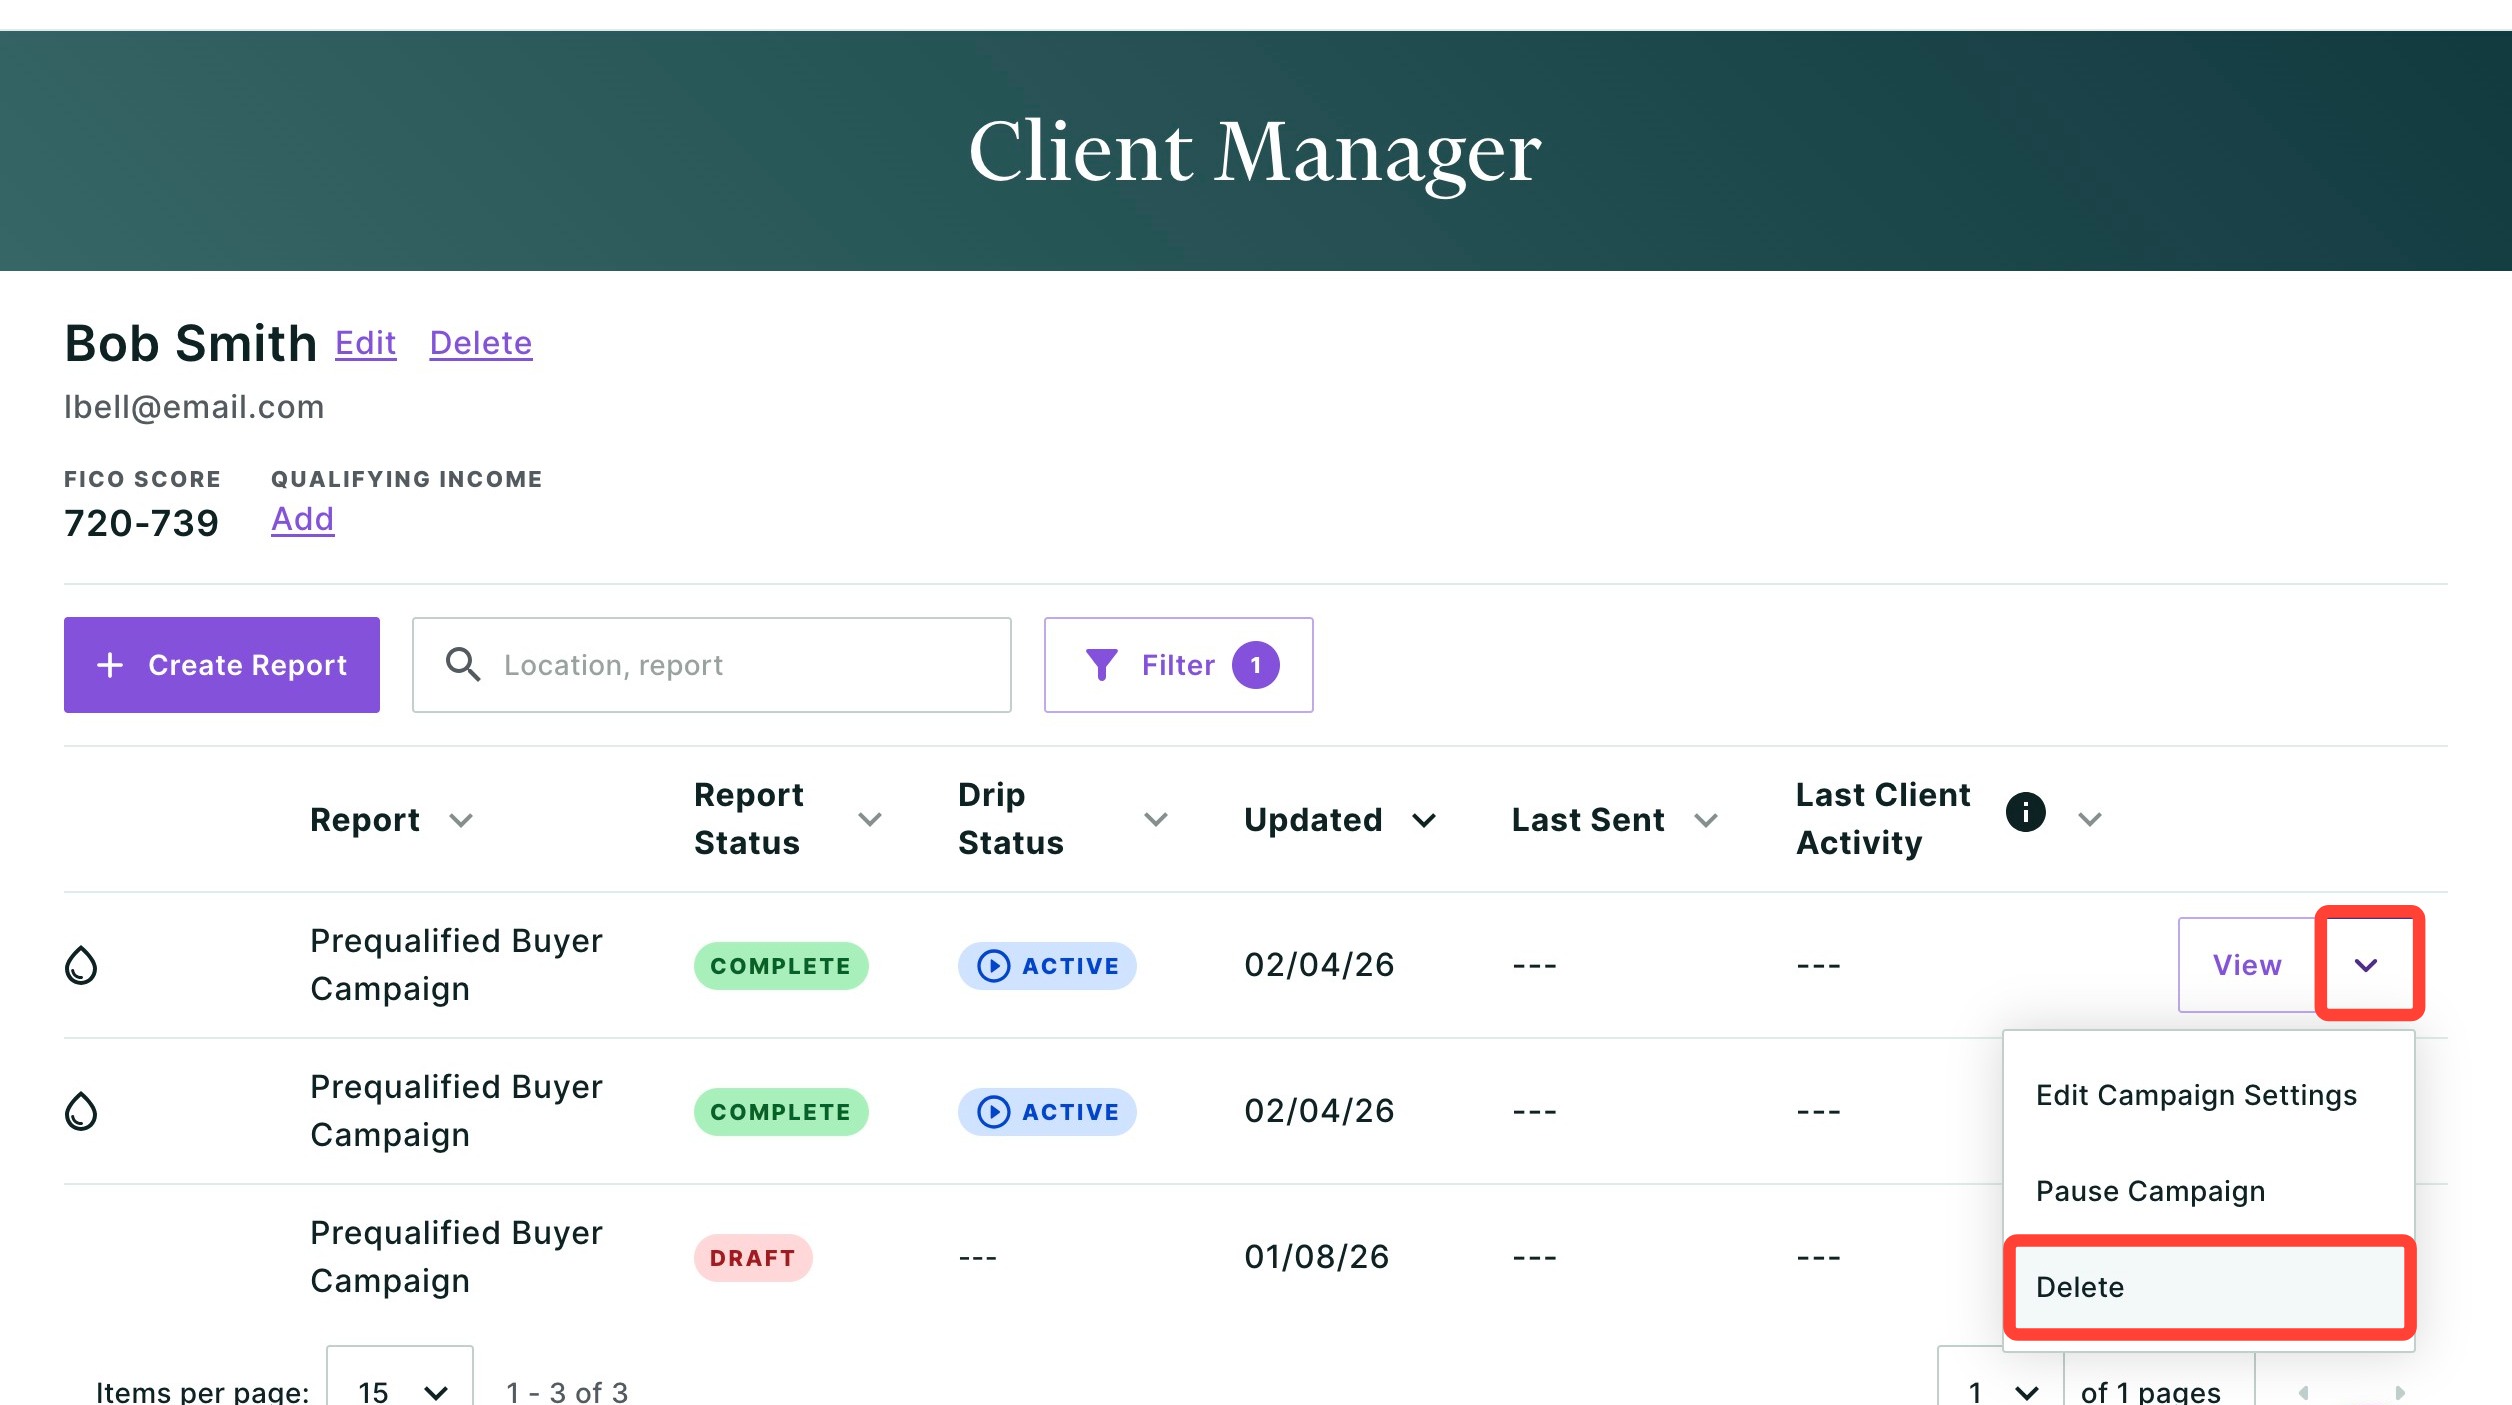
2. To quickly pause your campaign, click the down arrow next to View and click Pause Campaign. You will then be asked to confirm your selection. Click Resume Campaign to restart the campaign.
3. To delete your campaign, click the down arrow next to View and click Delete. You will then be asked to confirm if you would like to delete the campaign.
Have questions or want to learn more? Submit a ticket or call us today!
Related to