This guide walks you through using the Investment Property Analyzer to help a client evaluate a potential investment property. It covers searching for a property, entering the purchase price, and customizing the rental, property, loan, and home ownership details that drive the analysis. Use it whenever a client is weighing an investment purchase and wants to see a full breakdown of projected costs and returns.
Navigating to the Investment Property Analyzer
You can find your Investment Property Analyzer within Client Manager as well as within the Real Estate sidebar menu.
Navigating through the Client Manager
Client Manager allows you to create reports for your clients using previously saved loan and property details, saving you time when building new scenarios. To learn more, click here.
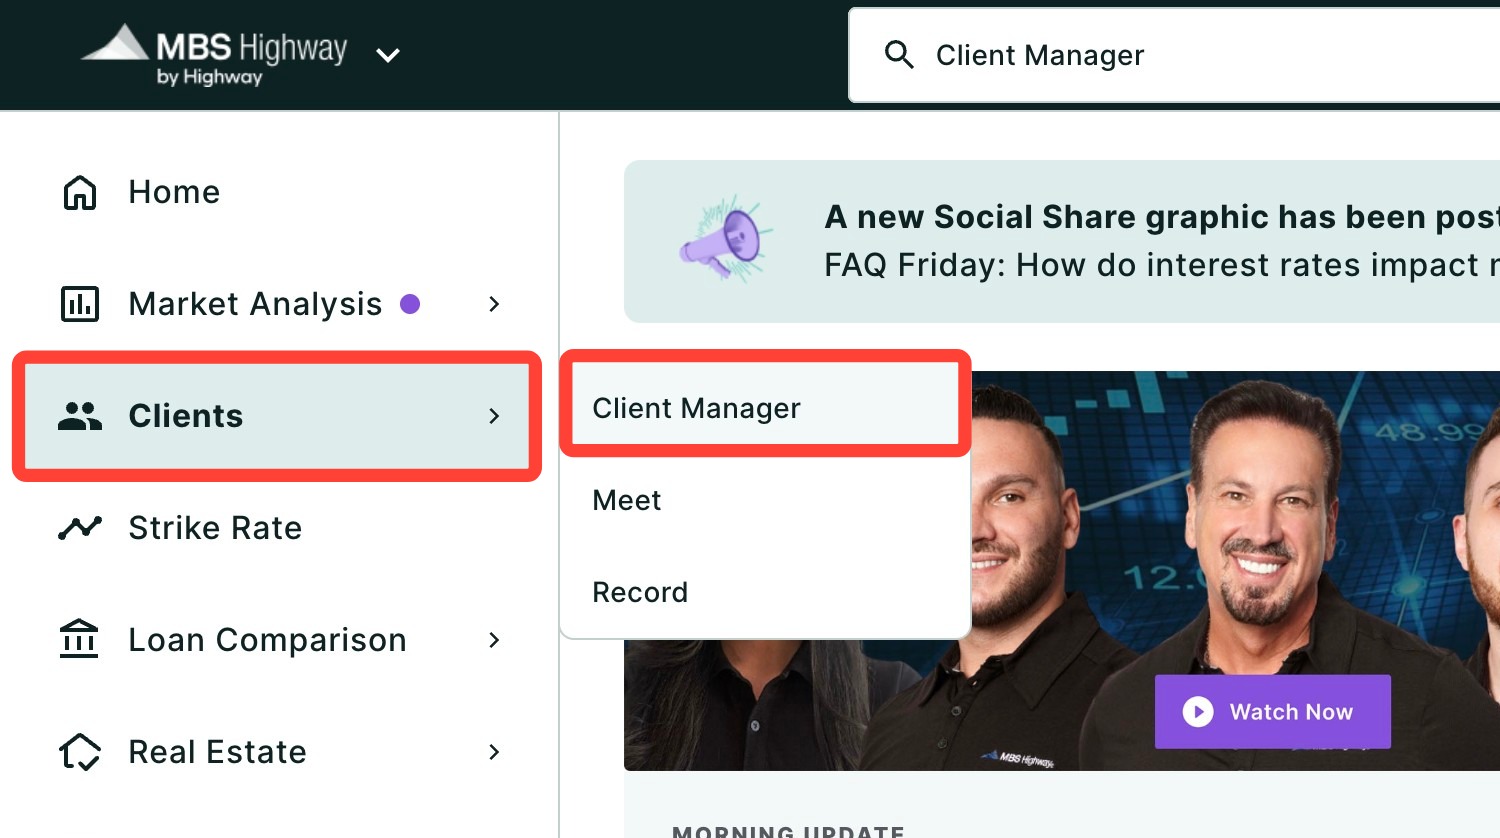
Navigating through the left-hand sidebar menu
To access the Investment Property Analyzer report using the left-hand sidebar menu, click Real Estate, then click Investment Property Analyzer.
💡 Helpful Tip: You can also search and favorite reports, tools, and calculators. Click here to learn how. |
Creating an Investment Property Analyzer Report
The Investment Property Analyzer estimates a buyer’s cumulative cash flow and profit through the purchase, maintenance, and future sale of an investment property. Keep reading to learn more:
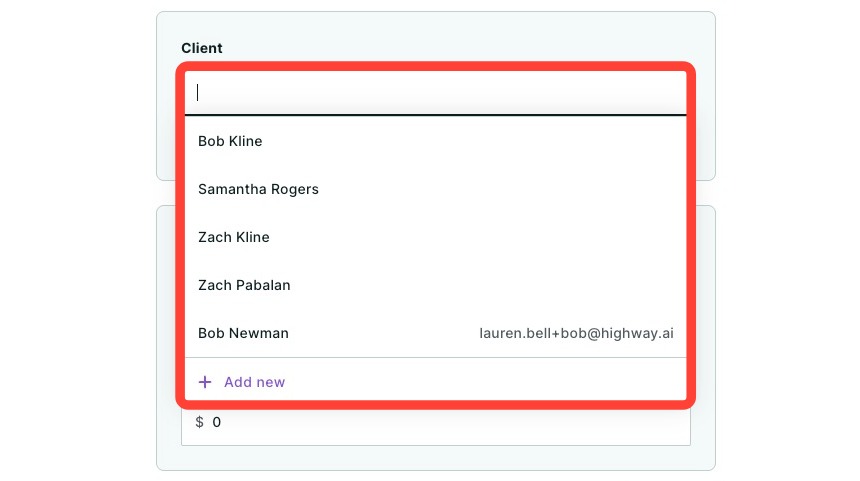
- If not already pre-filled, enter your client’s name and choose them from the dropdown list. To add a new client, click + Add new and fill in your client’s details. Name and FICO score are required fields. Click Add.
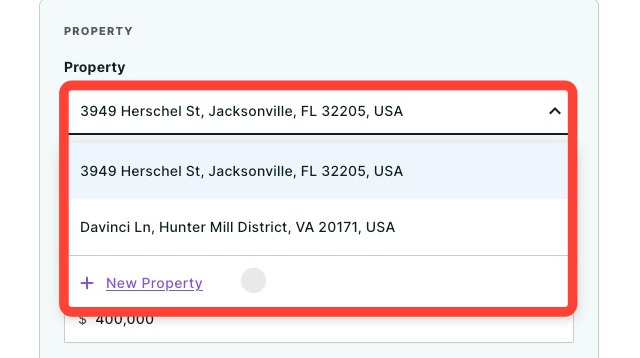
- Select a Property from the drop-down, or click + New Property and begin typing an address, city, county, or ZIP code in the Location field.
💡 Helpful Tip: Property and loan information is saved to your client, so any updates or changes made will automatically apply across all of their reports where those properties and loans are used. |
- If you selected a previously saved property, you can review and change the purchase price. If it is a new property, add the purchase Price.
- Click Next.
Editing your Report
Once your report preview is generated, you can make additional edits using the Client, Property, Renting, and Loan sections to the left of the preview.
Editing Client Information
- Click the Edit button under your client’s name.
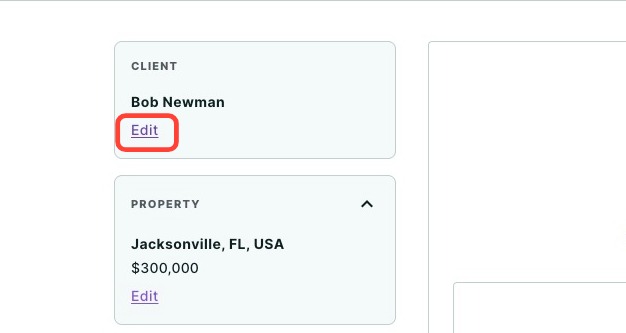
- From there, you can edit your client’s:
- Primary and secondary email addresses
- FICO score
- Monthly Qualifying Income
- Debt to Income Ratio
- Once your edits have been made, click Update.
Editing Property Information
- Click the Edit button within the property section.
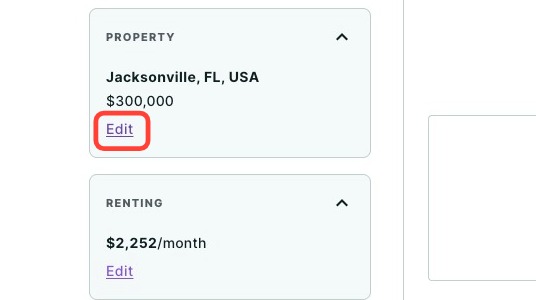
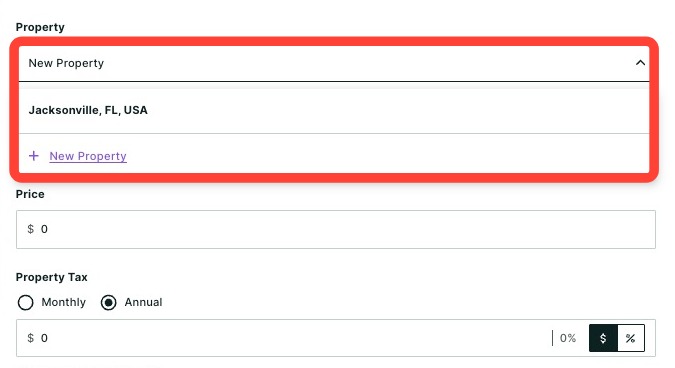
- From there, you can edit the following information for the property:
- Property (select from previously saved properties or create a new one by clicking + New Property)
- Location (address, city, county, or ZIP code)
- Price
- Property Tax
- Annual Property Tax Increase
- Monthly Home Insurance
- Monthly Association Fee
- Maintenance Fee (monthly estimate of costs to maintain property e.g. lawn care, repairs, etc.)
- Initial Renovation Cost
- Cost to Sell (cost for seller and buyer agent commission)
-
Appreciation Calculation
- Forecast (MBS Highway's proprietary rate)
- Historical
- Custom
- Once your edits have been made, click Update.
Editing Renting
- Click the Edit button within the Renting section.
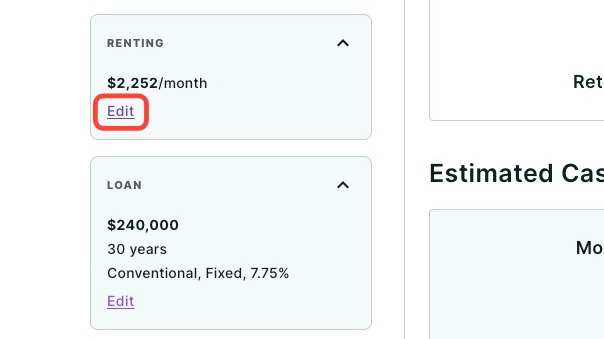
- From there, you can edit the following rent information:
- Monthly Rent
- Annual Rent Increase (by default, this will display the national average rent renewal percentage)
- Property Management Fee (as a percentage of monthly rent)
- Average Annual Vacancy (percentage of time during the year in which the home is expected to be vacant)
- Once your edits have been made, click Update.
Editing Loan Information
- Click the Edit button within the Loan section.
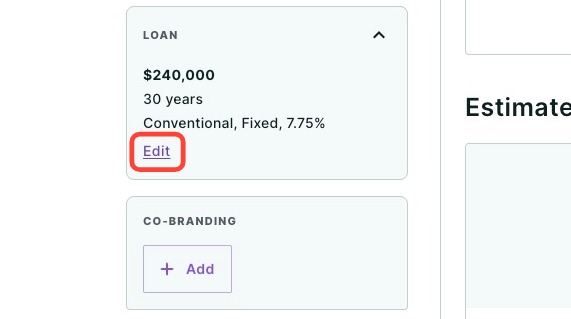
- From there, you can edit the following loan information:
- Click the Loan drop-down to choose a previously saved loan or click + New Loan to create a new loan.
- Loan Name
- Loan Amount
- Loan Term in years
- Select a Loan Program from the drop-down
- Select a Loan Type from the drop-down (includes fixed, ARMs and buydowns)
- Interest Rate
- APR
- Monthly Mortgage Insurance (a worksheet is available to calculate the monthly mortgage insurance)
- Closing Costs (a worksheet is available to calculate closing costs. This can be saved and re-used)
- Once your edits have been made, click Update.
Adding Co-branding for Referral Partner
You can also add a referral partner’s co-branding on your report. To learn more about co-branding, click here.
- Click Add under Co-branding.
- Click on the drop-down menu and select an agent or add a new agent.
- Choose the orientation for how you want their branding displayed on the report.
- Click Save.
Reviewing and Sharing your Report
Click Review report in the top right hand corner to then generate and preview your report. From here, you can share the completed report by clicking Share. A dropdown menu will then appear.
- Click Download to download the report as a PDF.
- Click Send a link via email with an optional video recording (not available for some users depending on their company permission settings).
- Click Host a meeting to virtually meet to discuss the report with your client.
- Click Record a Video to provide your client with a clear walkthrough of the report along with your own insights and context.
To learn more about sharing your report, click here.
Go to the next article to learn about what each section of report communicates to your client: What's Inside the Investment Property
Need Help?
Have questions or want to learn more? Submit a ticket or call us today!
Related to