Learn how to create a Seller Contribution Report with the Loan Comparison - Purchase tool. Compare a Price Break, Permanent Buydown, Temporary Buydown, and Seller-paid Closing Costs side by side when the seller is willing to offer assistance to your client. This guide assumes you are already familiar with the Loan Comparison - Purchase tool.
Navigating to the Purchase Loan Comparison Report
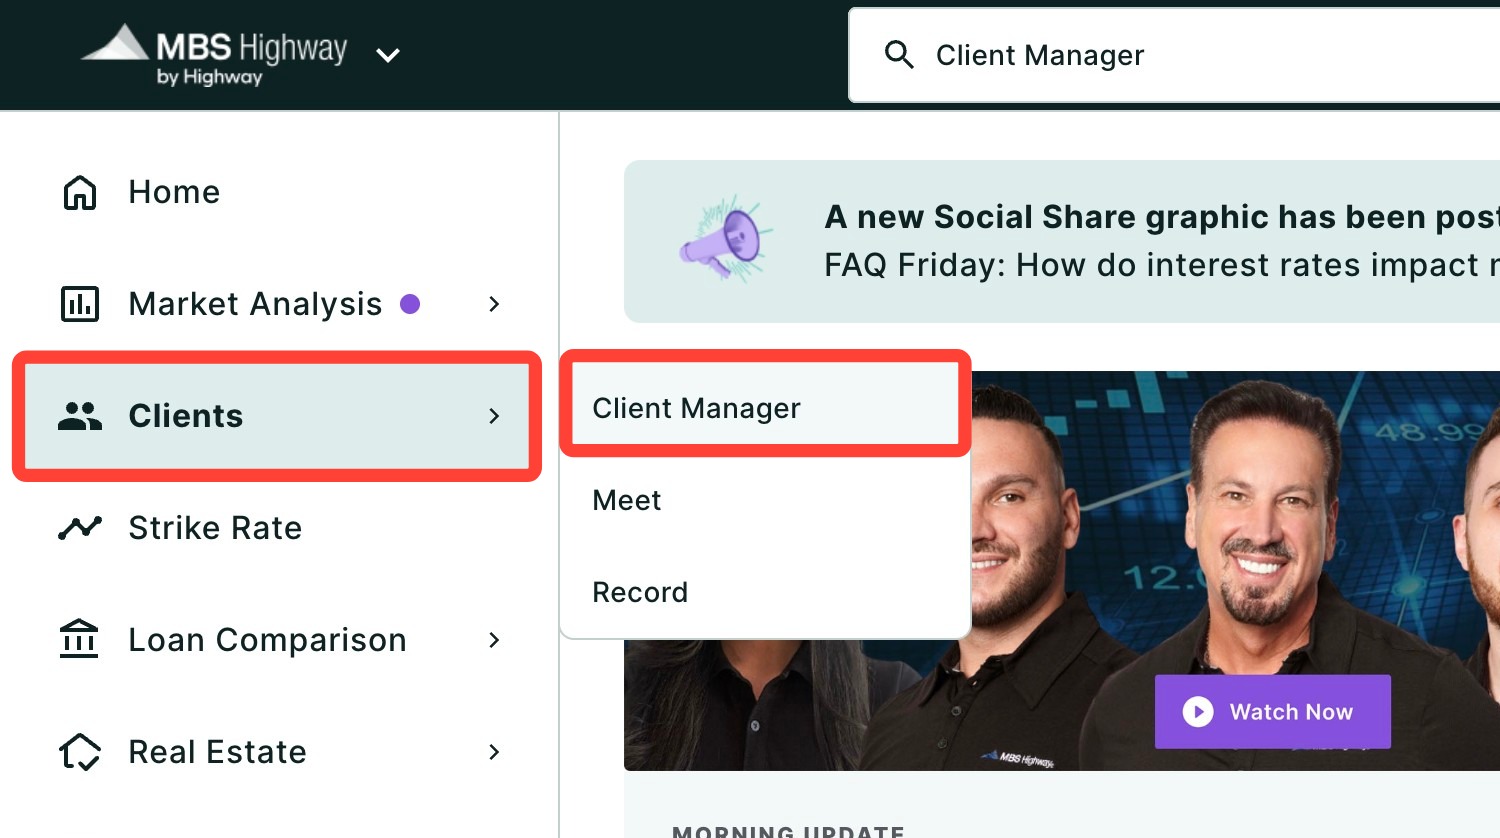
You can find your Purchase Loan Comparison Report within Client Manager as well as within the Loan Comparison sidebar menu.
Navigating through the Client Manager
Client Manager allows you to create reports for your clients using previously saved loan and property details, saving you time when building new scenarios. To learn more, click here.
Navigating through the left-hand sidebar menu
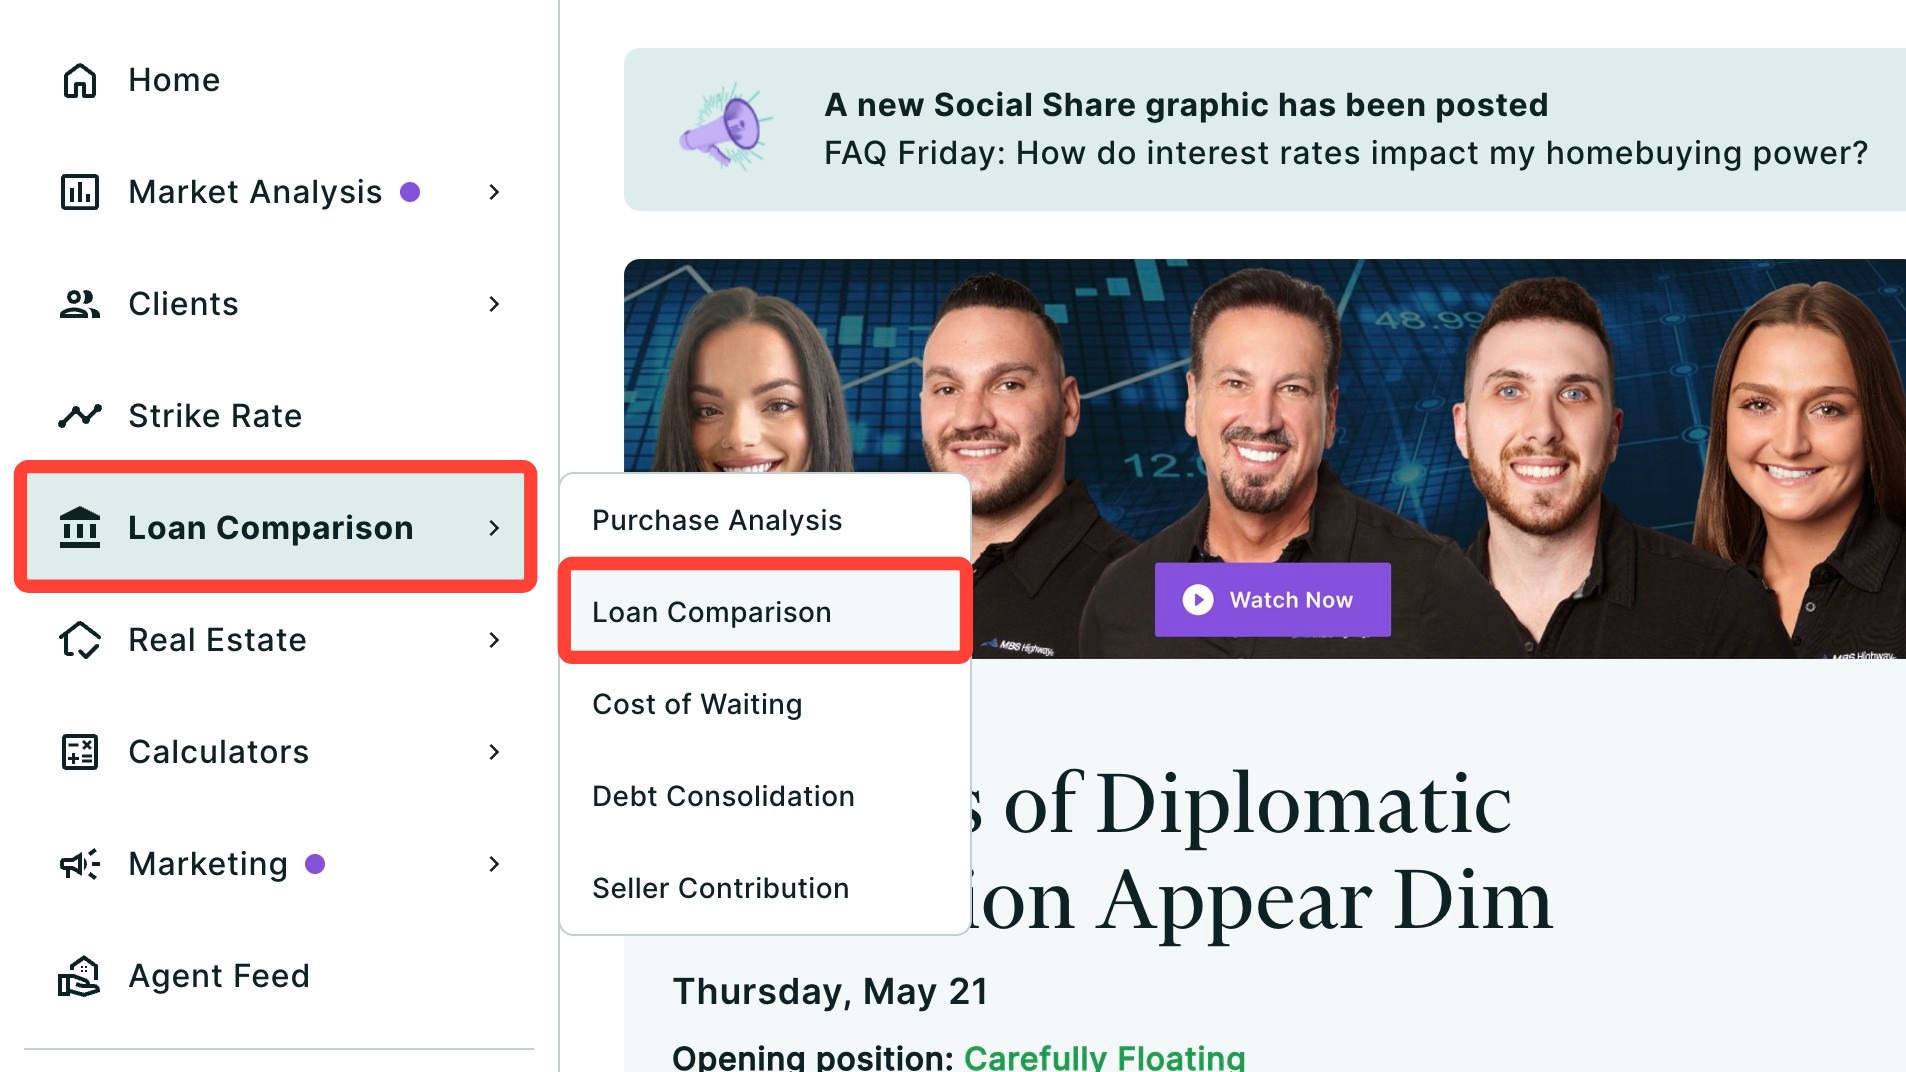
To access the Loan Comparison - Purchase report using the left-hand sidebar menu, click Loan Comparison, then click Loan Comparison. By default, the Purchase report will be displayed.
💡 Helpful Tip: You can also search and favorite reports, tools, and calculators. Click here to learn how. |
Initializing the Report
- Before you begin, make sure that the Purchase option is selected at the top of the page.
- Add your client's name, location and property details. For a full step-by-step on how to create a new Loan Comparison report, click here.
- Click Next at the bottom of the page.
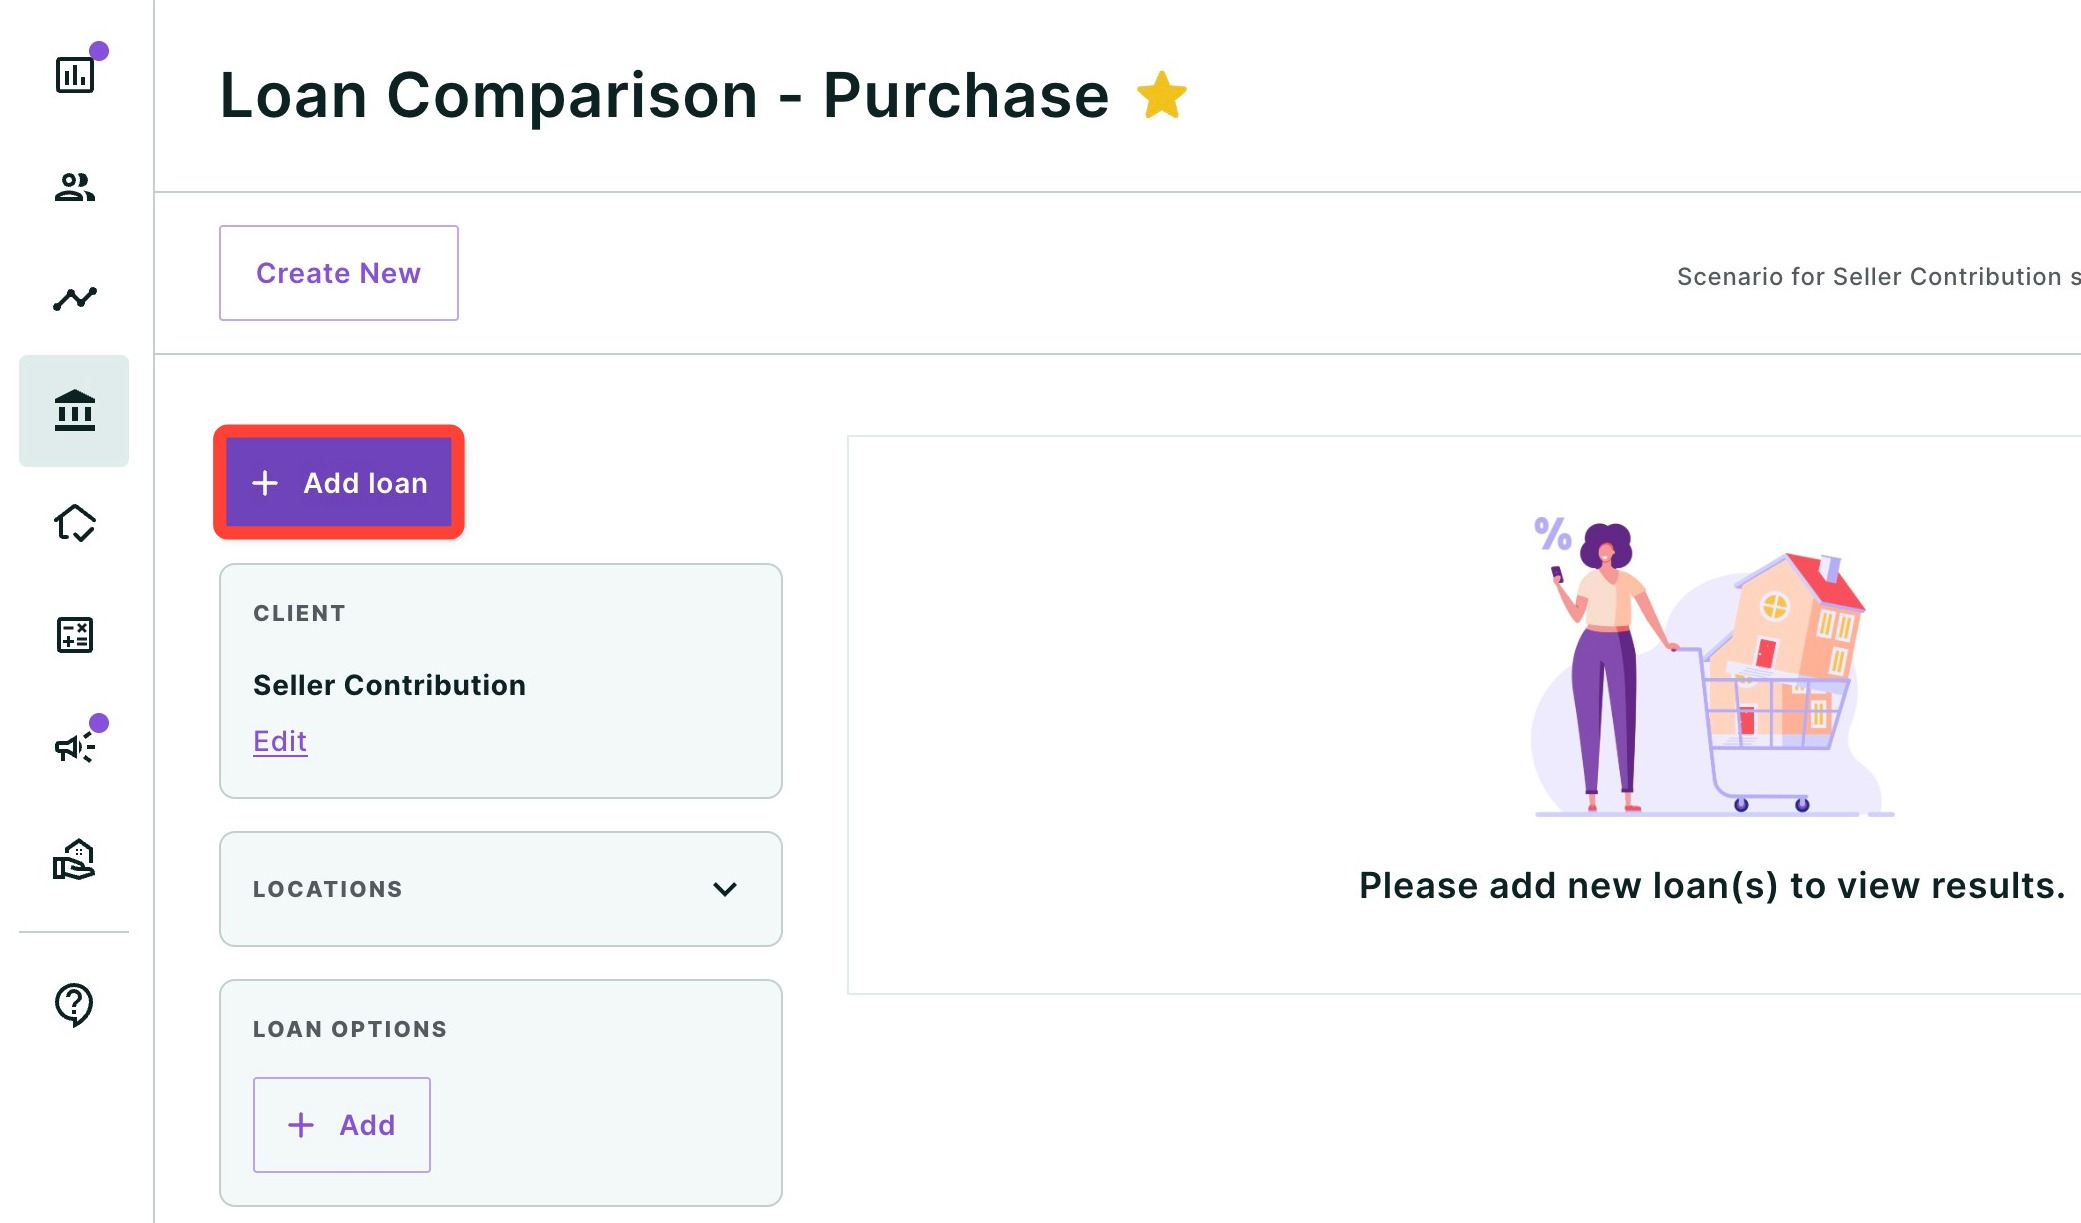
- Click the + Add loan button.
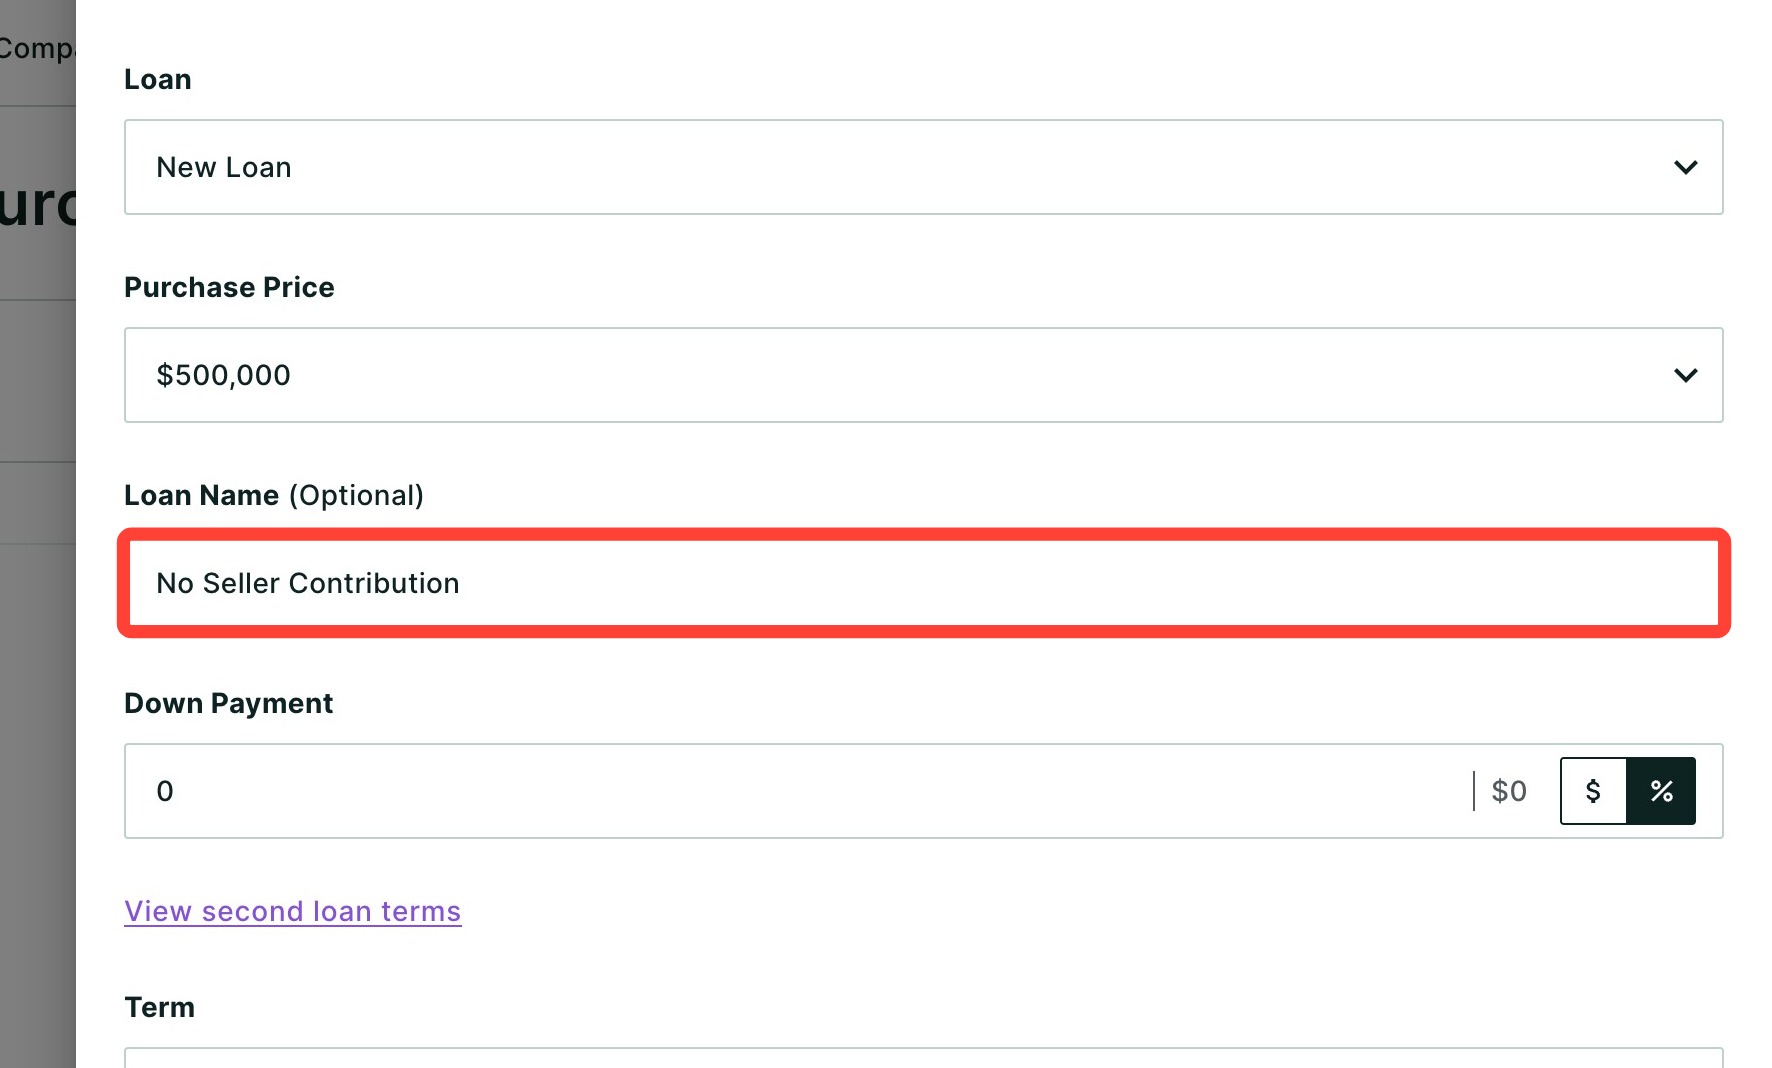
- Enter the details of your first loan option with no seller contribution. This loan serves as the base that each contribution option is compared to. In our example, we named it "No Seller Contribution."
Adding Seller Contribution Scenarios
Once your base loan is saved, build one loan for each way the seller can contribute. Duplicating your base loan keeps the rest of the loan details consistent, so only the contribution changes between scenarios.
Price Break
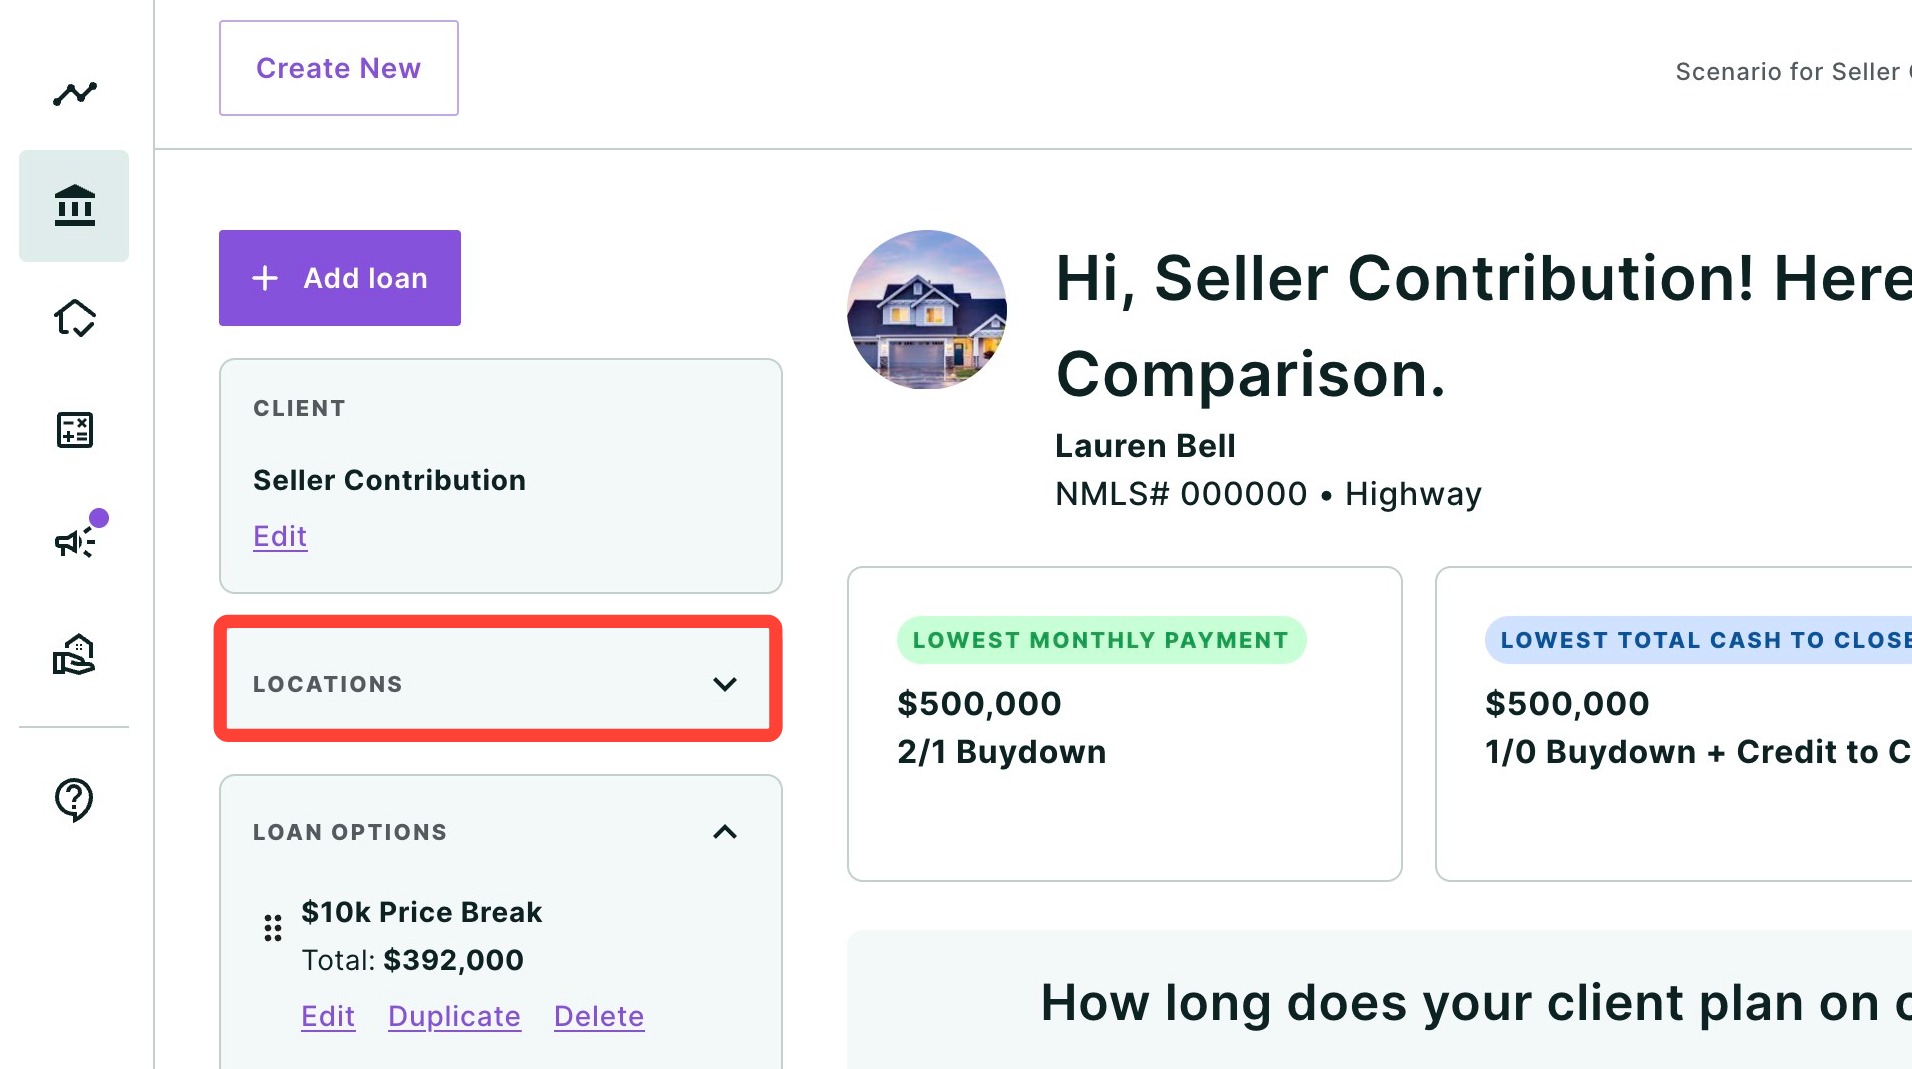
- Click the Locations section to reveal the edit option.
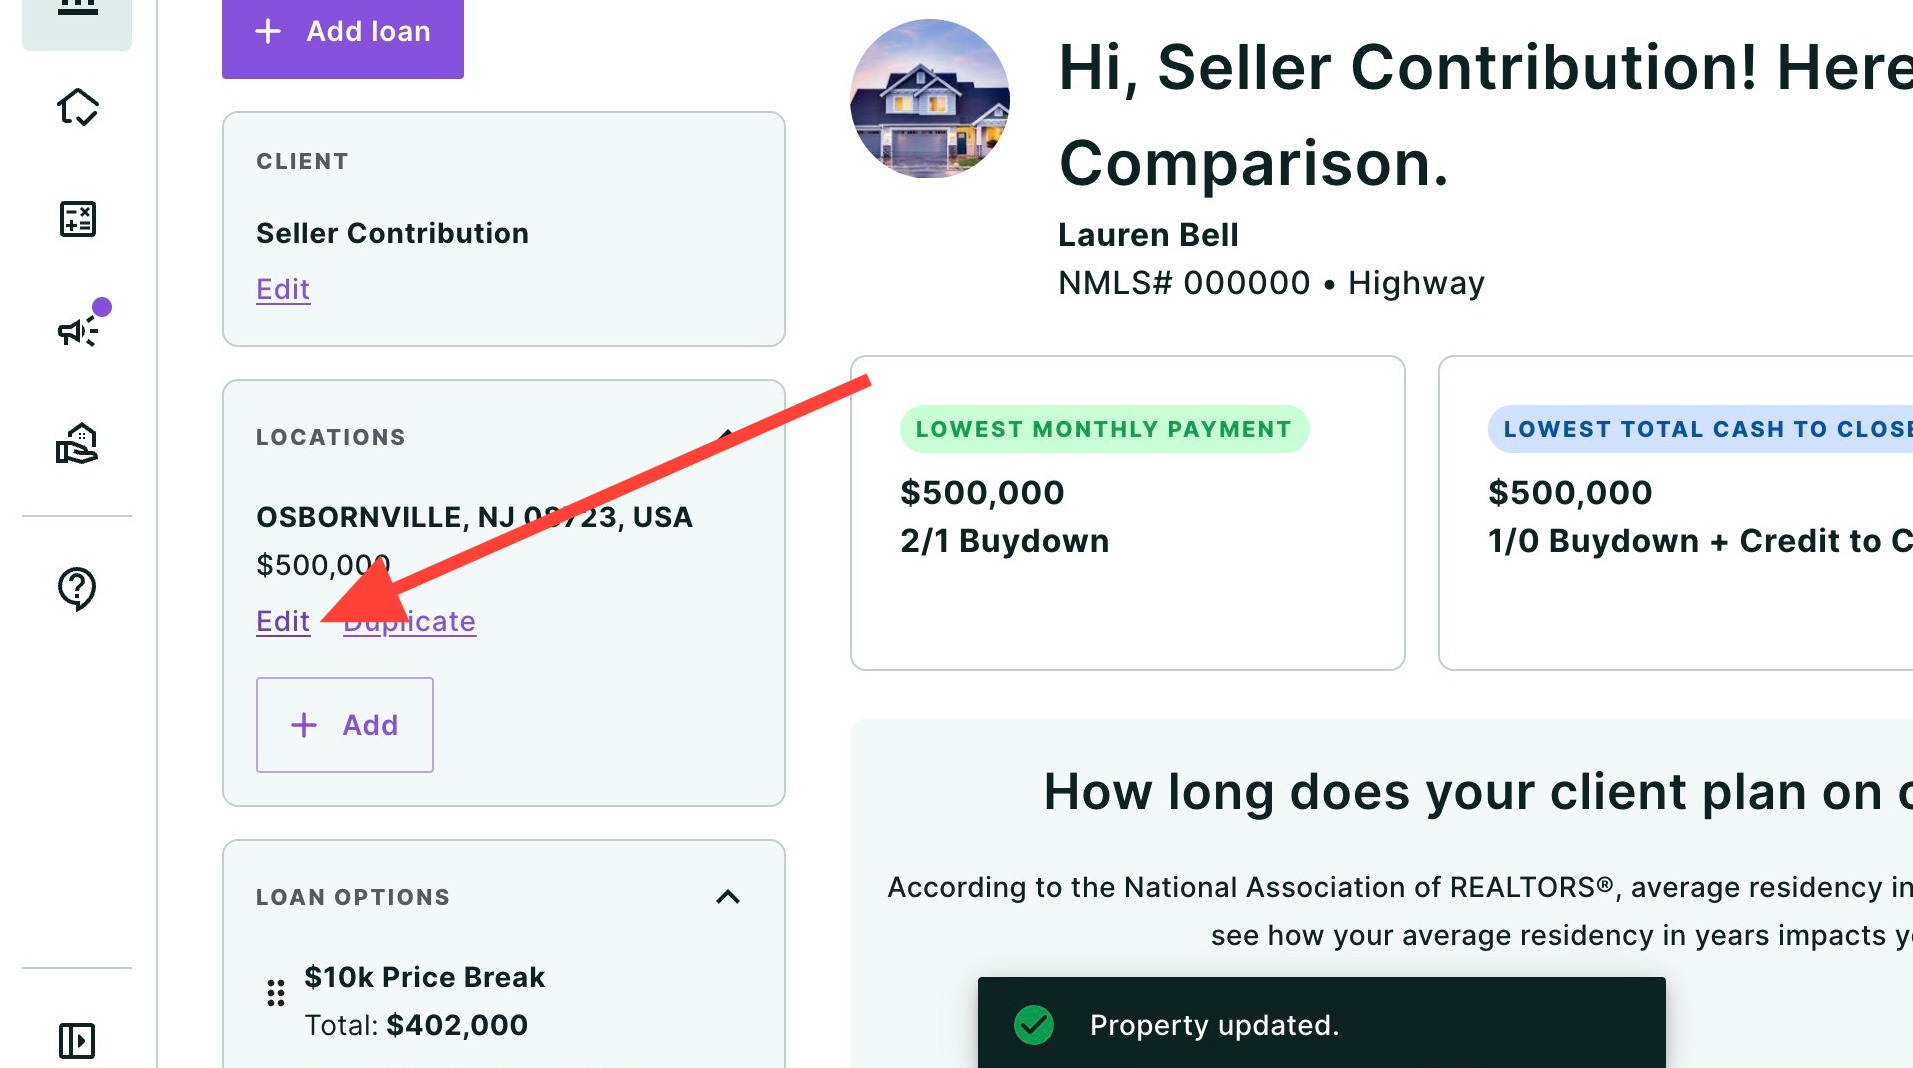
- Click Edit.
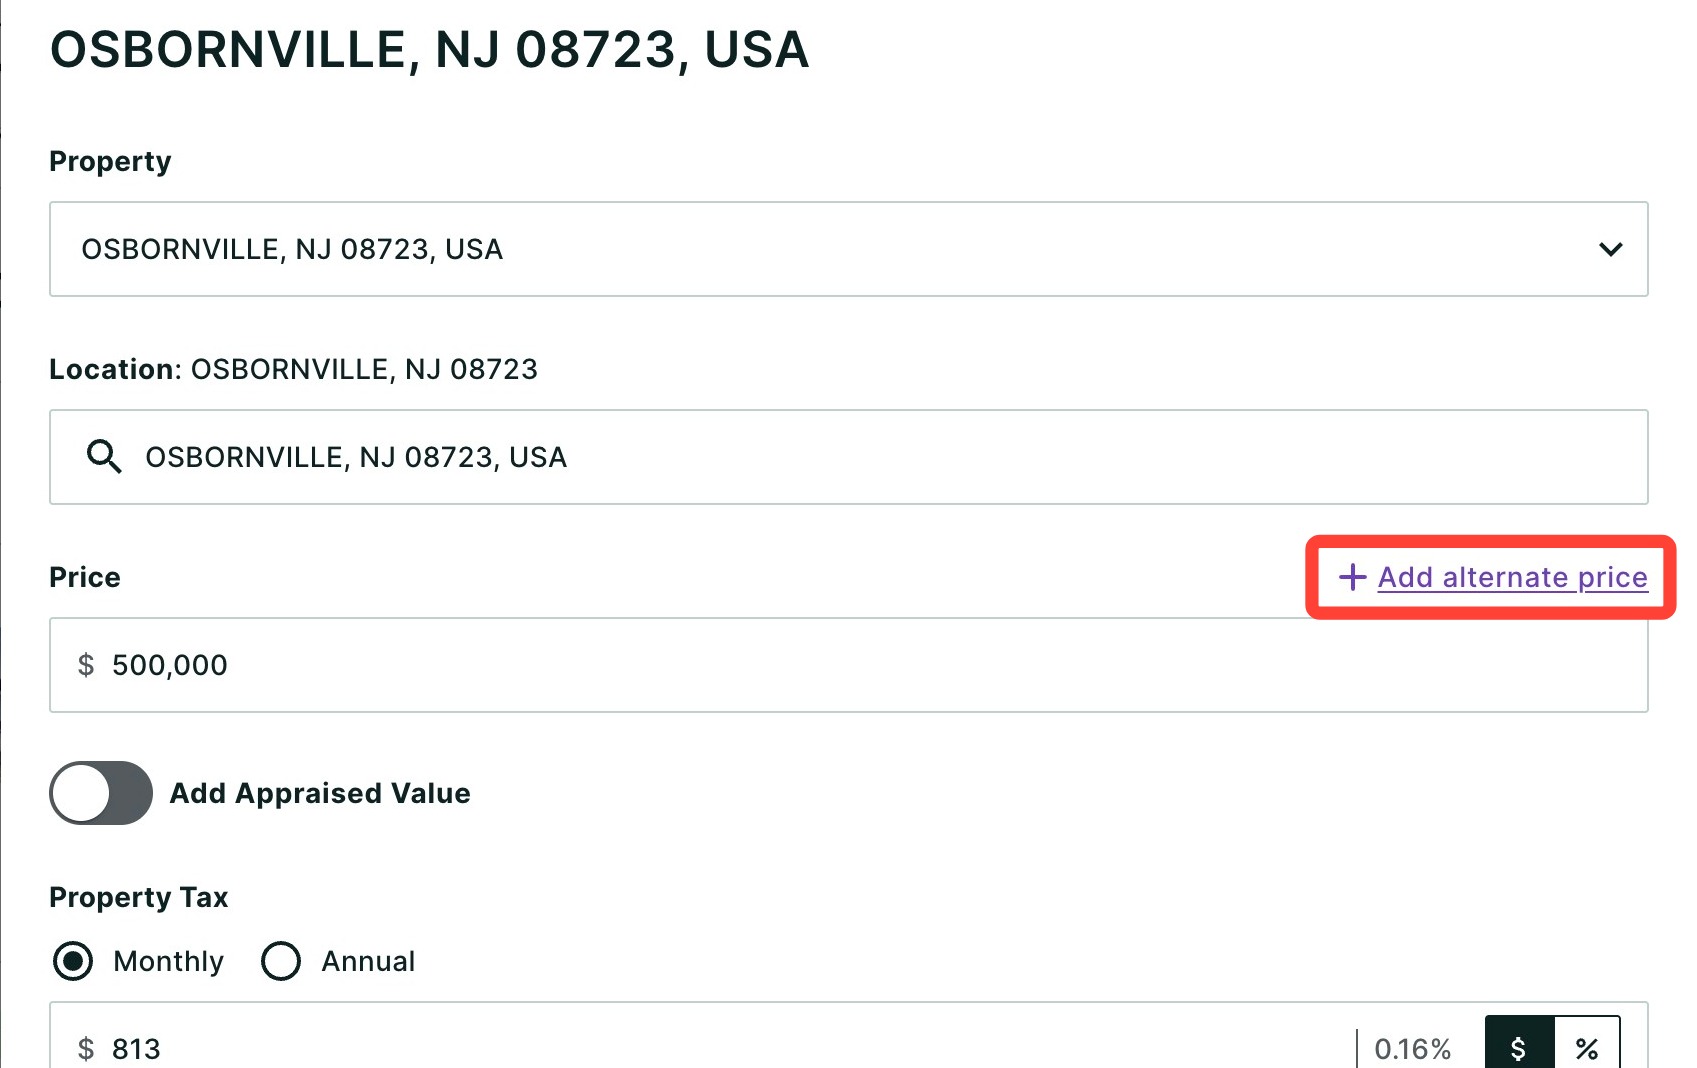
- Click + Add alternate price.
- Enter the alternate purchase price.
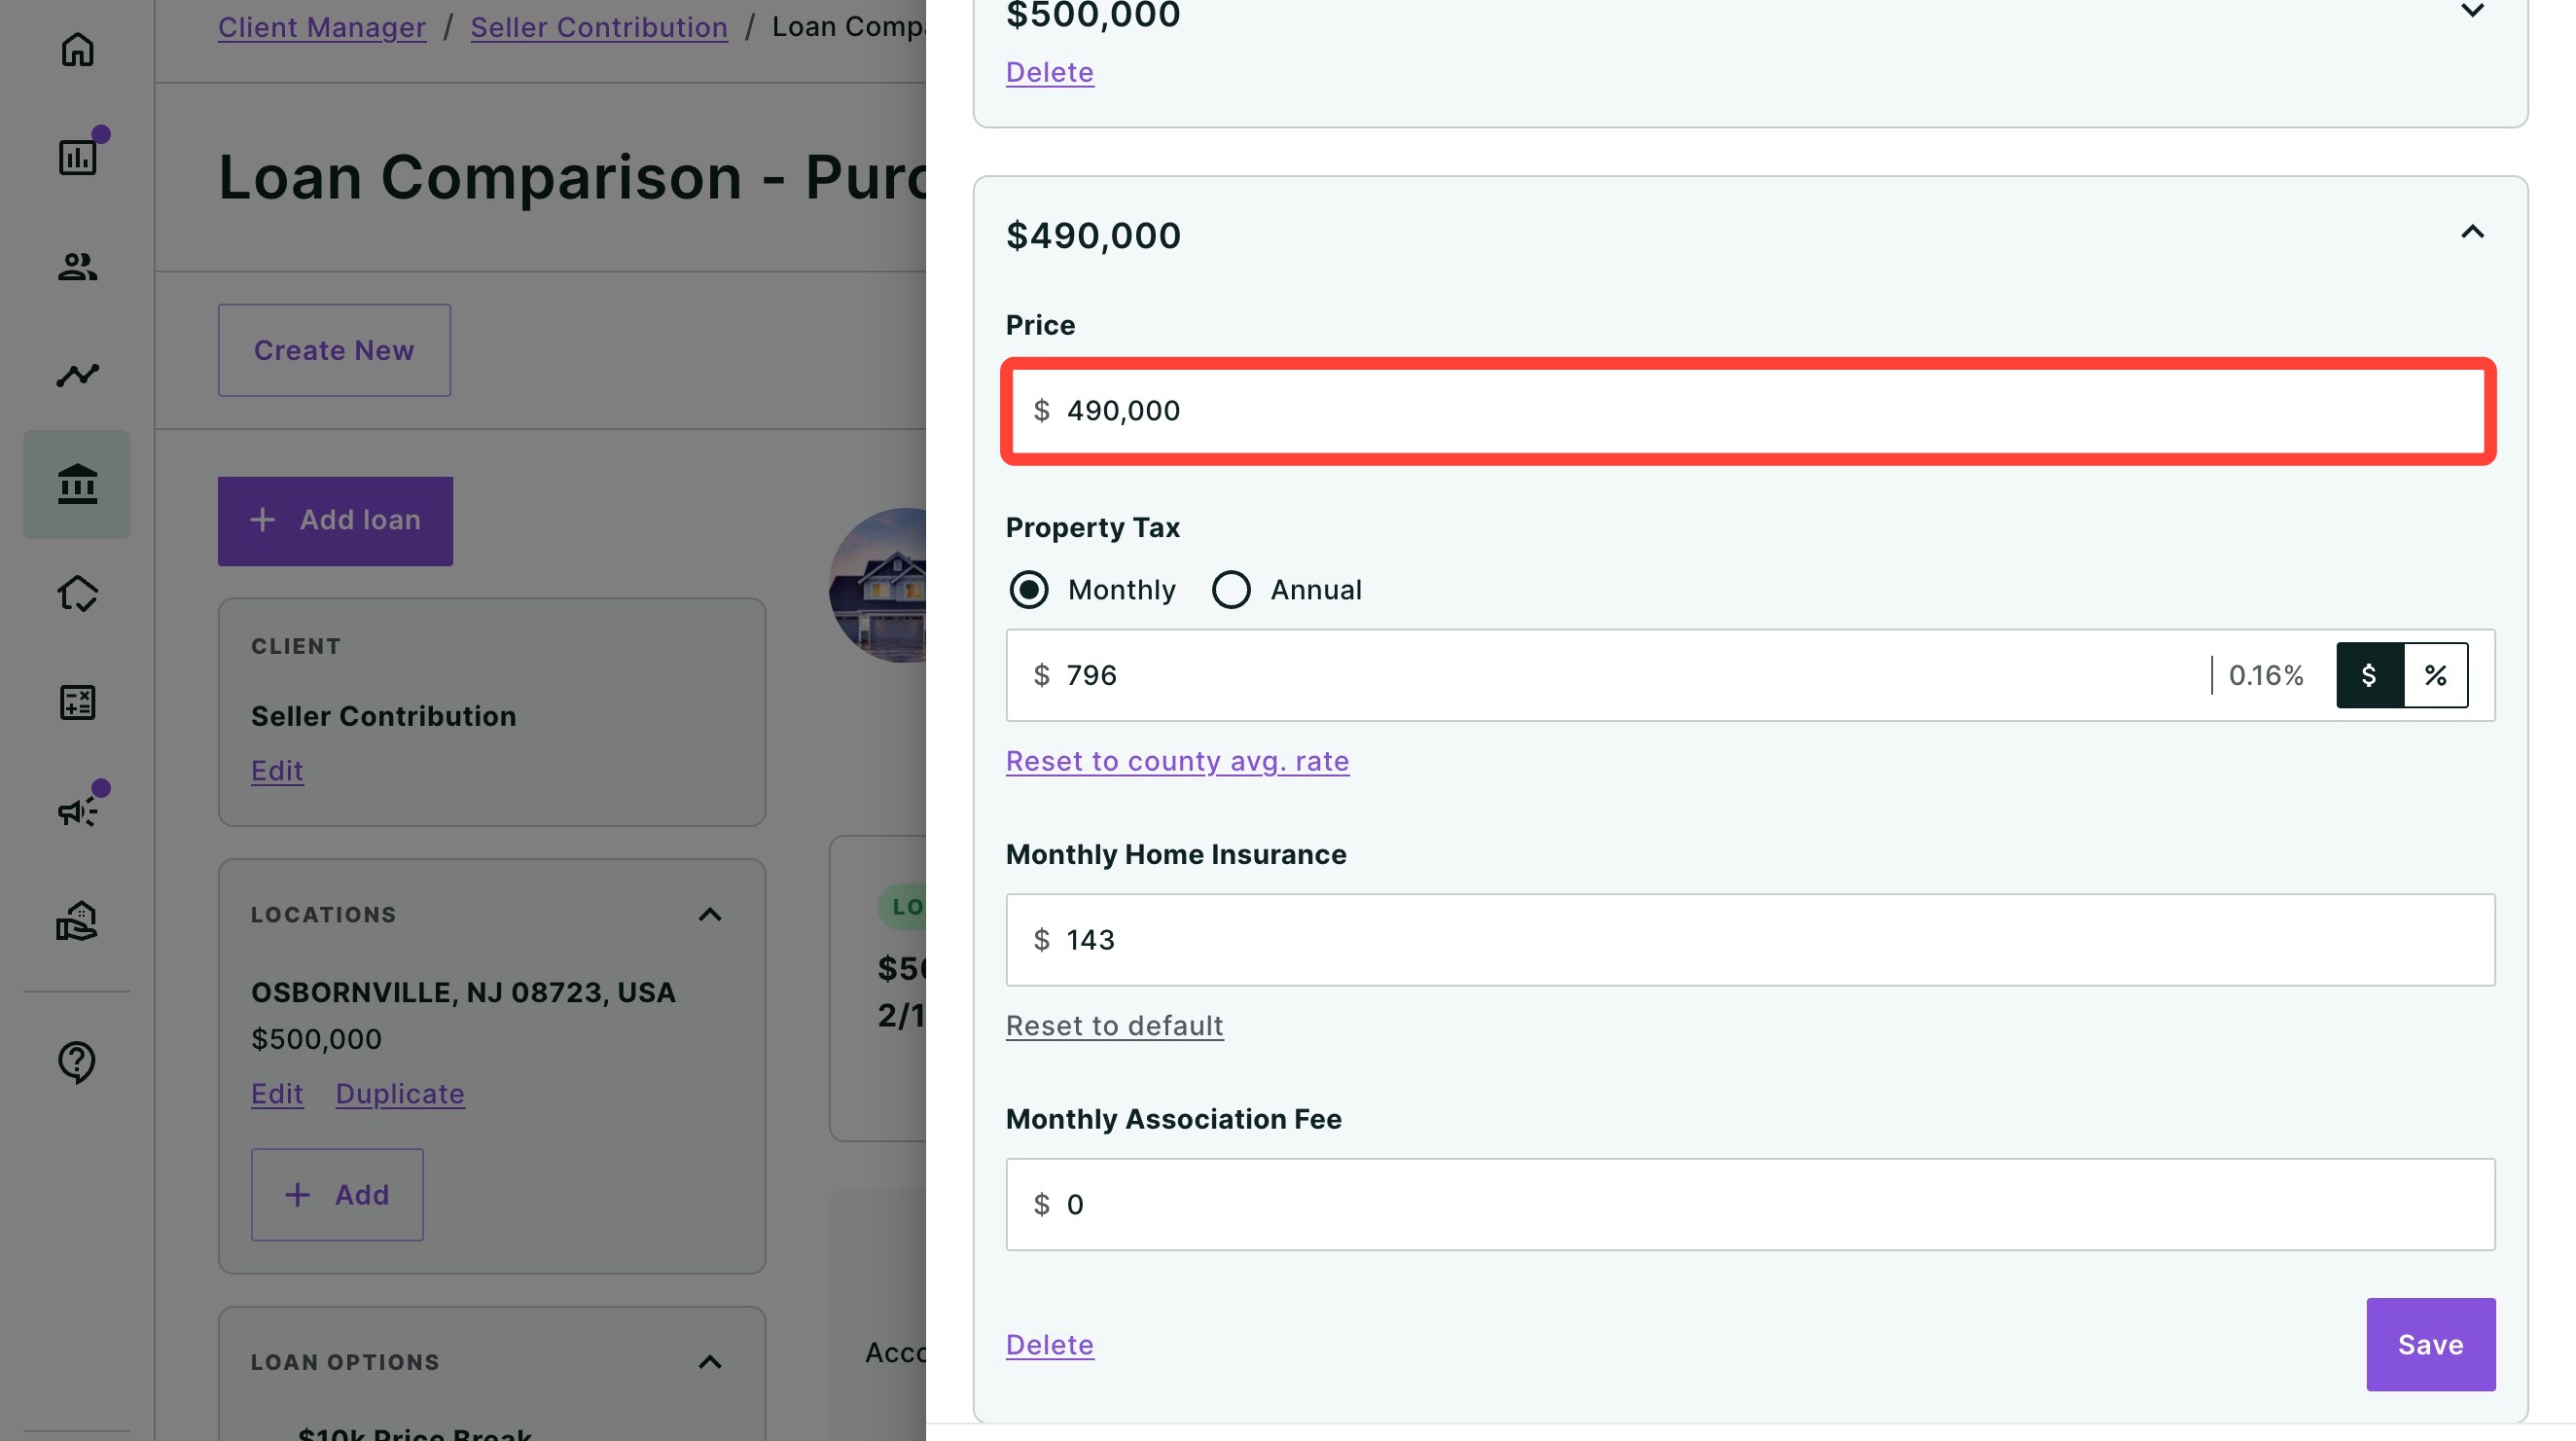
- Adjust taxes, insurance and fees, if needed.
- Click Save and then Update.
- In the Loan Options section, click Duplicate on your base loan.
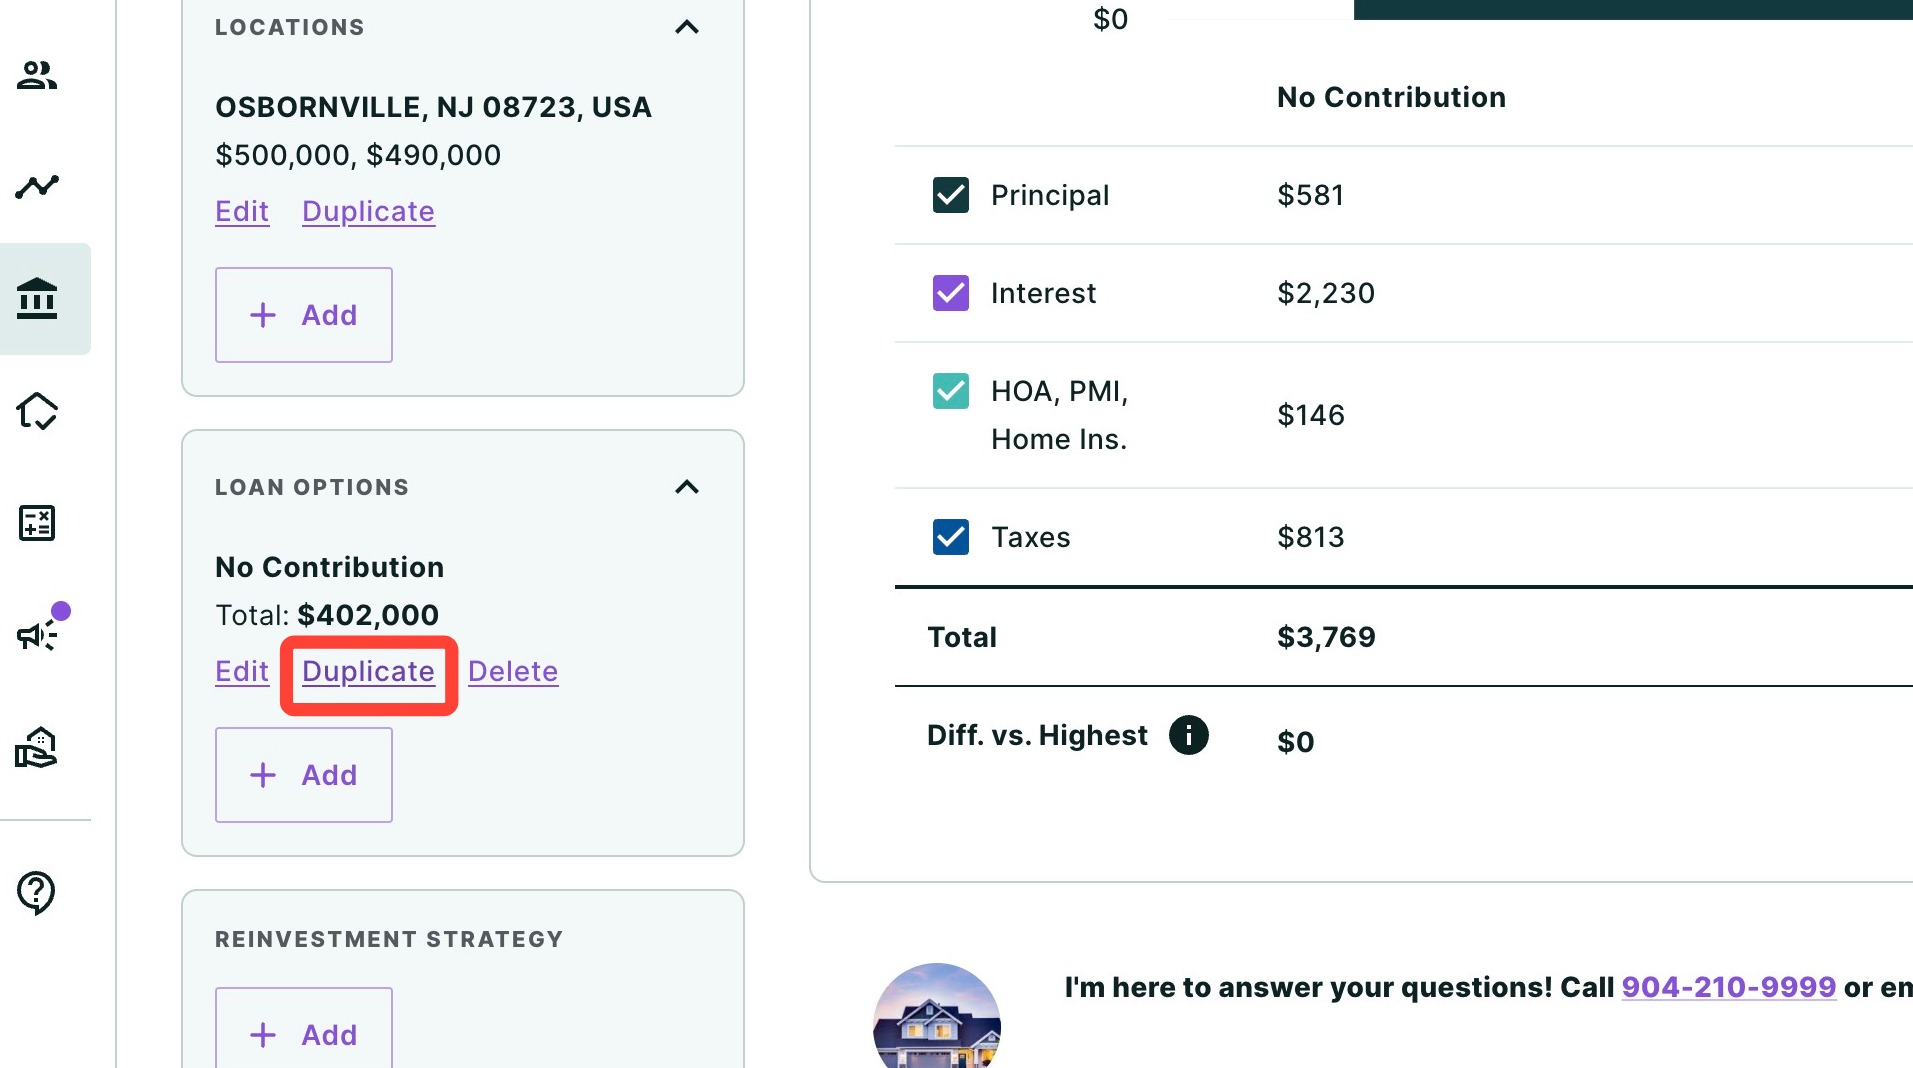
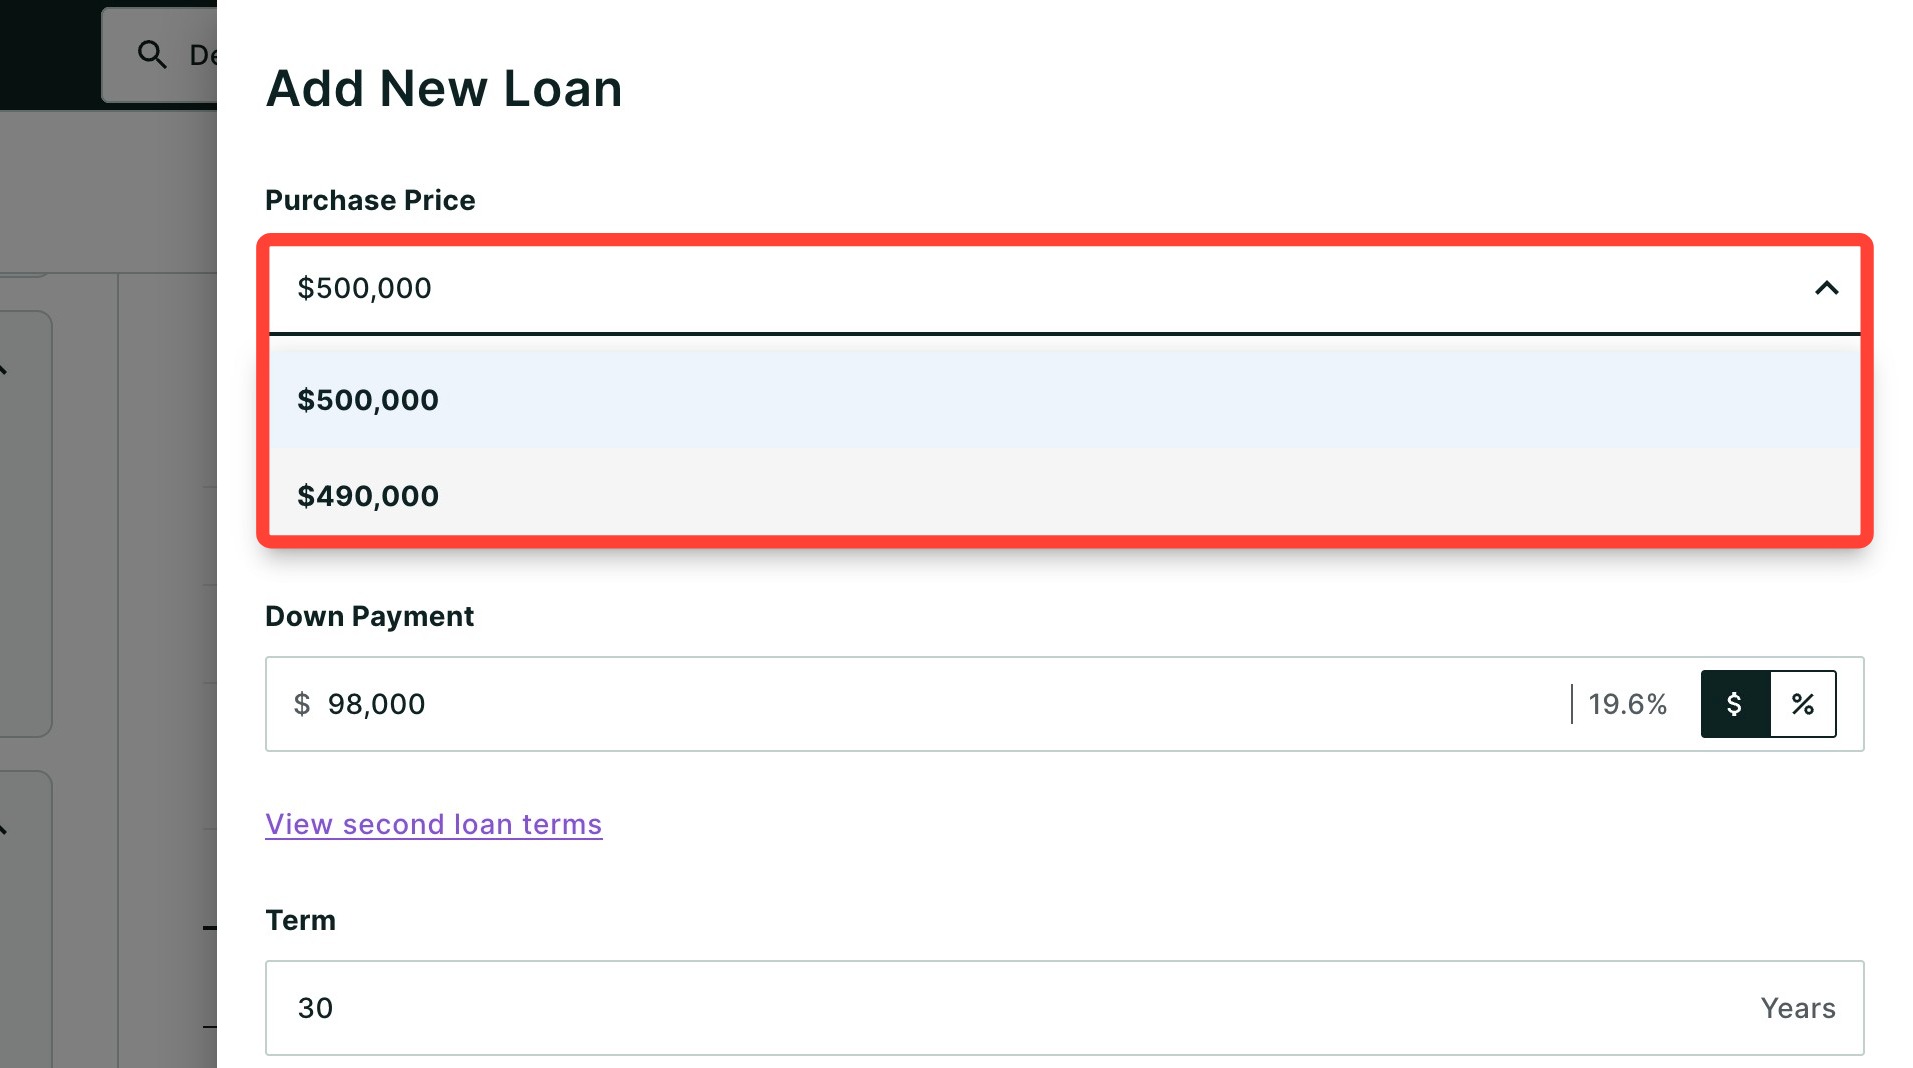
- Click the Purchase Price dropdown and select the lower purchase price to assign to this loan.
- Add a Loan Name. In this example, we used "$10k Price Break".
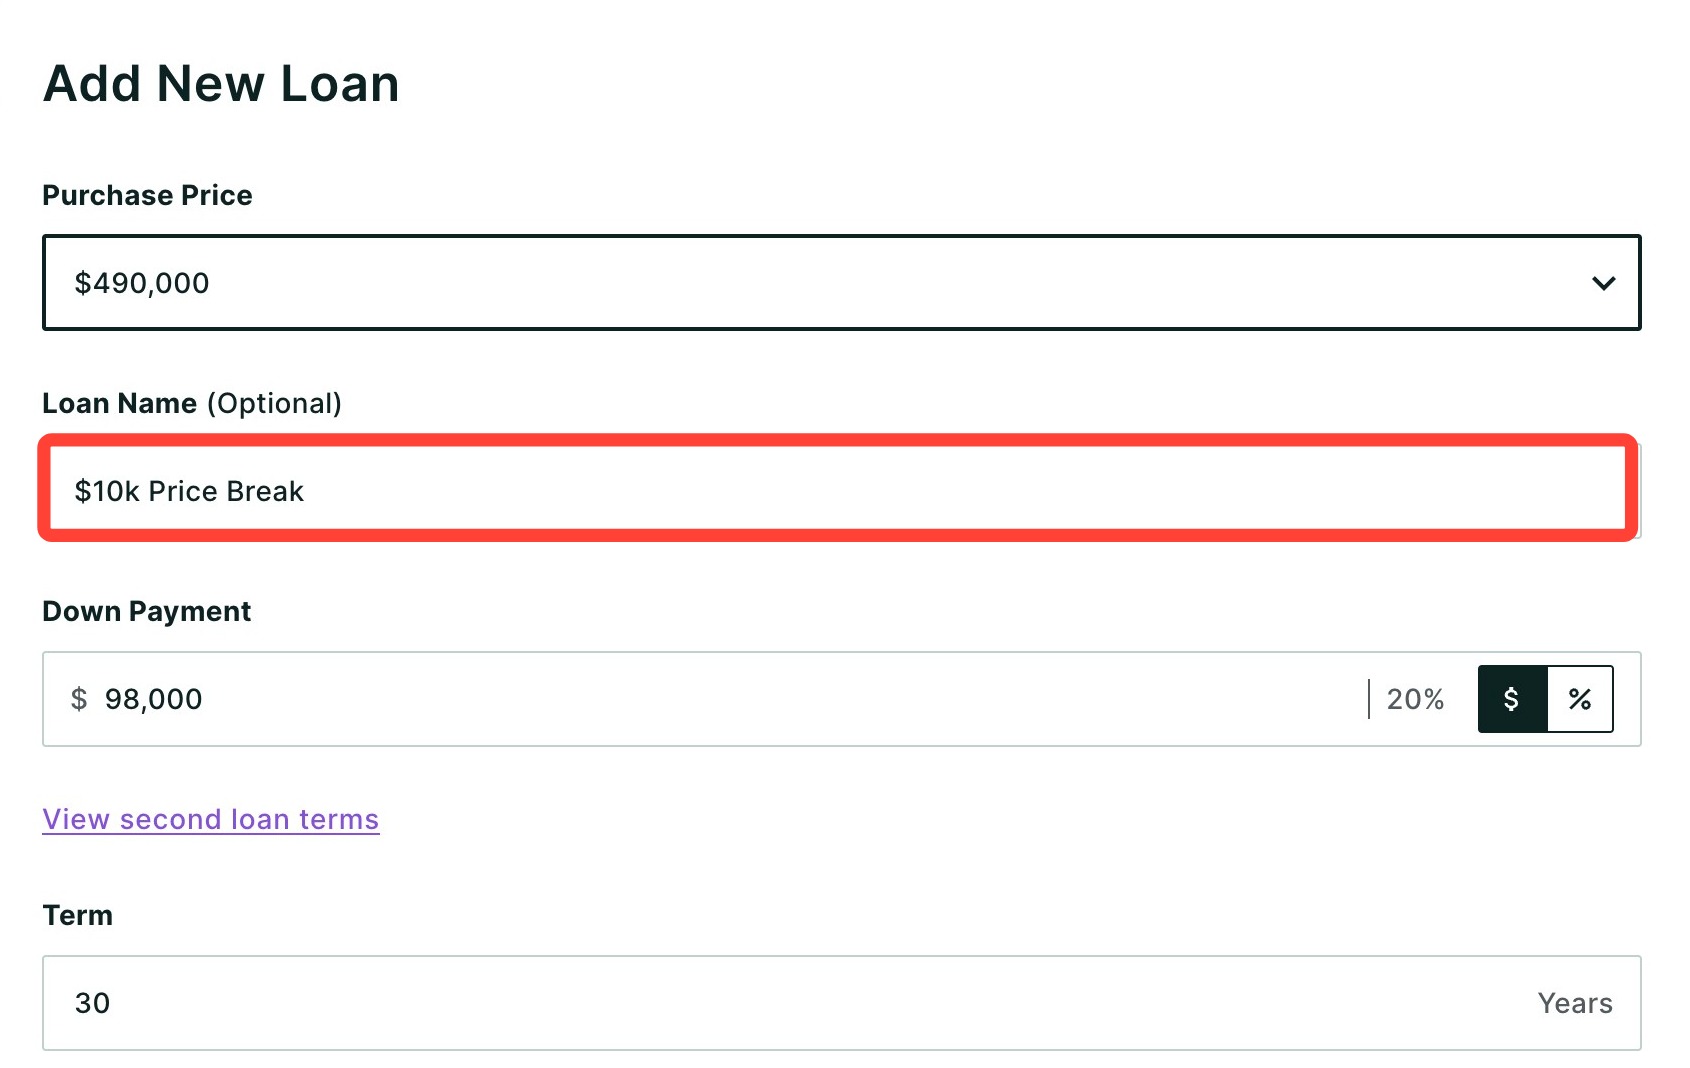
5. Click Add.
Please note: The Purchase Price dropdown only appears in the loan editor once an alternate price has been added. |
Permanent Buydown
- Click Duplicate on your base loan.
- Give the new loan a name. In this scenario, we used "Permanent Buydown".
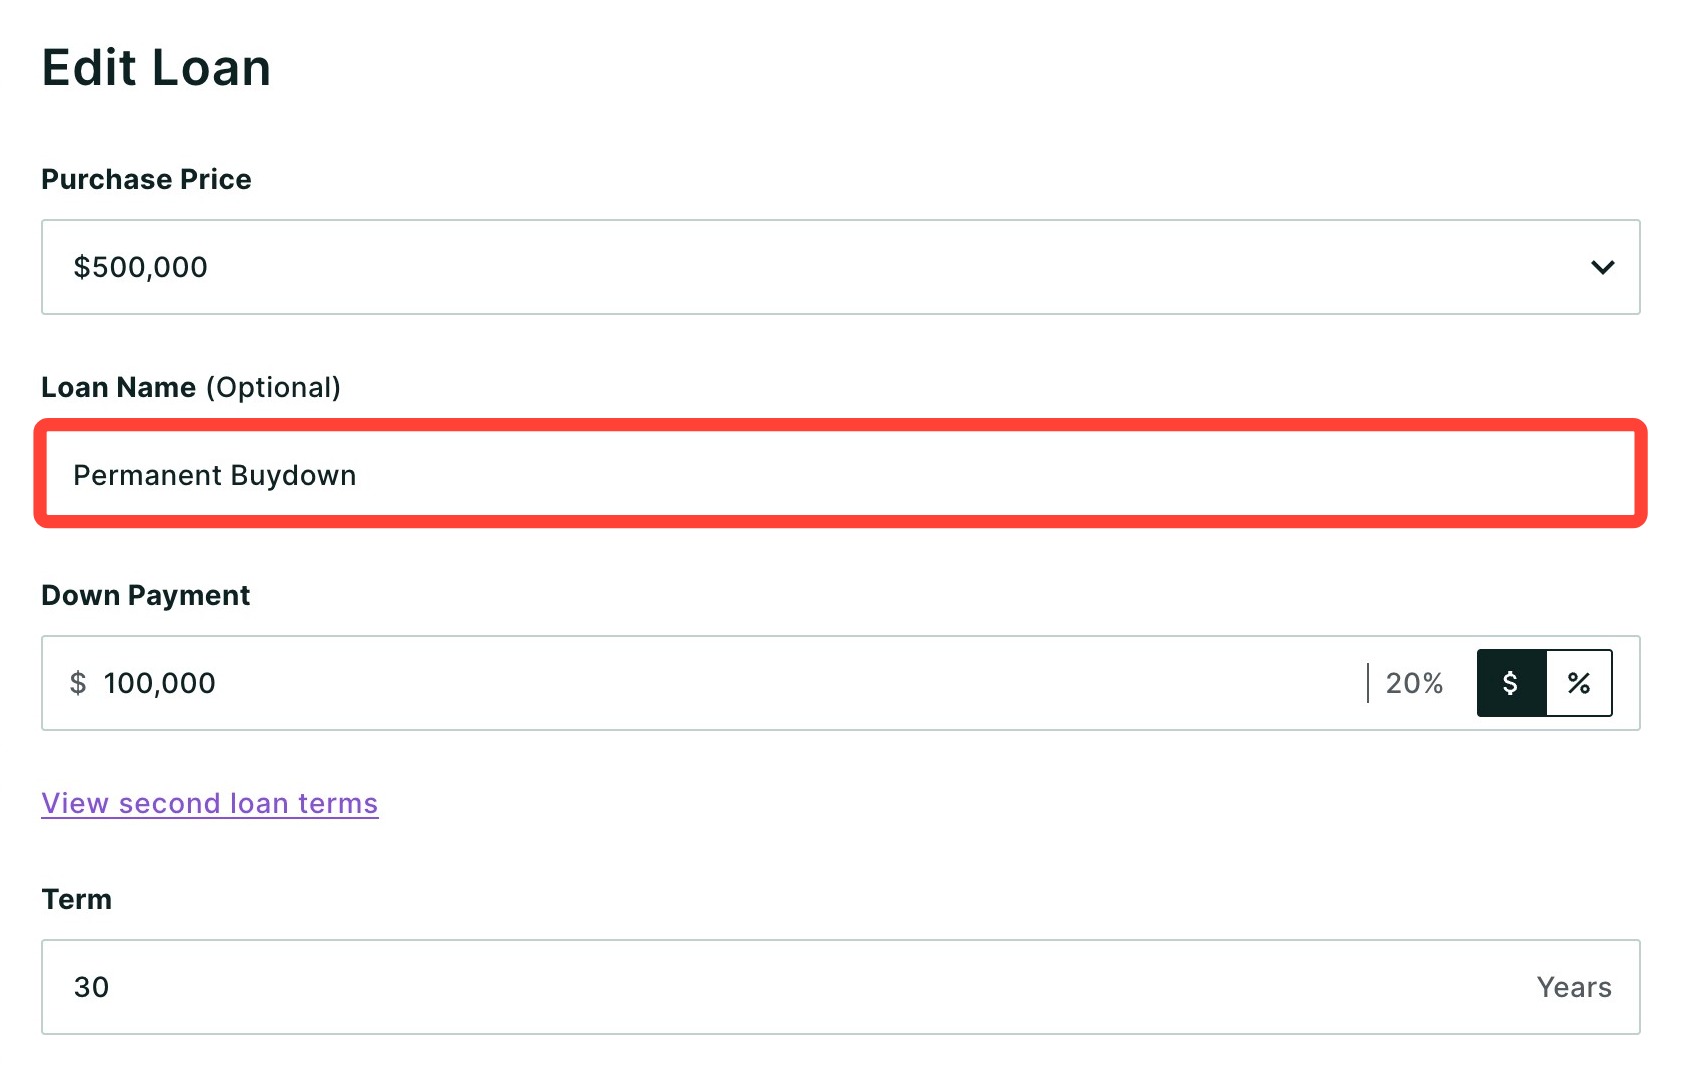
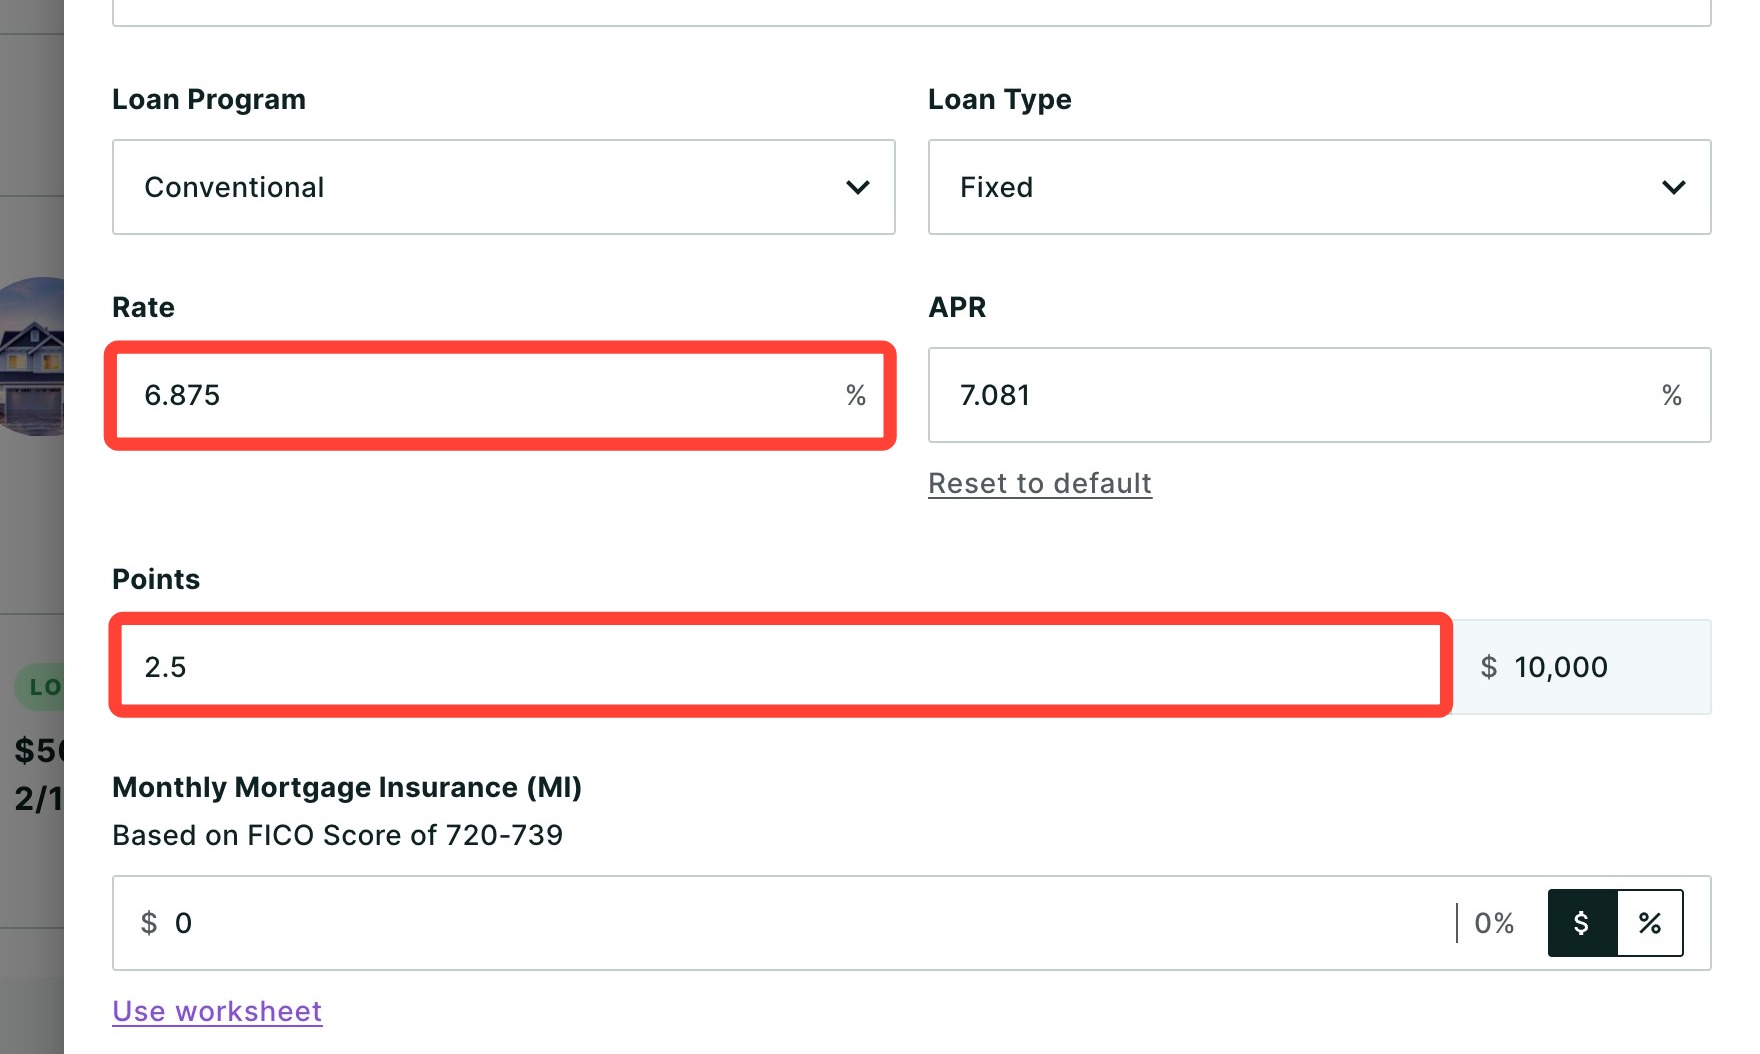
- Enter the new interest rate and number of points.
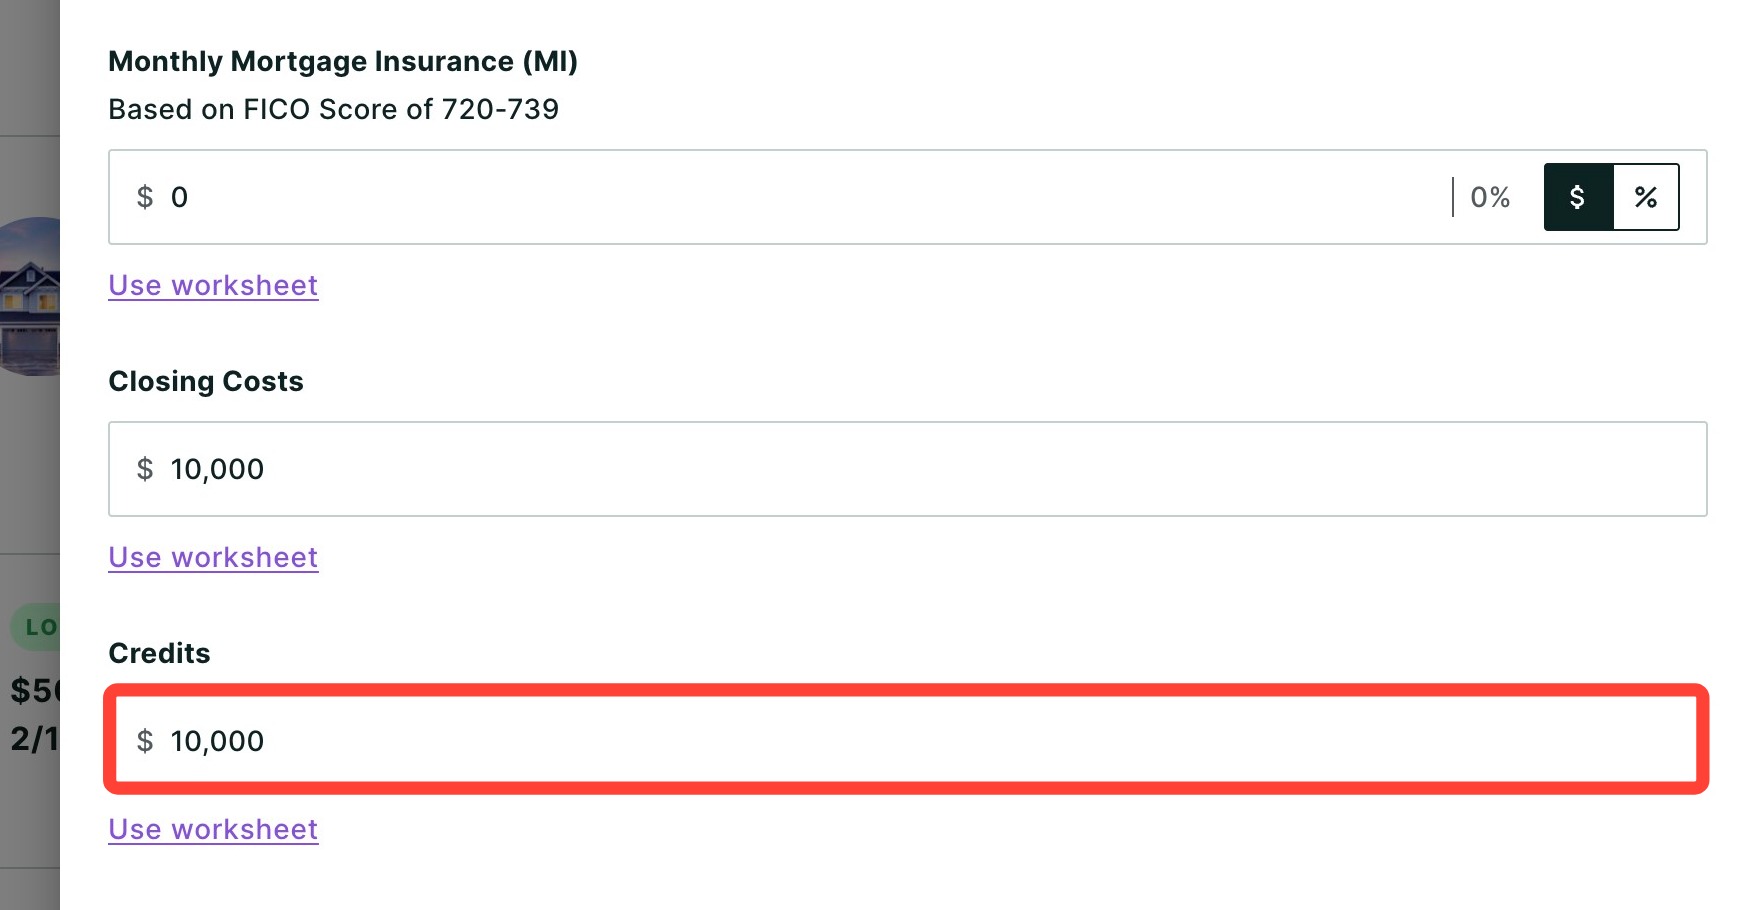
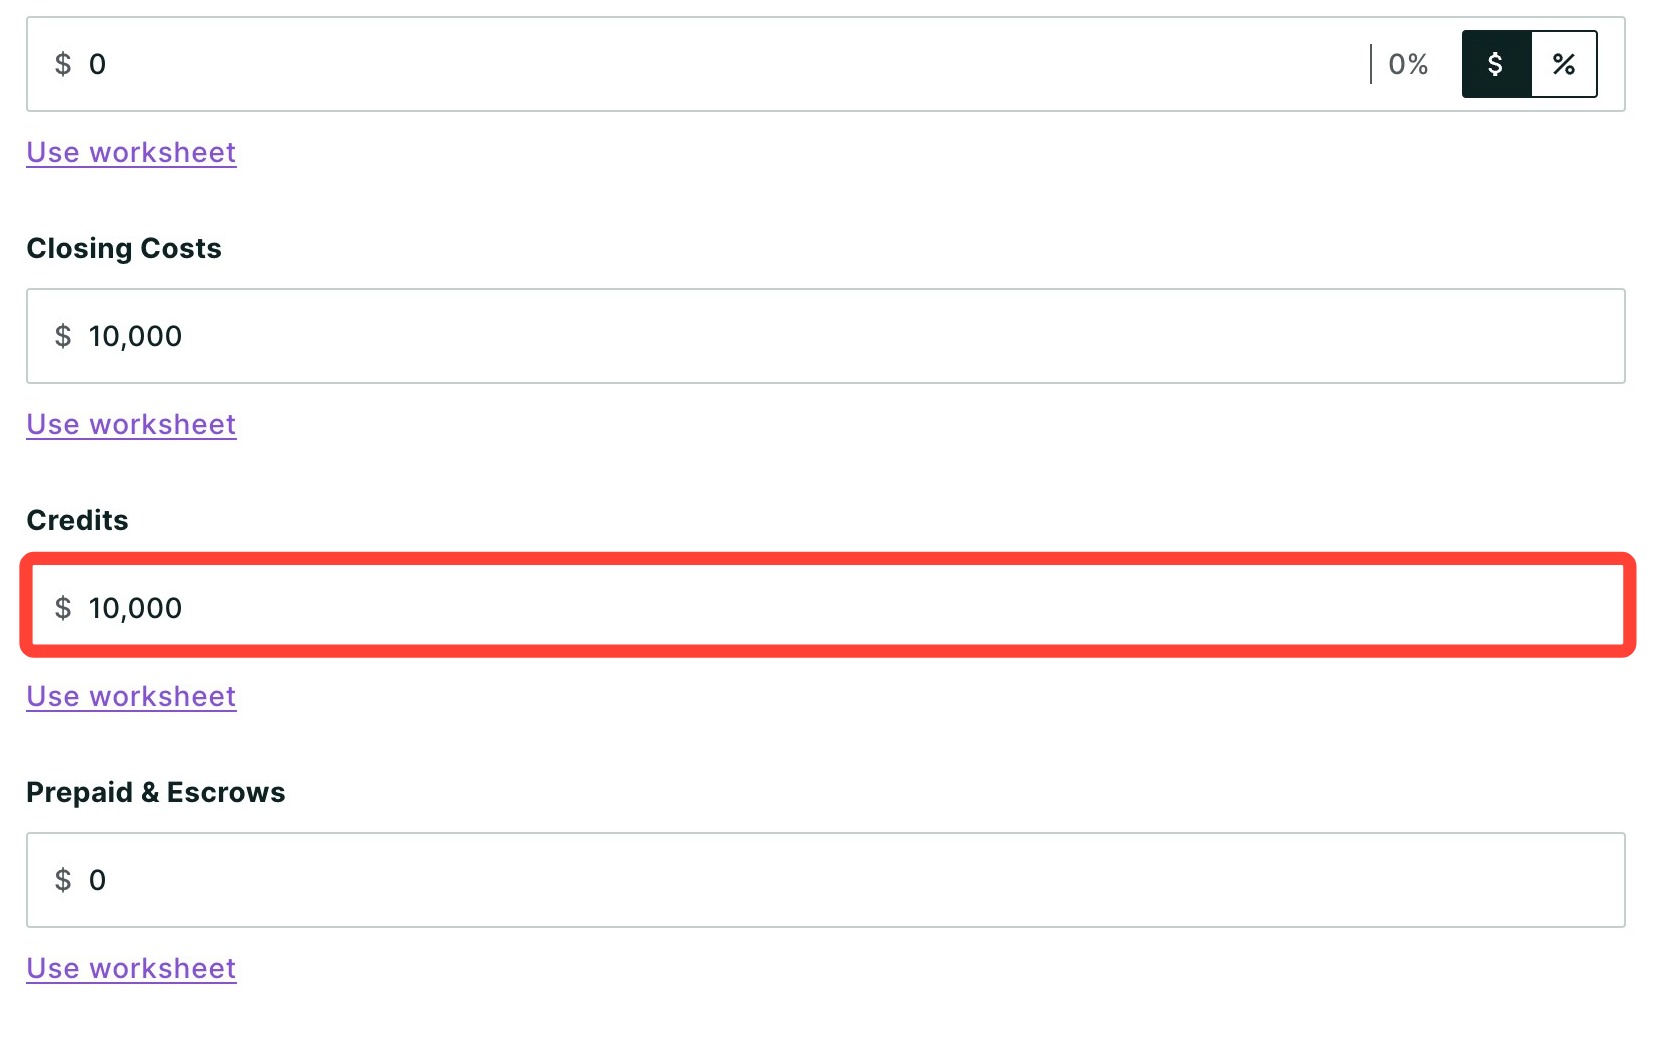
- Enter the total amount the seller is contributing as a Credit to offset the cost. In our example, we used $10,000 for an equivalent contribution.
Temporary Buydown
- Click Duplicate on your base loan.
- Give the new loan a name. In this scenario, we used "2/1 Buydown".
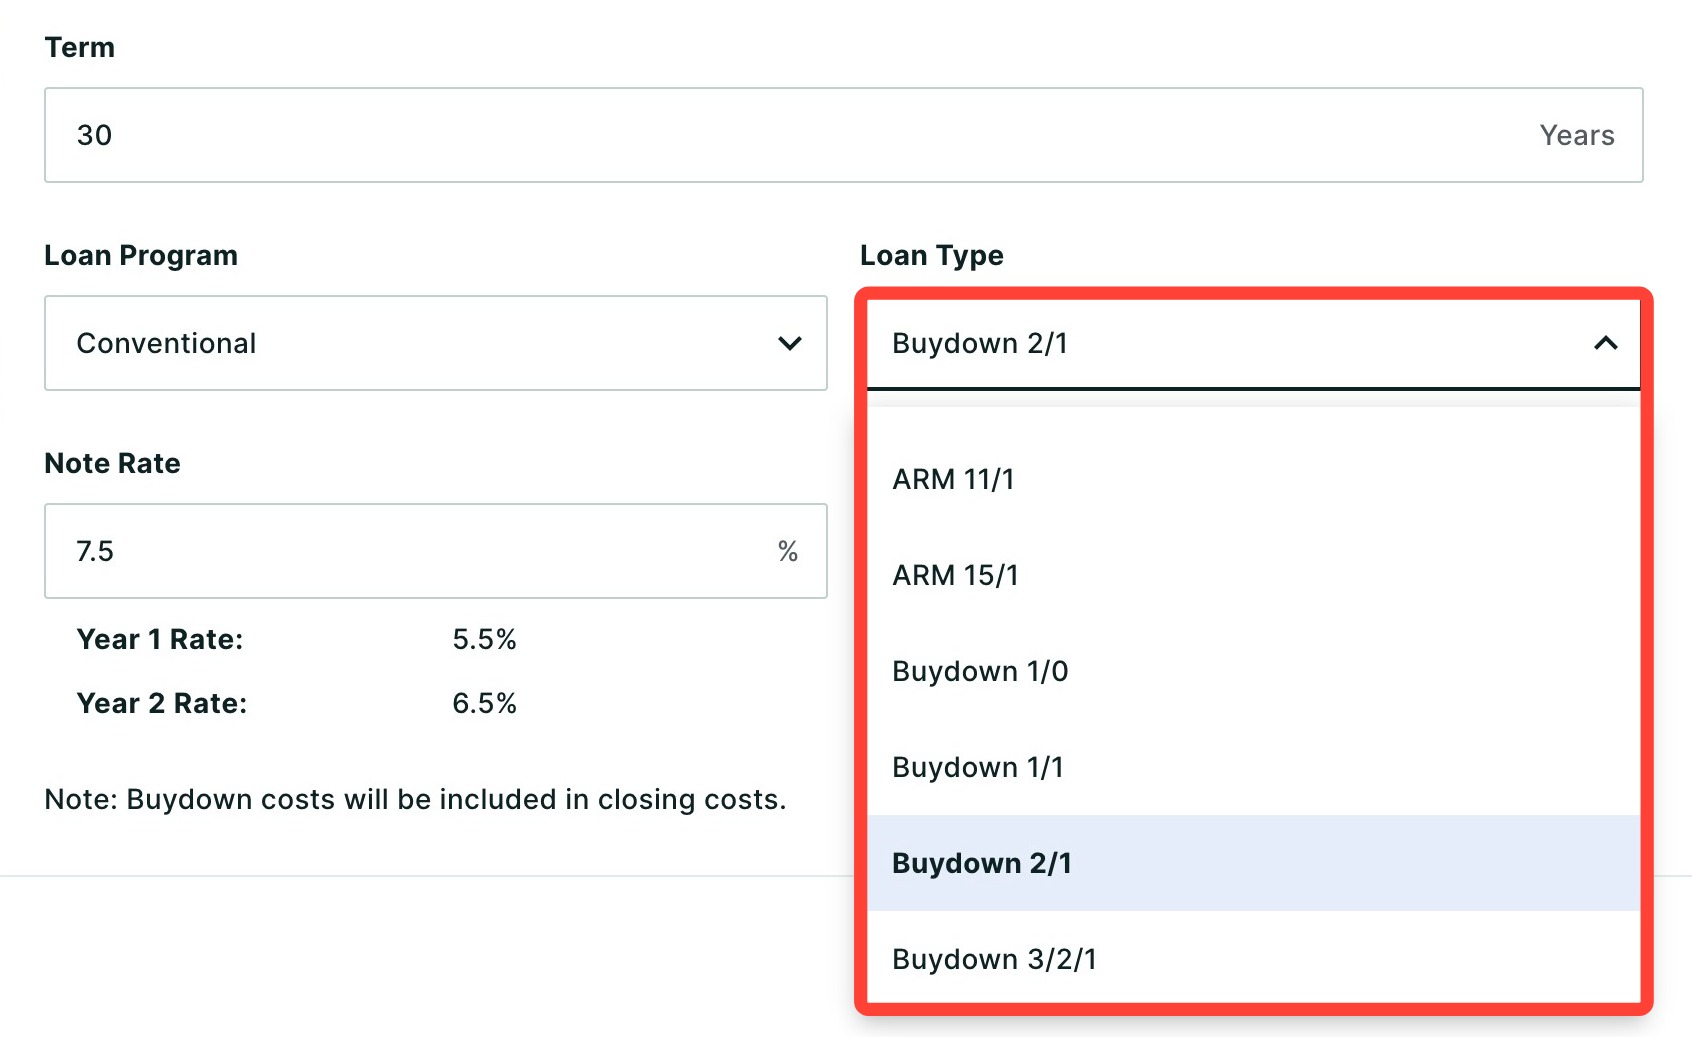
- Click the Loan Type dropdown and select your buydown. Buydown options are at the bottom of the list, below the ARM loans.
- If the seller is willing to contribute more than the cost of the buydown, you can enter the leftover amount as Additional Credits. In our example, we entered $469 so the total credit equals $10,000.
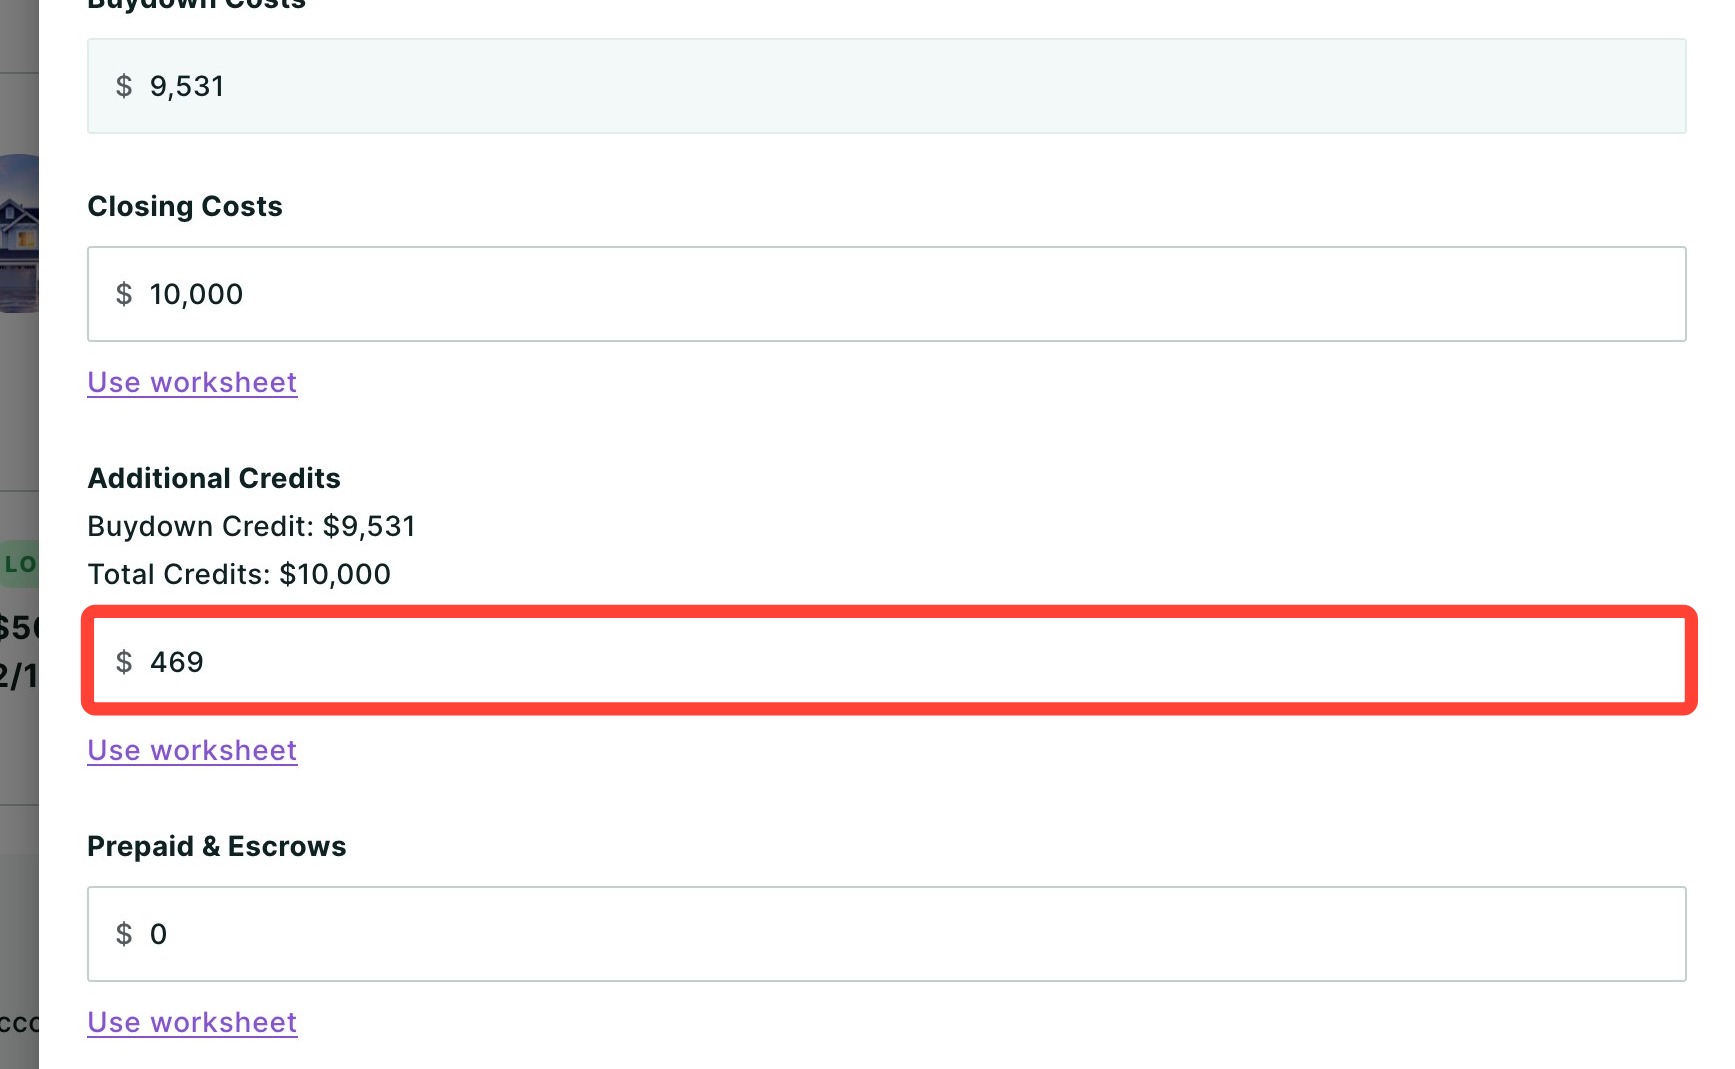
Please note: The cost of a temporary buydown is calculated and credited automatically, since our tools treat it as a seller concession. Only enter a Credit for any money left over. |
Seller-paid Closing Costs
- Click Duplicate on your base loan.
- Give the new loan a name. In this scenario, we used "$10k Credit to Closing Costs"
- Enter the entire amount the seller is willing to contribute under Credits.
Reviewing your Seller Contribution Report
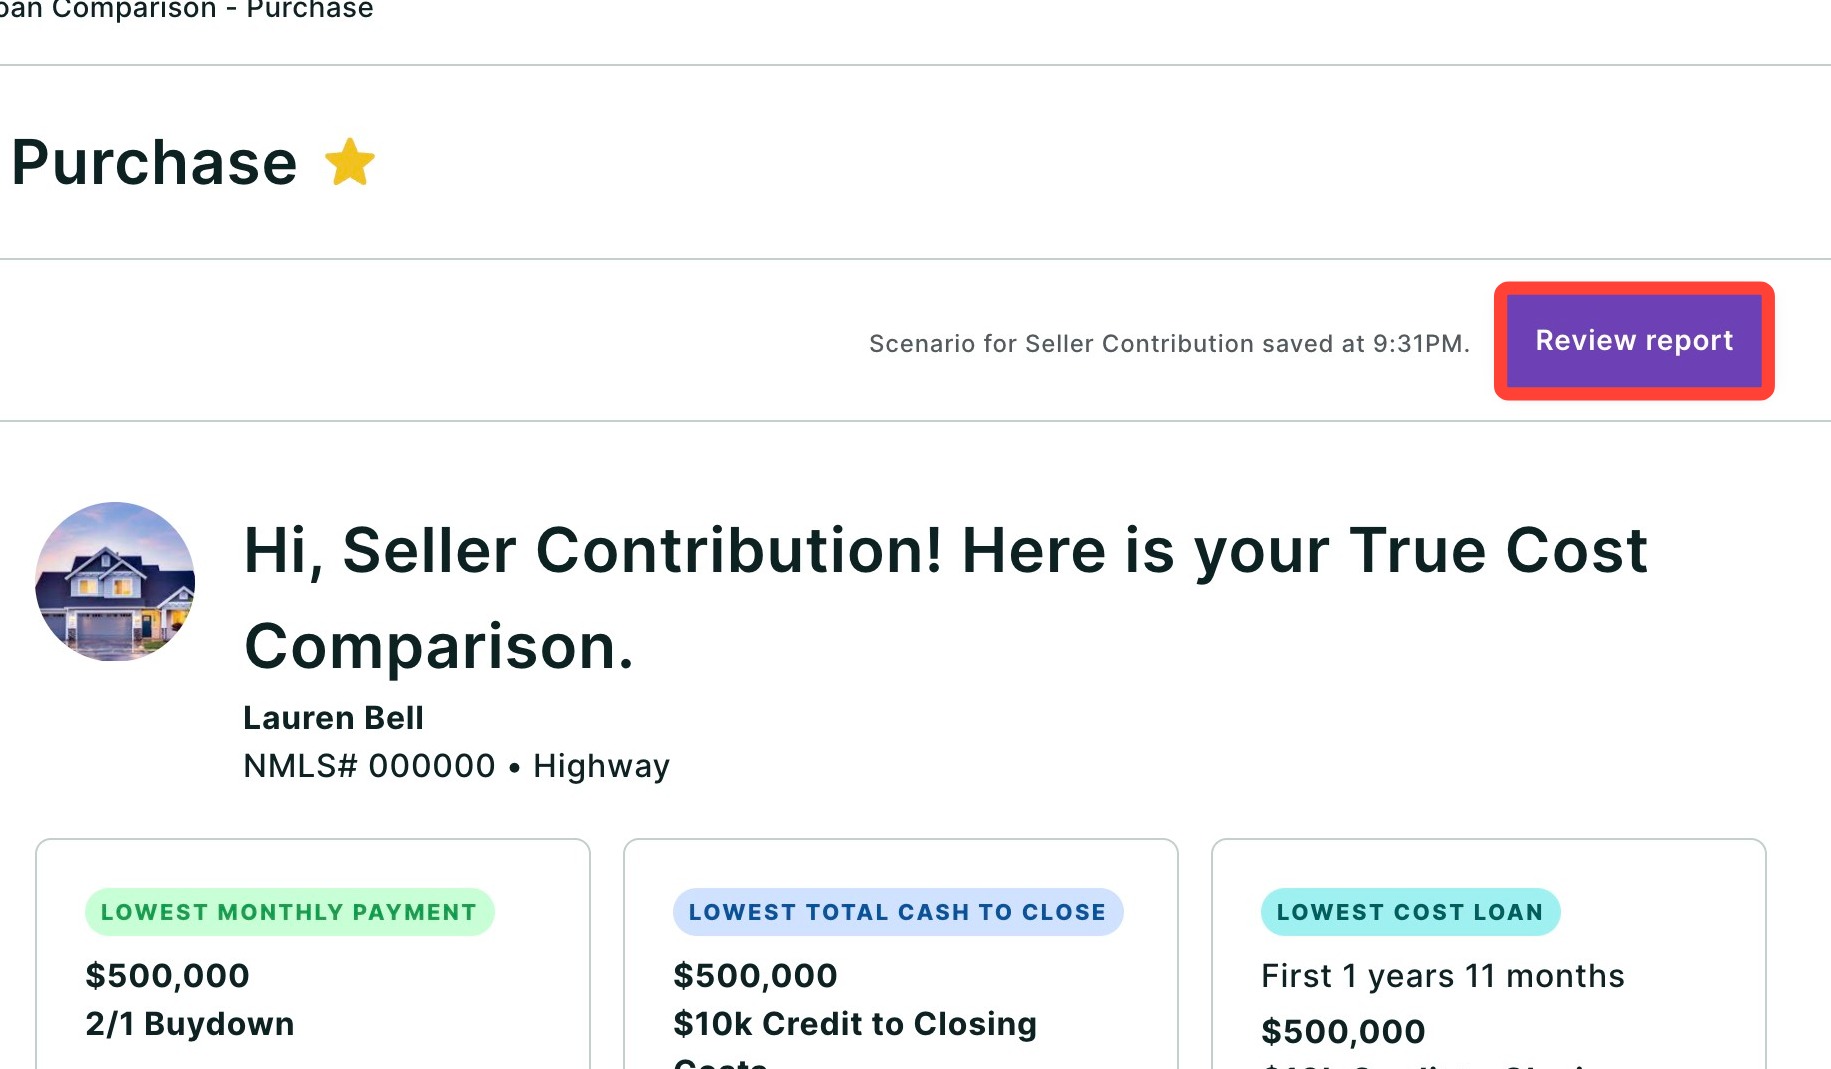
When you have finished building each loan scenario, click Review report in the upper right to see your full Seller Contribution Report.
The Financial Snapshot module compares your scenarios in three views. Click each button to switch between them:
- Monthly Payment: Compare the monthly payment for each scenario.
- Total Cost: Compare the total cost of each scenario.
- Equity Impact: Compare how each scenario affects your client's equity.
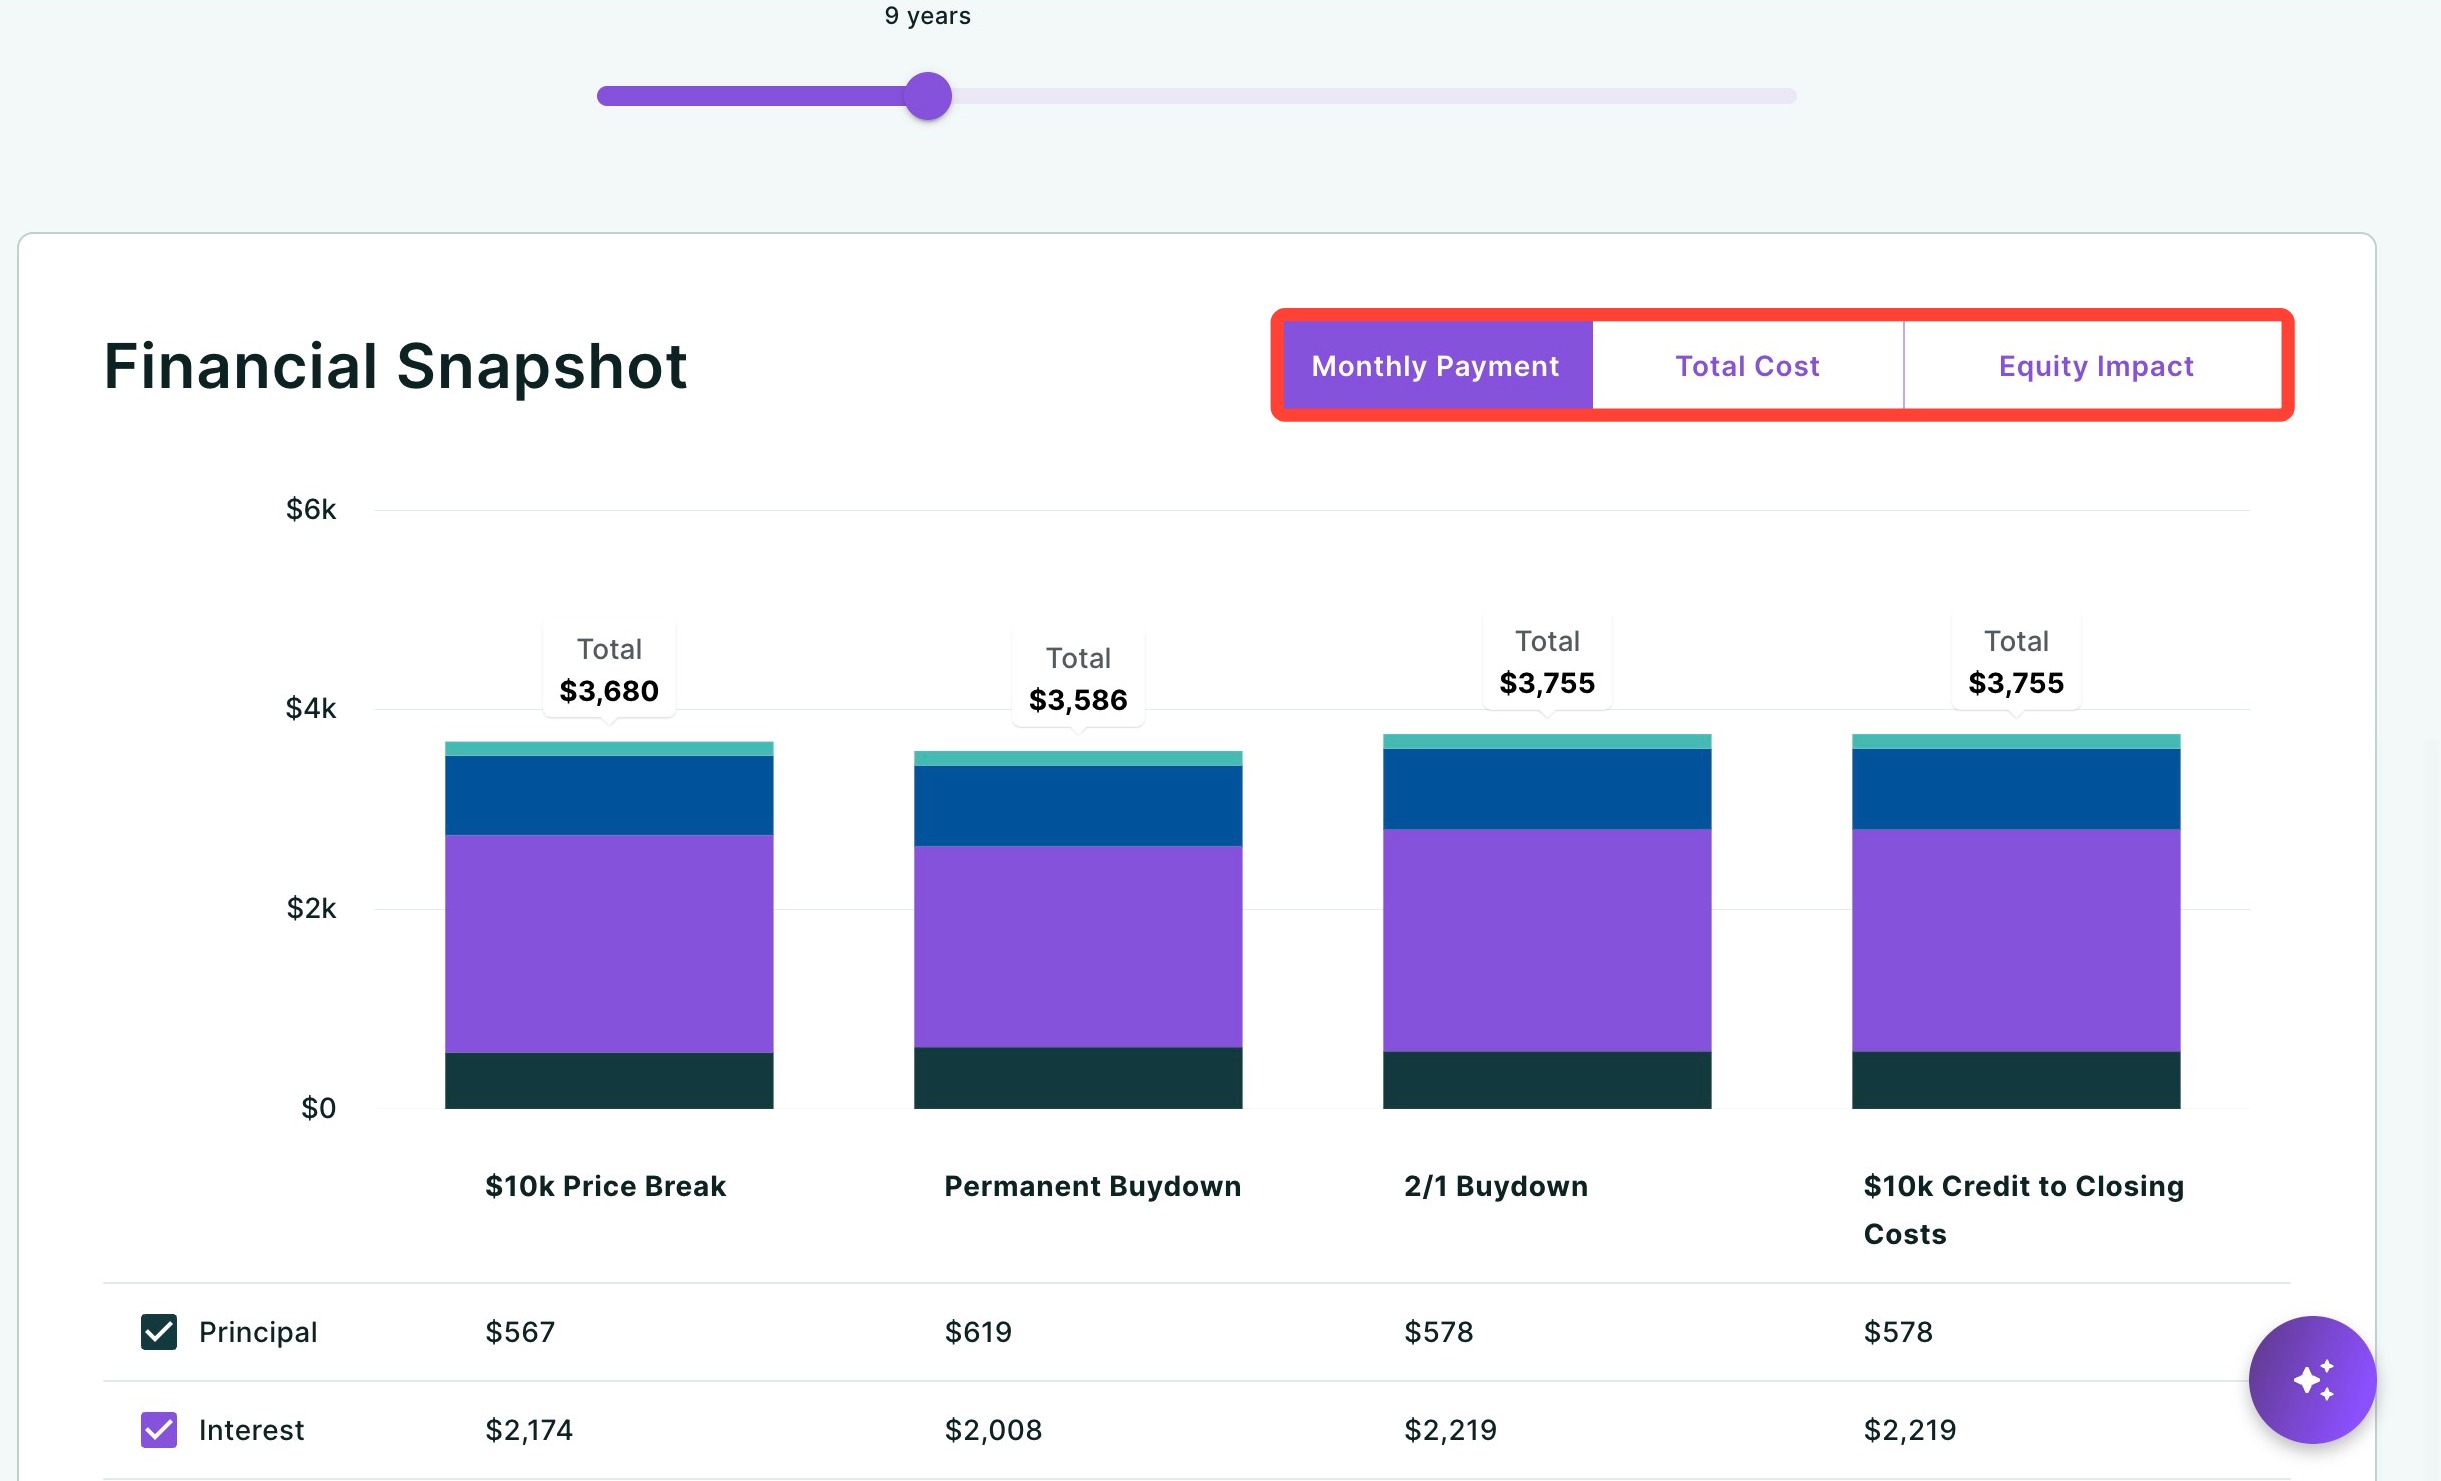
💡 Helpful Tip: Use the "How long does your client plan on owning their home?" slider to see how different lengths of ownership change the total monthly cost. |
Generating and Sharing your Report
Click Review report in the top right hand corner to then generate and preview your report. From here, you can share the completed report by clicking Share. A dropdown menu will then appear.
- Click Download to download the report as a PDF.
- Click Send a link via email with an optional video recording (not available for some users depending on their company permission settings).
- Click Host a meeting to virtually meet to discuss the report with your client.
- Click Record a Video to provide your client with a clear walkthrough of the report along with your own insights and context.
To learn more about sharing your report, click here.
Need Help?
Have questions or want to learn more? Submit a ticket or call us today!