The Equity Gained report is a great way to show a buyer the financial opportunity there is in housing today. To get started using this tool, follow the steps below.
Navigating to the Equity Gained
You can find your Equity Gained report within Client Manager as well as within the Real Estate sidebar menu.
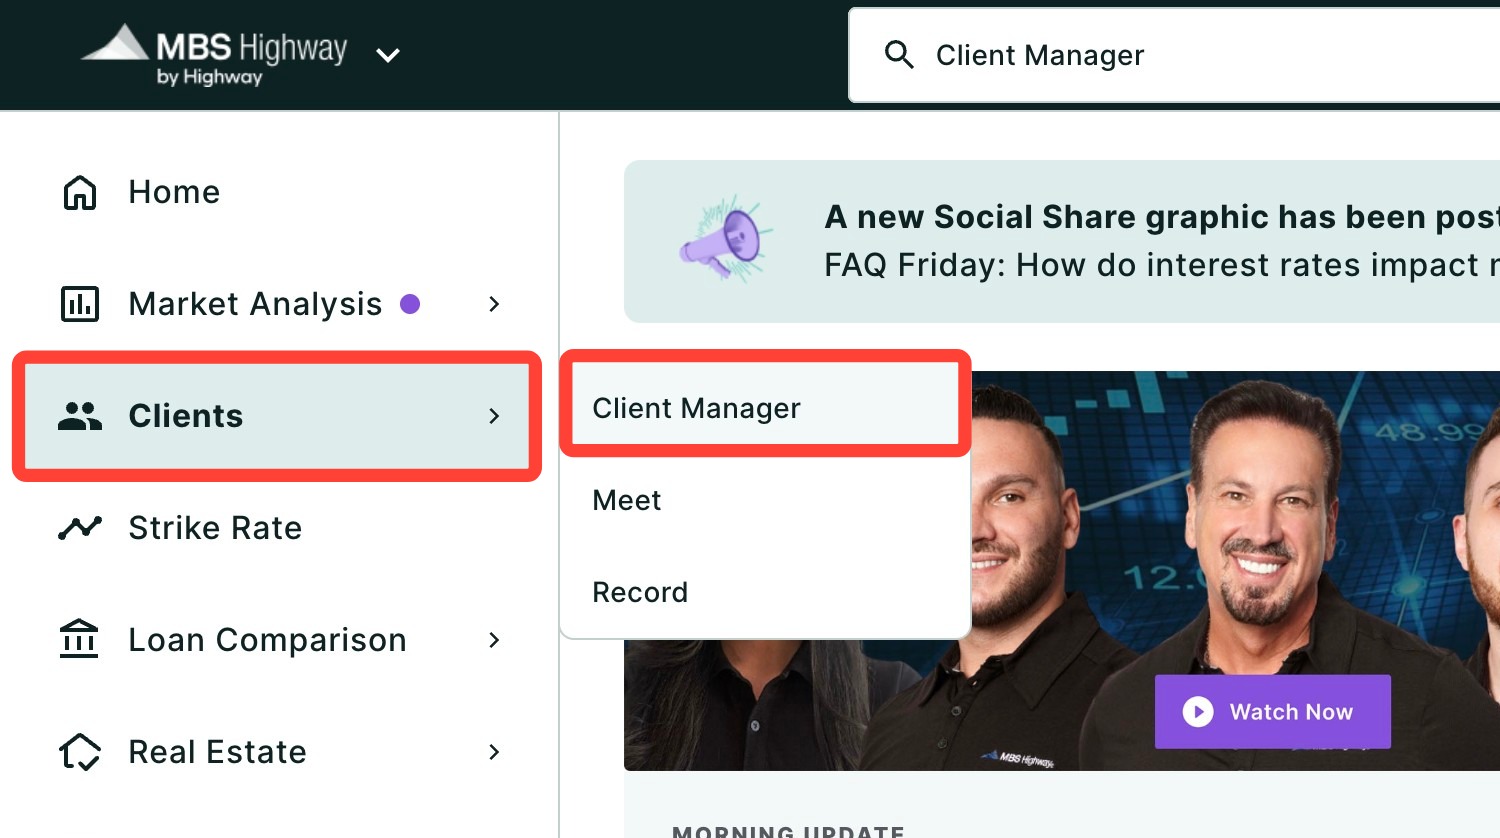
Navigating through the Client Manager
Client Manager allows you to create reports for your clients using previously saved loan and property details, saving you time when building new scenarios. To learn more, click here.
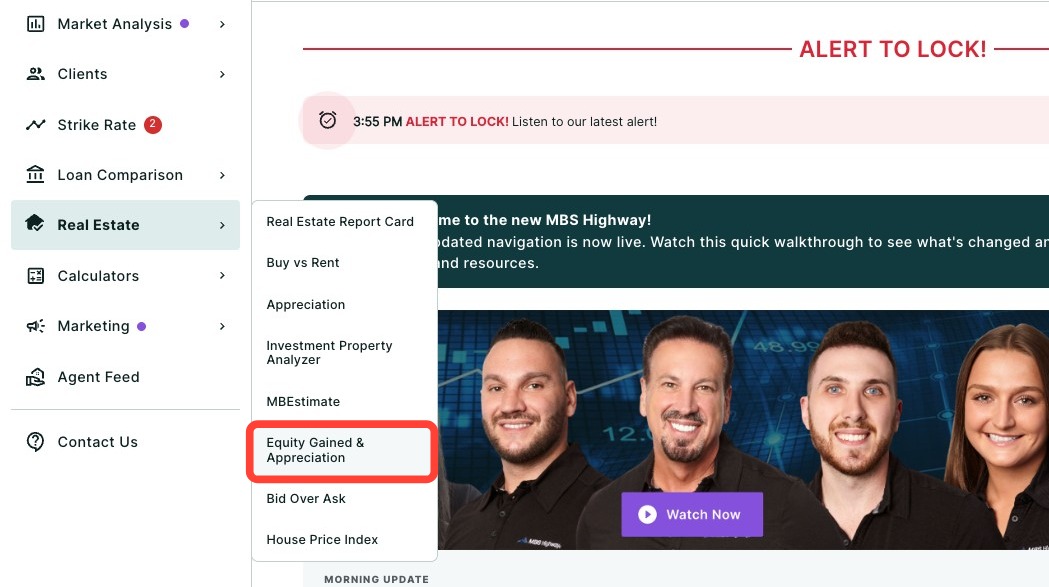
Navigating through the Menu
To access the Equity Gained report using the left-hand sidebar menu, click Real Estate, then click Equity Gained and Appreciation. By default, the Purchase report will be displayed.
💡 Helpful Tip: You can also search and favorite reports, tools, and calculators. Click here to learn how.
Creating Your Report
Follow the steps below to enter the required details and generate the Equity Gained report.
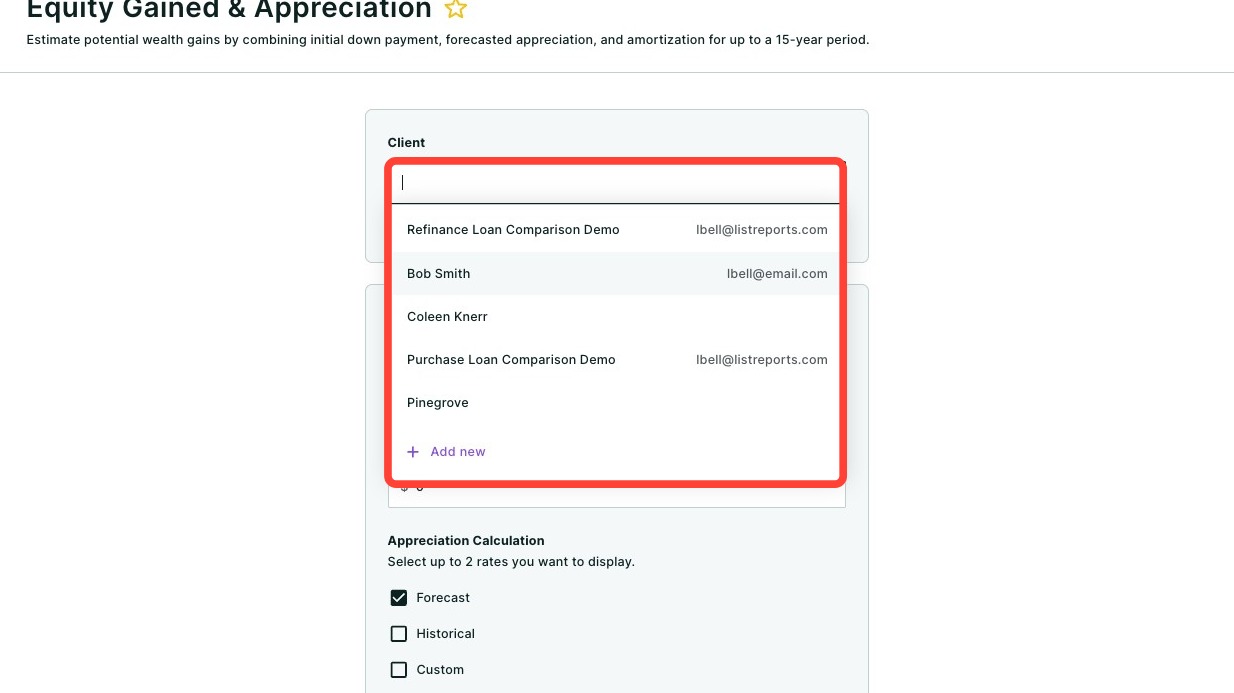
- If not already pre-filled, enter your client’s name and choose them from the dropdown list. To add a new client, click + Add new and fill in your client's details. Name and FICO score are required fields. Click Add.
- Select a Property from the drop-down, or click + New Property and begin typing an address, city, county, or ZIP code in the search field.
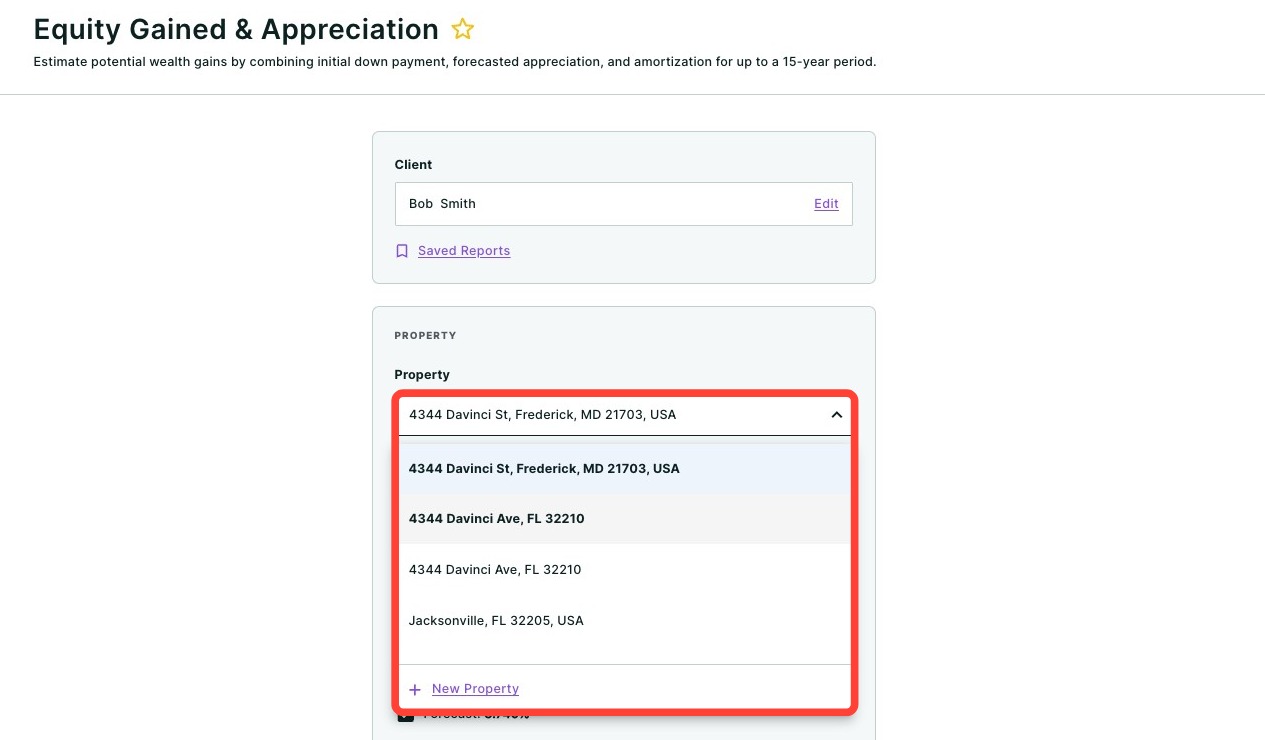
💡 Helpful Tip: Property and loan information is saved to your client, so any updates or changes made will automatically apply across all of their reports where those properties and loans are used.
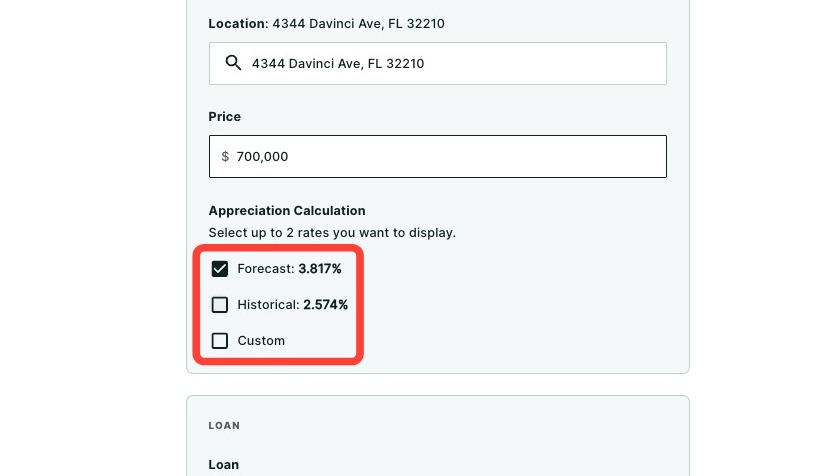
- Add the purchase Price.
- Select up to 2 rates of Appreciation you would like displayed in the report.
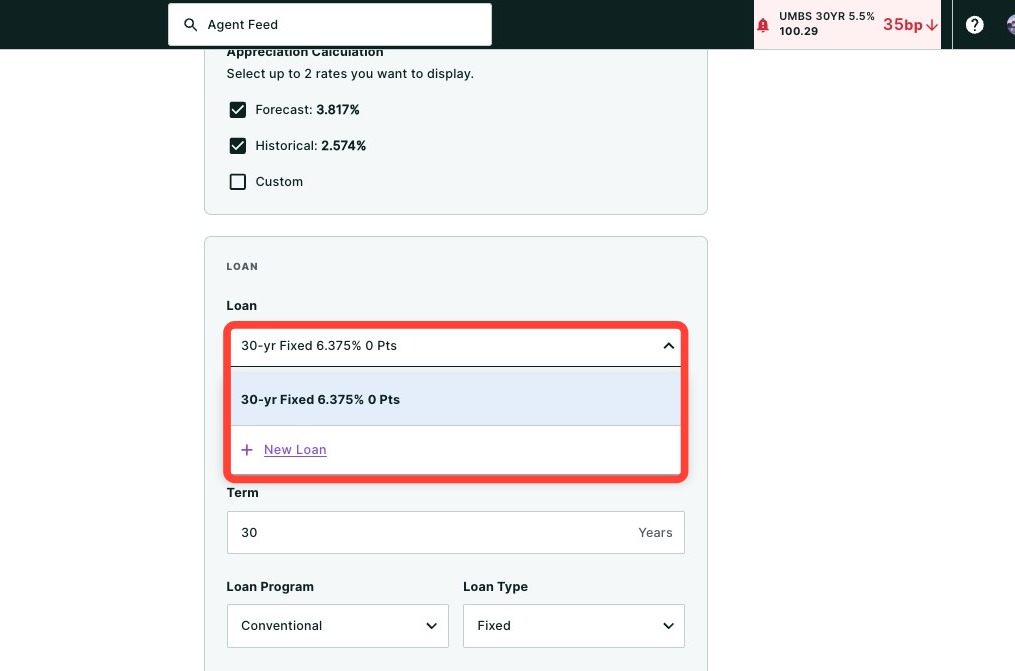
- Select a previously saved loan from the drop-down or click +Add a Loan to create a new loan option for your client.
💡 Helpful Tip: Property and loan information is saved to your client, so any updates or changes made will automatically apply across all of their reports where those properties and loans are used.
- If creating a new loan, add your loan Term, select the Loan Program and Loan Type, and enter the loan's interest Rate.
- Click Calculate.
Making Edits
Follow the steps below to learn how to edit your report details, including client information and scenario inputs.
- Once you click Calculate, you will be brought to a preview of your report where you make edits.
- To make change to your client's name, email, FICO score, monthly qualifying income or debt-to-income ratio, click Edit under the Client section.
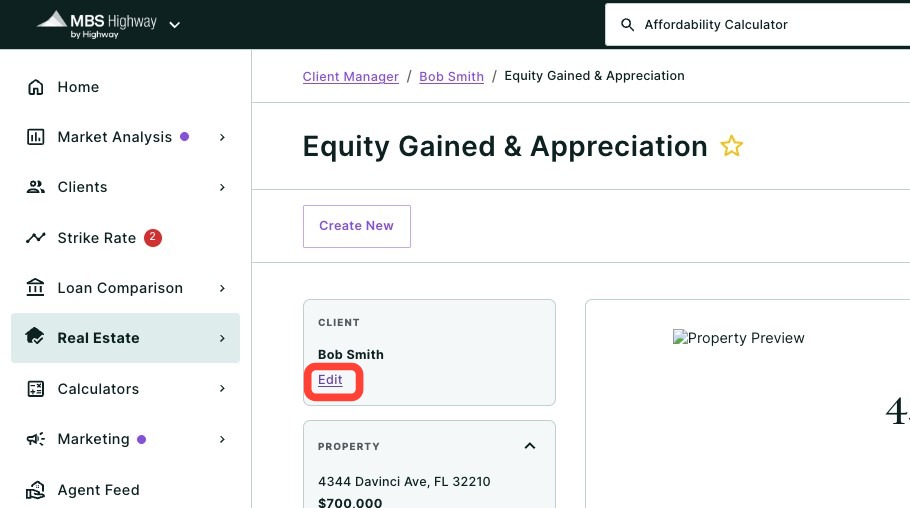
3. Make changes to your property including actual address, displayed address, price and appreciation rates by clicking Edit under Property.
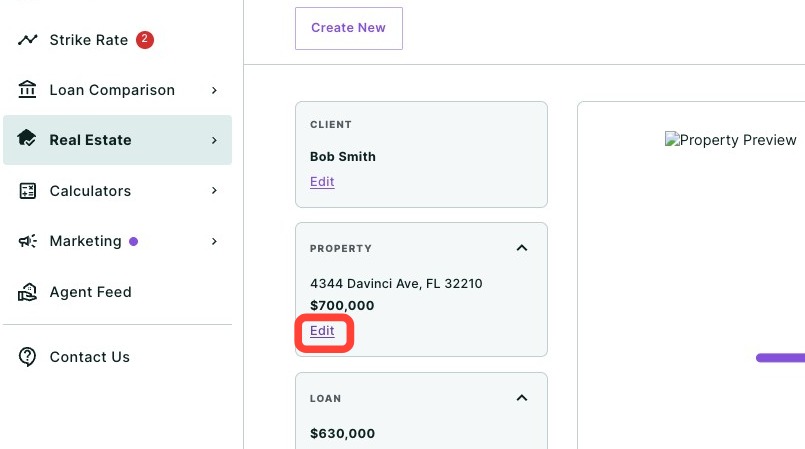
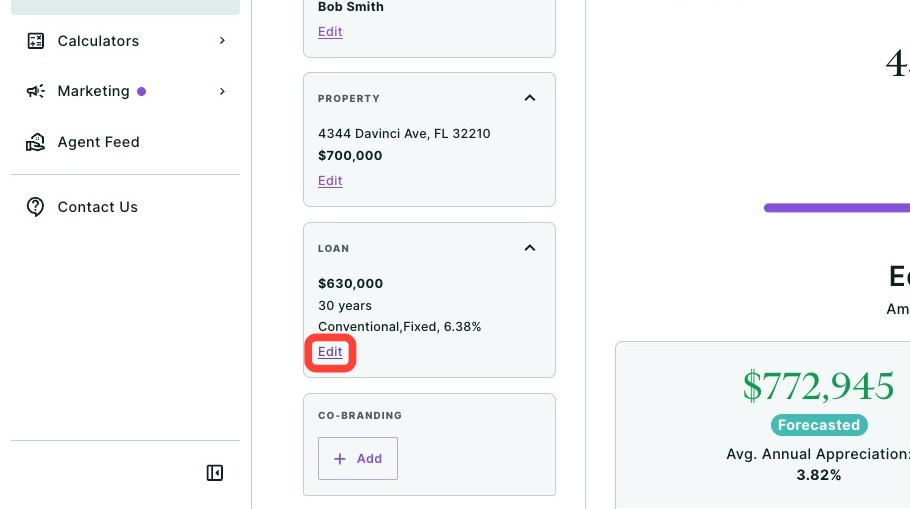
4. To make edits to the loan information, click Edit. You can make changes to the loan amount, term, loan program, loan type, and rate.
5. To add an agent for Co-branding, click Edit under Co-branding.

6. Once you have made your desired edits, click Review Report.
Add Agent Co-Branding
You can also add a referral partner's co-branding on your report. To learn more about co-branding, click here.
1. Click on + Add under Co-branding.

2. Click on the drop-down menu and select an agent or add a new agent by clicking + Add new co-branding partner.
3. Choose the orientation for how you want their branding displayed on the report.
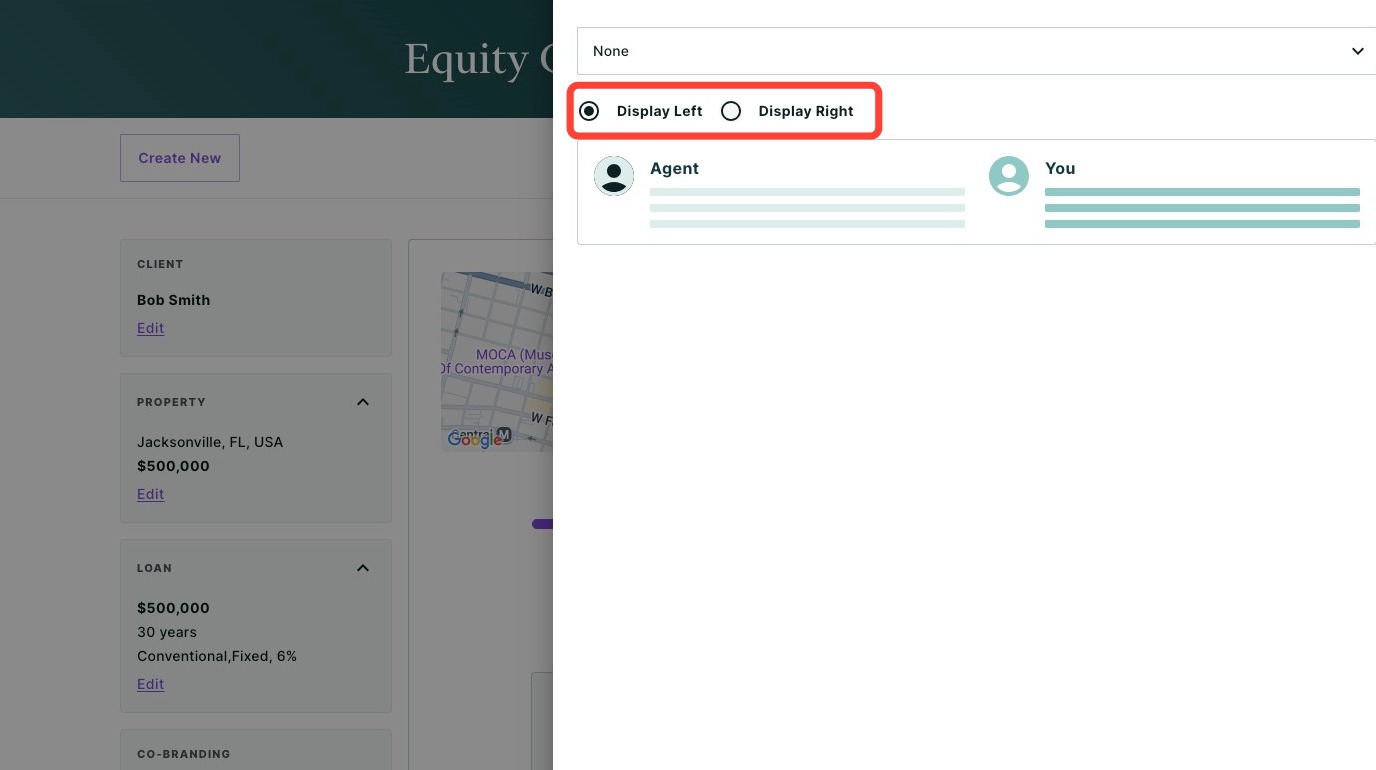
4. Click Save.
Sharing the Results
To share the completed report, click Share. A dropdown menu will appear.
- Click Download to download the report as a PDF.
- Click Send a link via email with an optional video recording (not available for some users depending on their company permission settings).
- Click Host a meeting to virtually meet to discuss the report with your client.
- Click Record a Video to provide your client with a clear walkthrough of the report along with your own insights and context.
To learn more about sharing your report, click here.
Still Need Help?
Have questions or want to learn more? Submit a ticket or call us today!
Related to