Summary
The Blended Rate Calculator helps you show clients the true cost of carrying multiple debts. Instead of looking at each debt in isolation, this tool combines them into a single rate, giving you and your client a clearer picture of their overall borrowing and opening the door to meaningful conversations.
Watch the video below for a quick walkthrough of the tool, or continue reading for step-by-step instructions.
Navigating to the Blended Rate Calculator
You can find your Blended Rate Calculator within Client Manager as well as within the Calculators tab in the left-hand navigation menu.
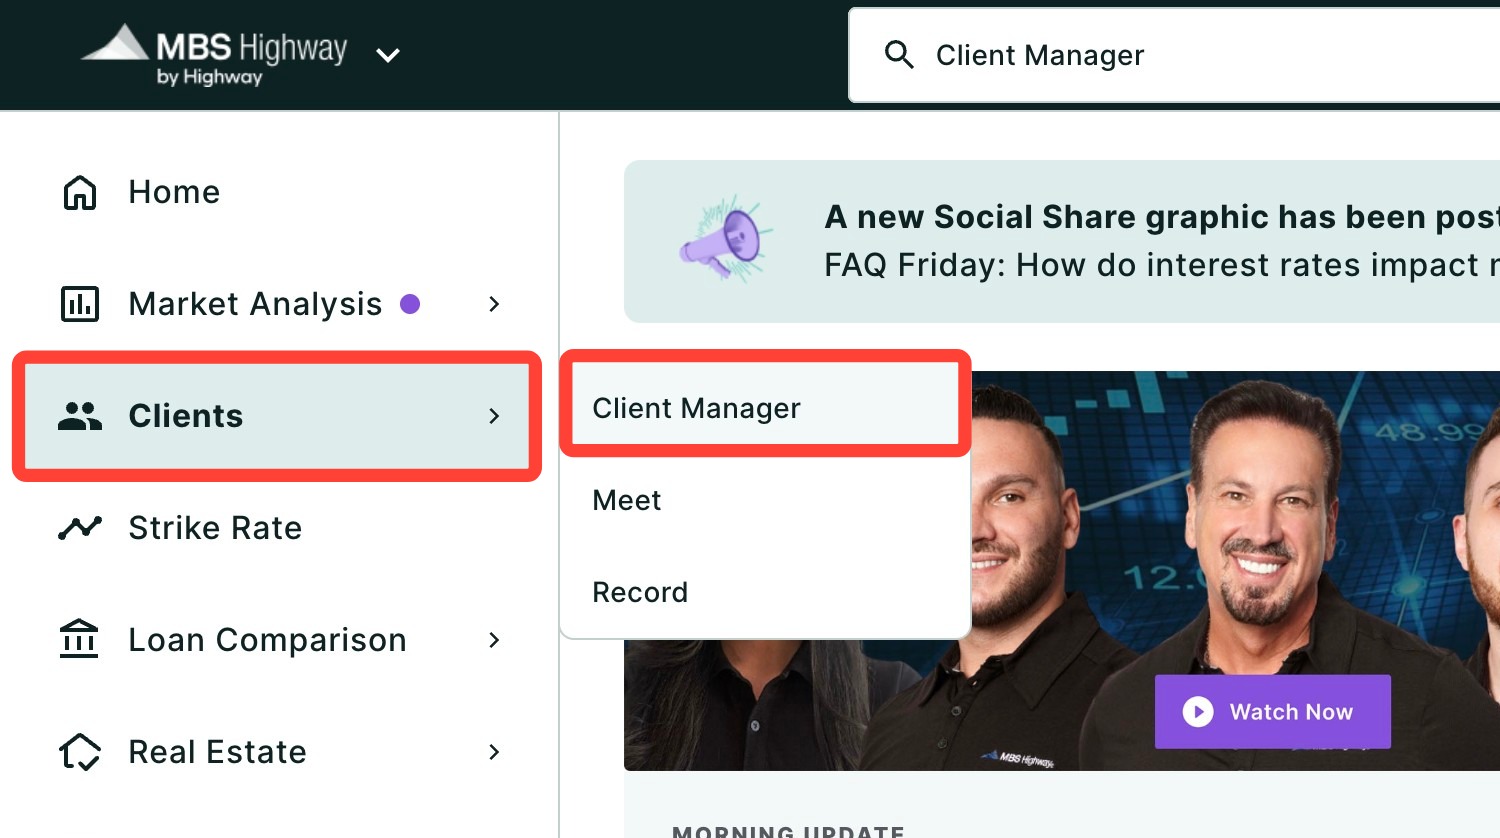
Navigating through the Client Manager
Client Manager allows you to create reports for your clients using previously saved loan and property details, saving you time when building new scenarios. To learn more, click here.
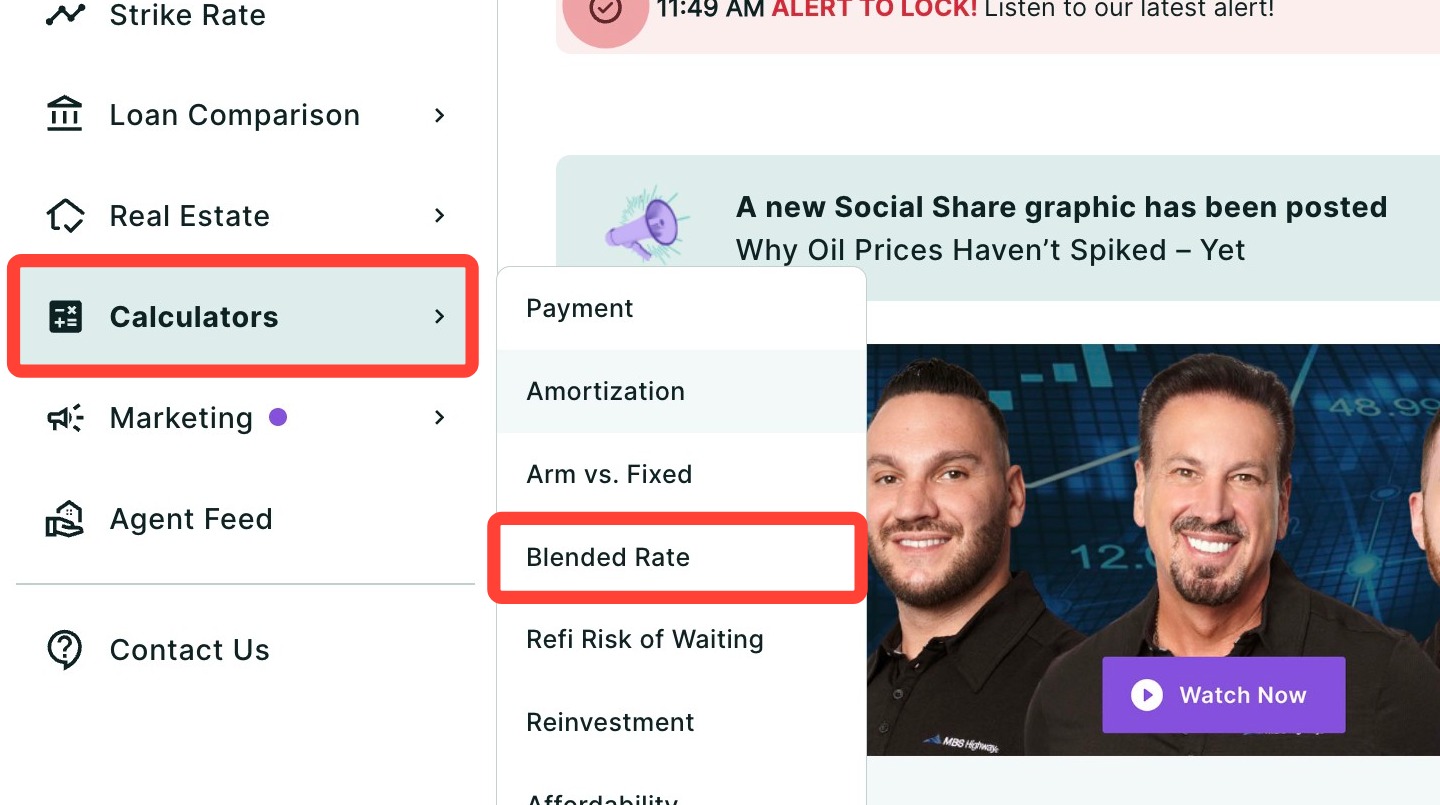
Navigating through the left-hand sidebar menu
To access the Appreciation report using the left-hand sidebar menu, click Calculators, then click Blended Rate.
💡Helpful Tip: You can also search and favorite reports, tools, and calculators. Click here to learn how.
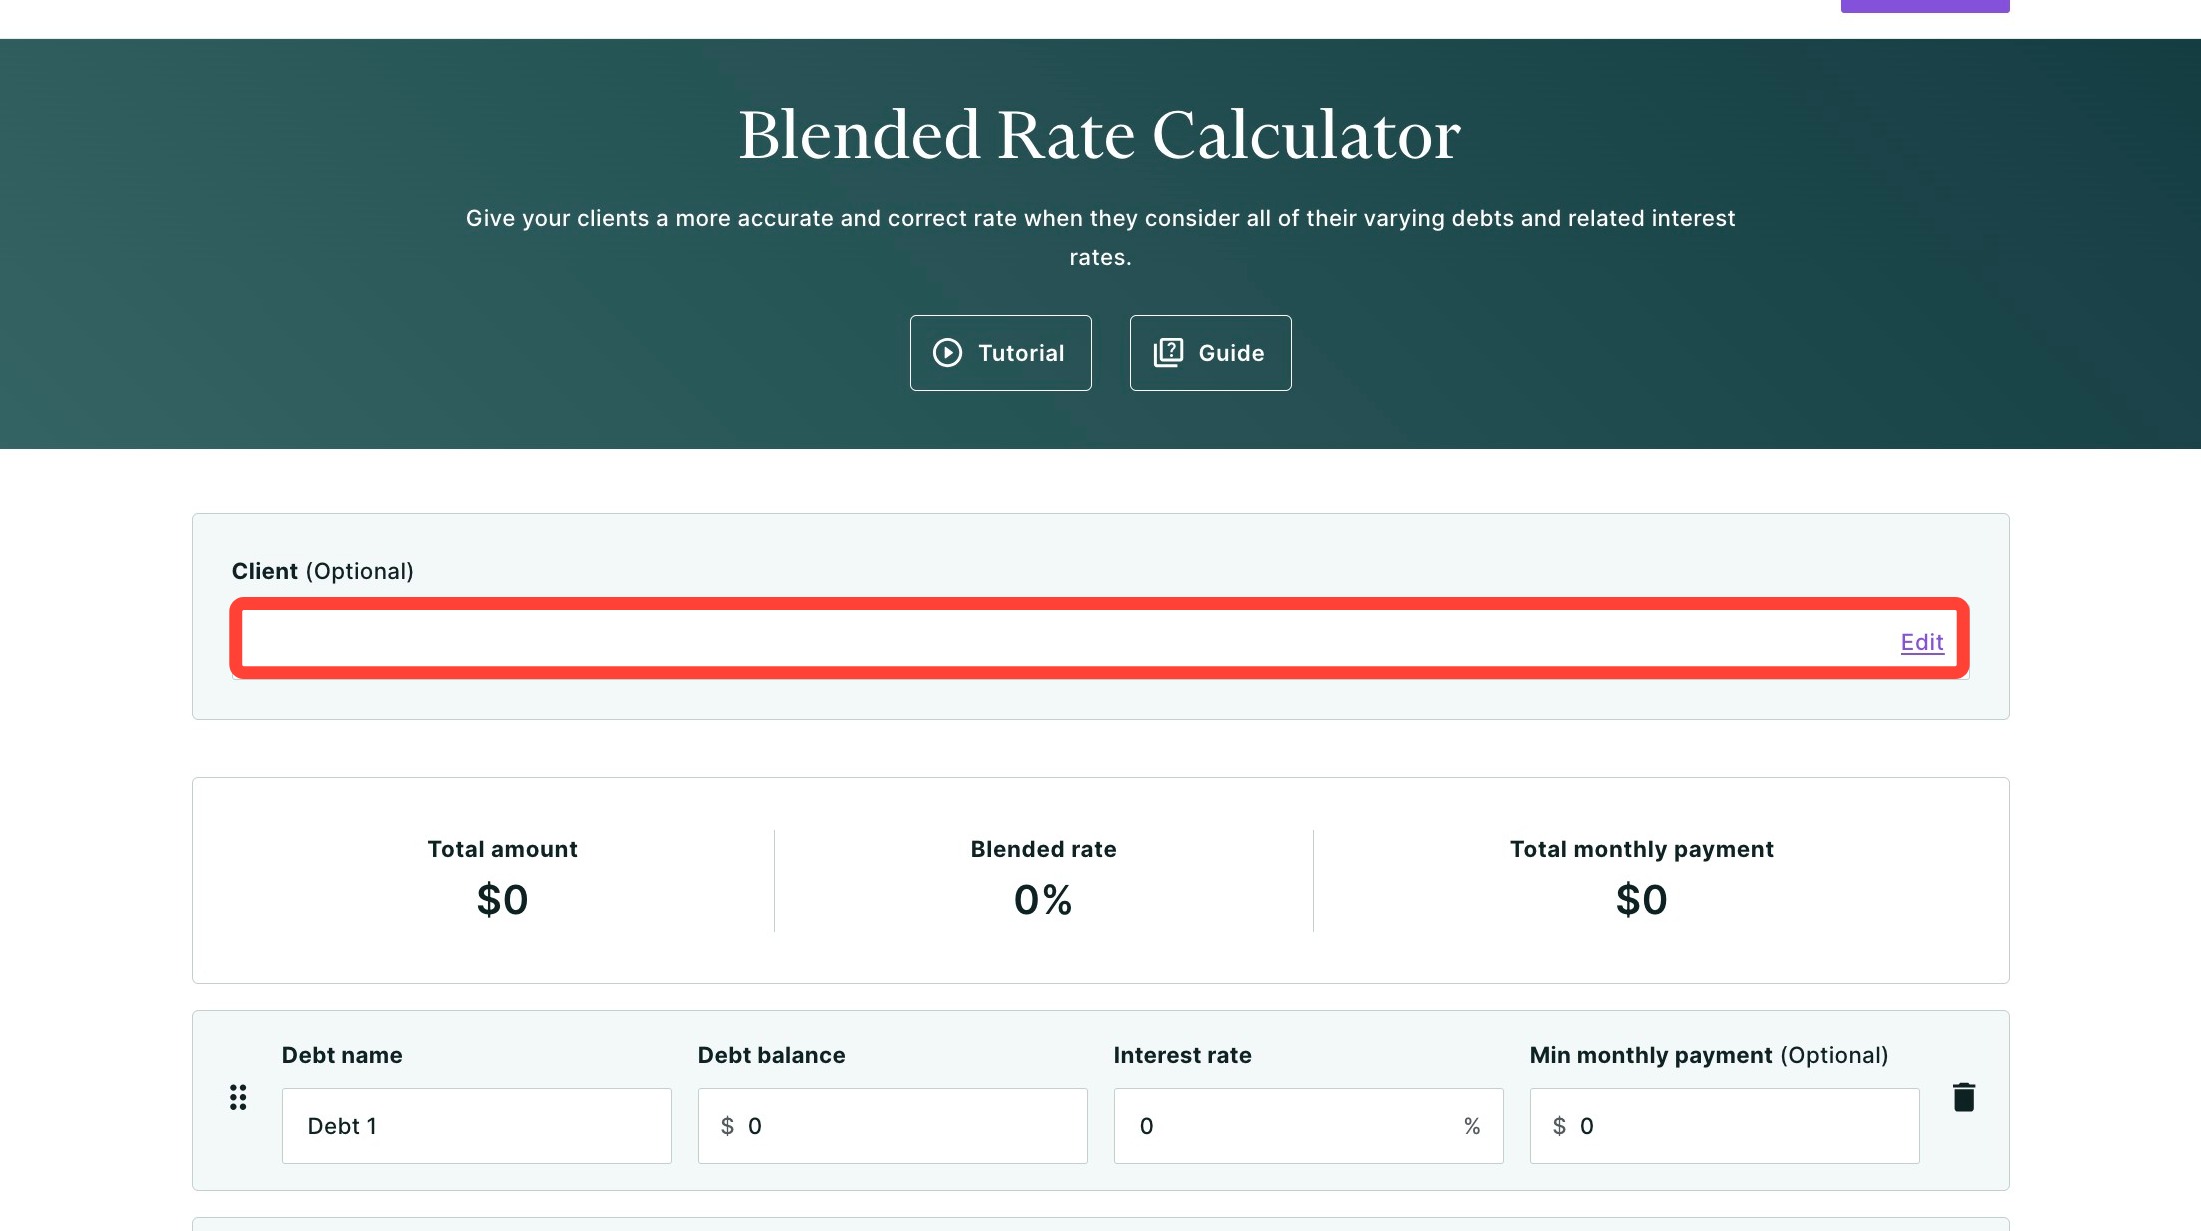
Setting Up Your Calculation
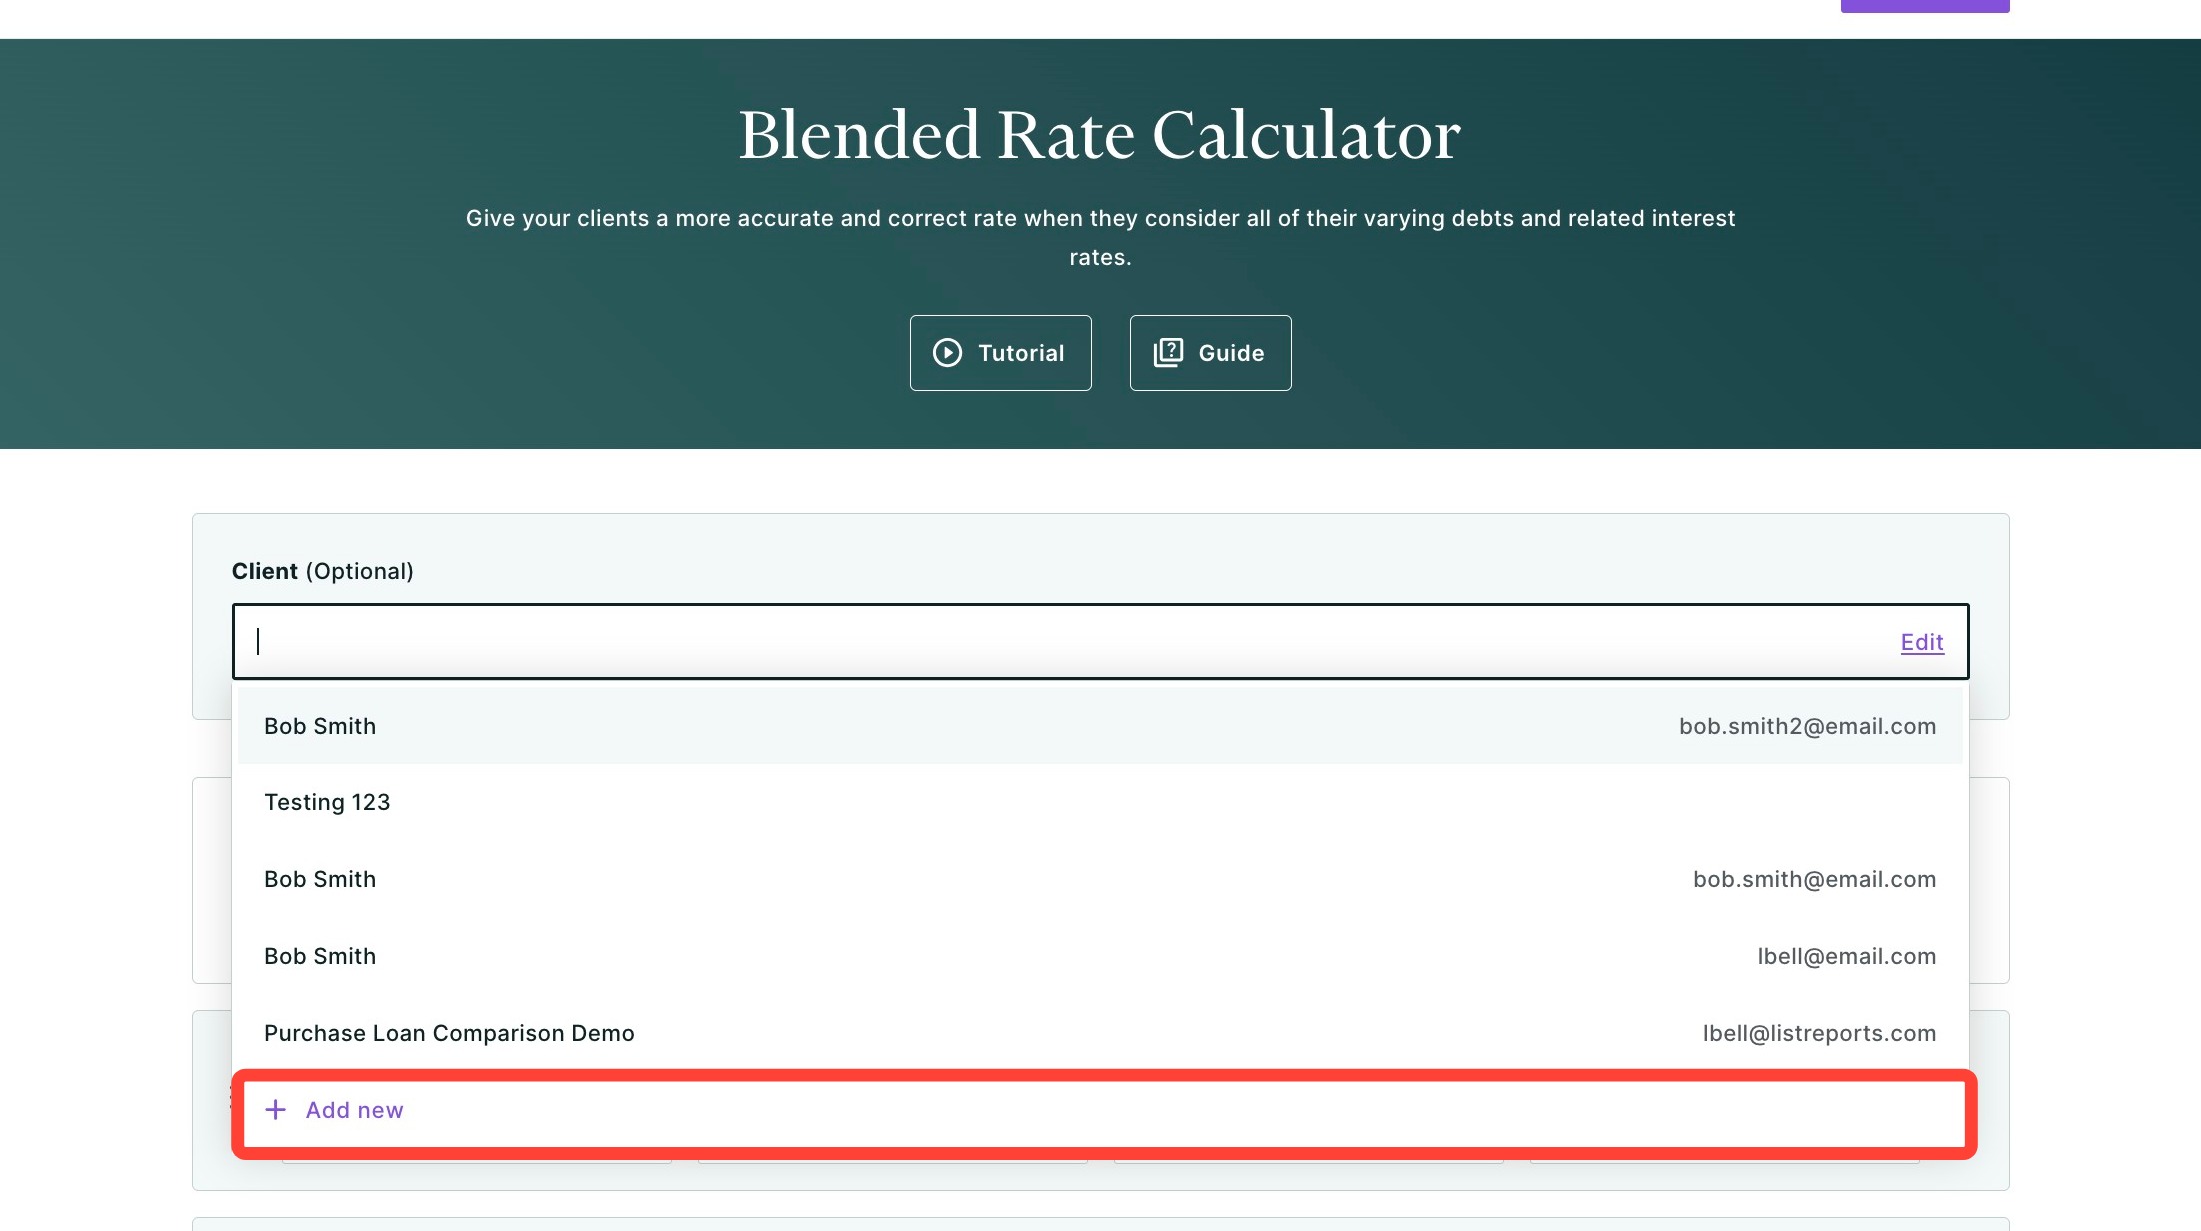
1. Select a client by typing their name in the field below and select them from the drop-down. This is optional and does not affect the calculation, but helps you save and identify scenarios later.
2. To add a new client, select + Add new from the drop-down.
3. Next, fill in your client's information. Name and FICO score are required fields.
4. Click Add.
5. For each debt, fill in the following fields:
- Debt name: Give the debt a descriptive label (e.g., "Car Loan," "Credit Card,").
- Debt balance: Enter the current outstanding balance.
- Interest rate: Enter the annual interest rate as a percentage.
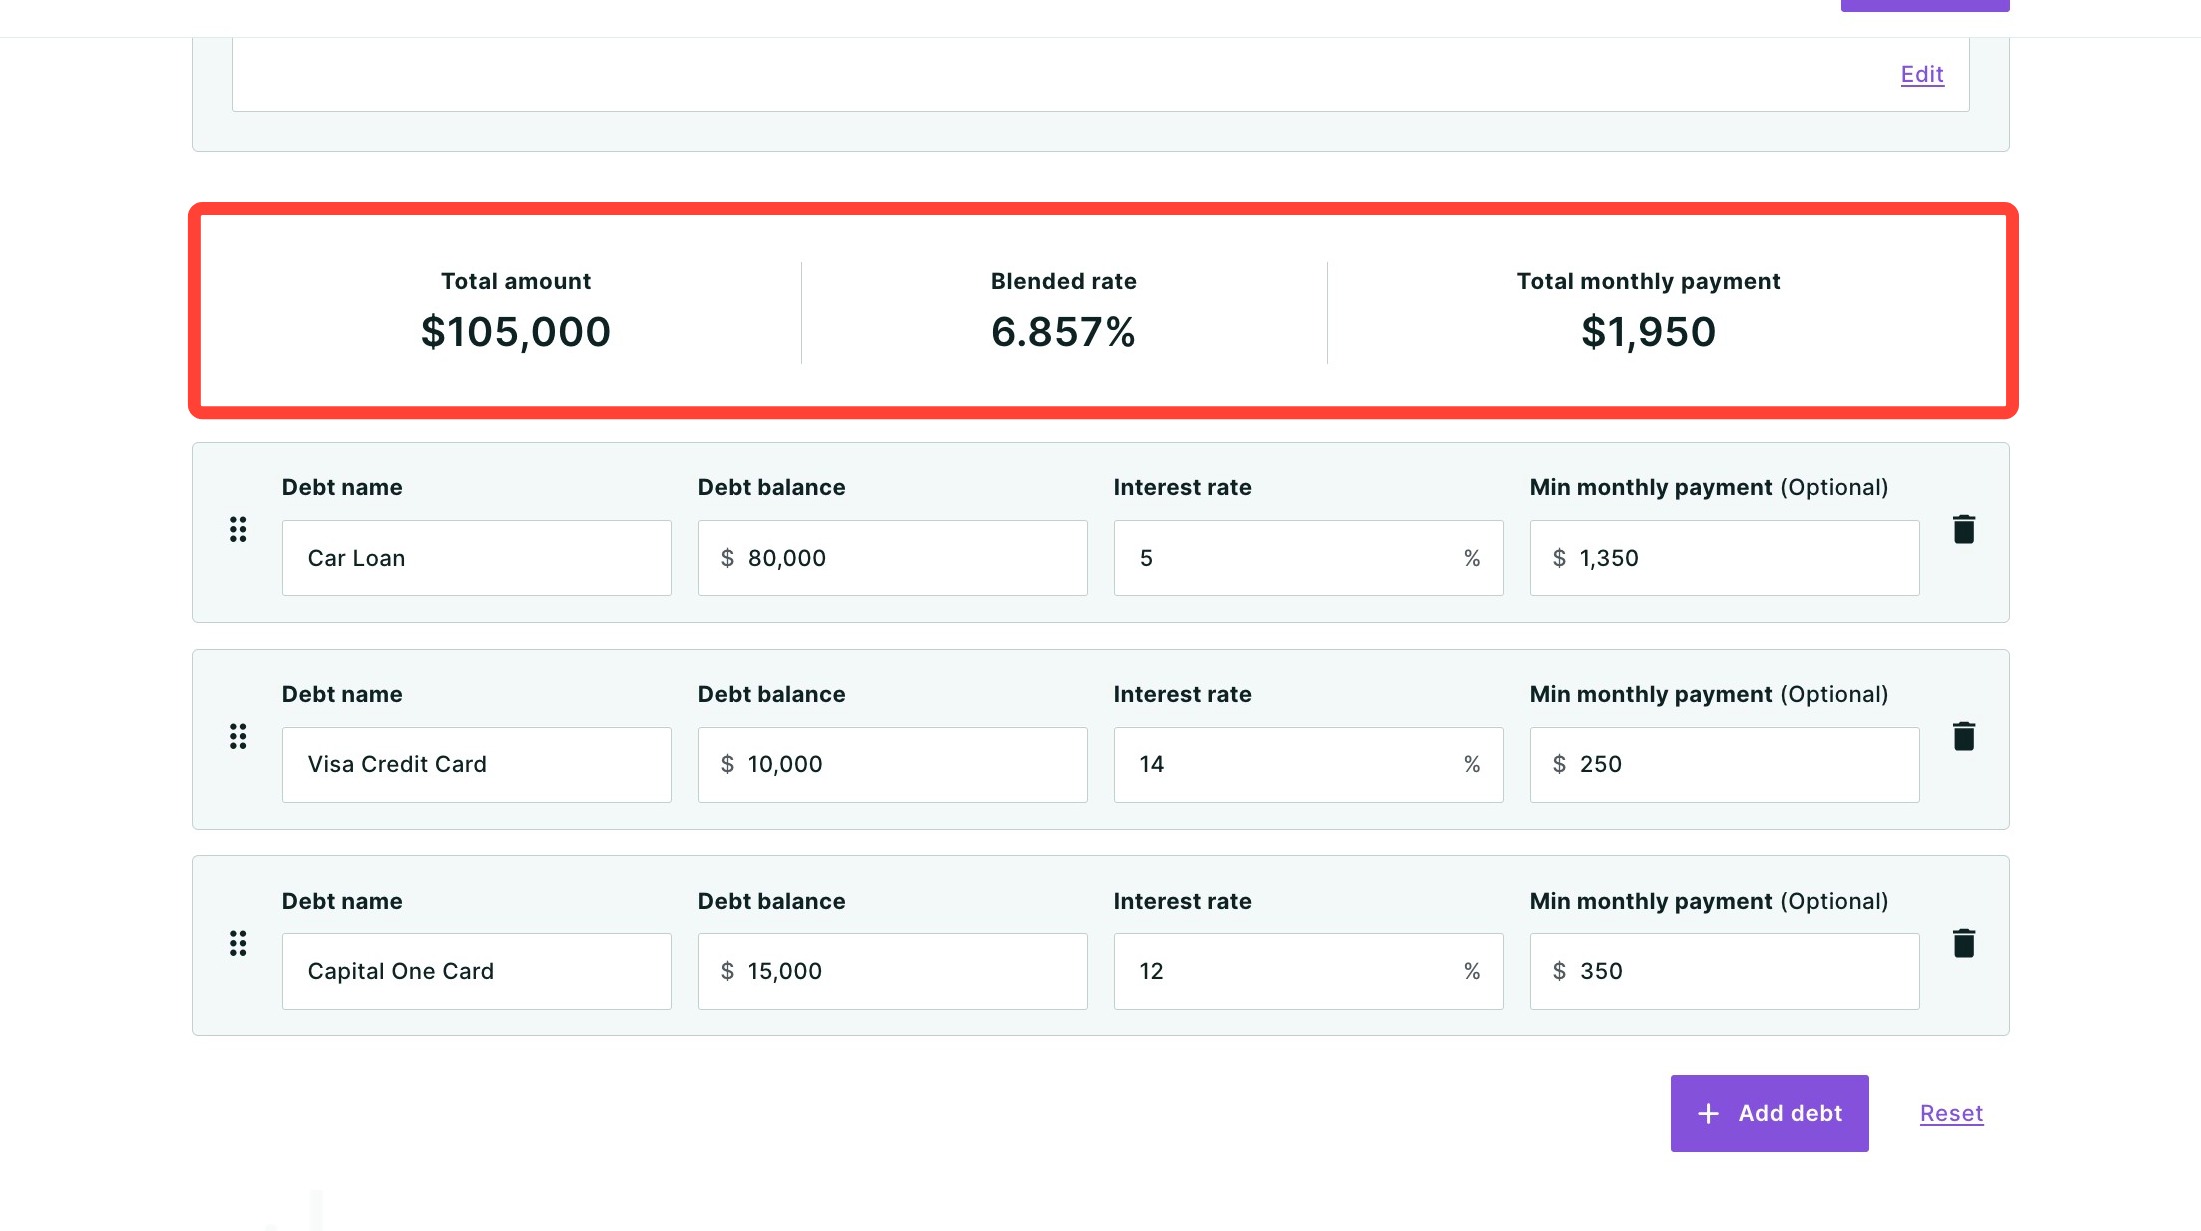
- Minimum monthly payment: Optional, but recommended. Including this ensures the Total Monthly Payment figure in the summary bar is accurate for client presentations.
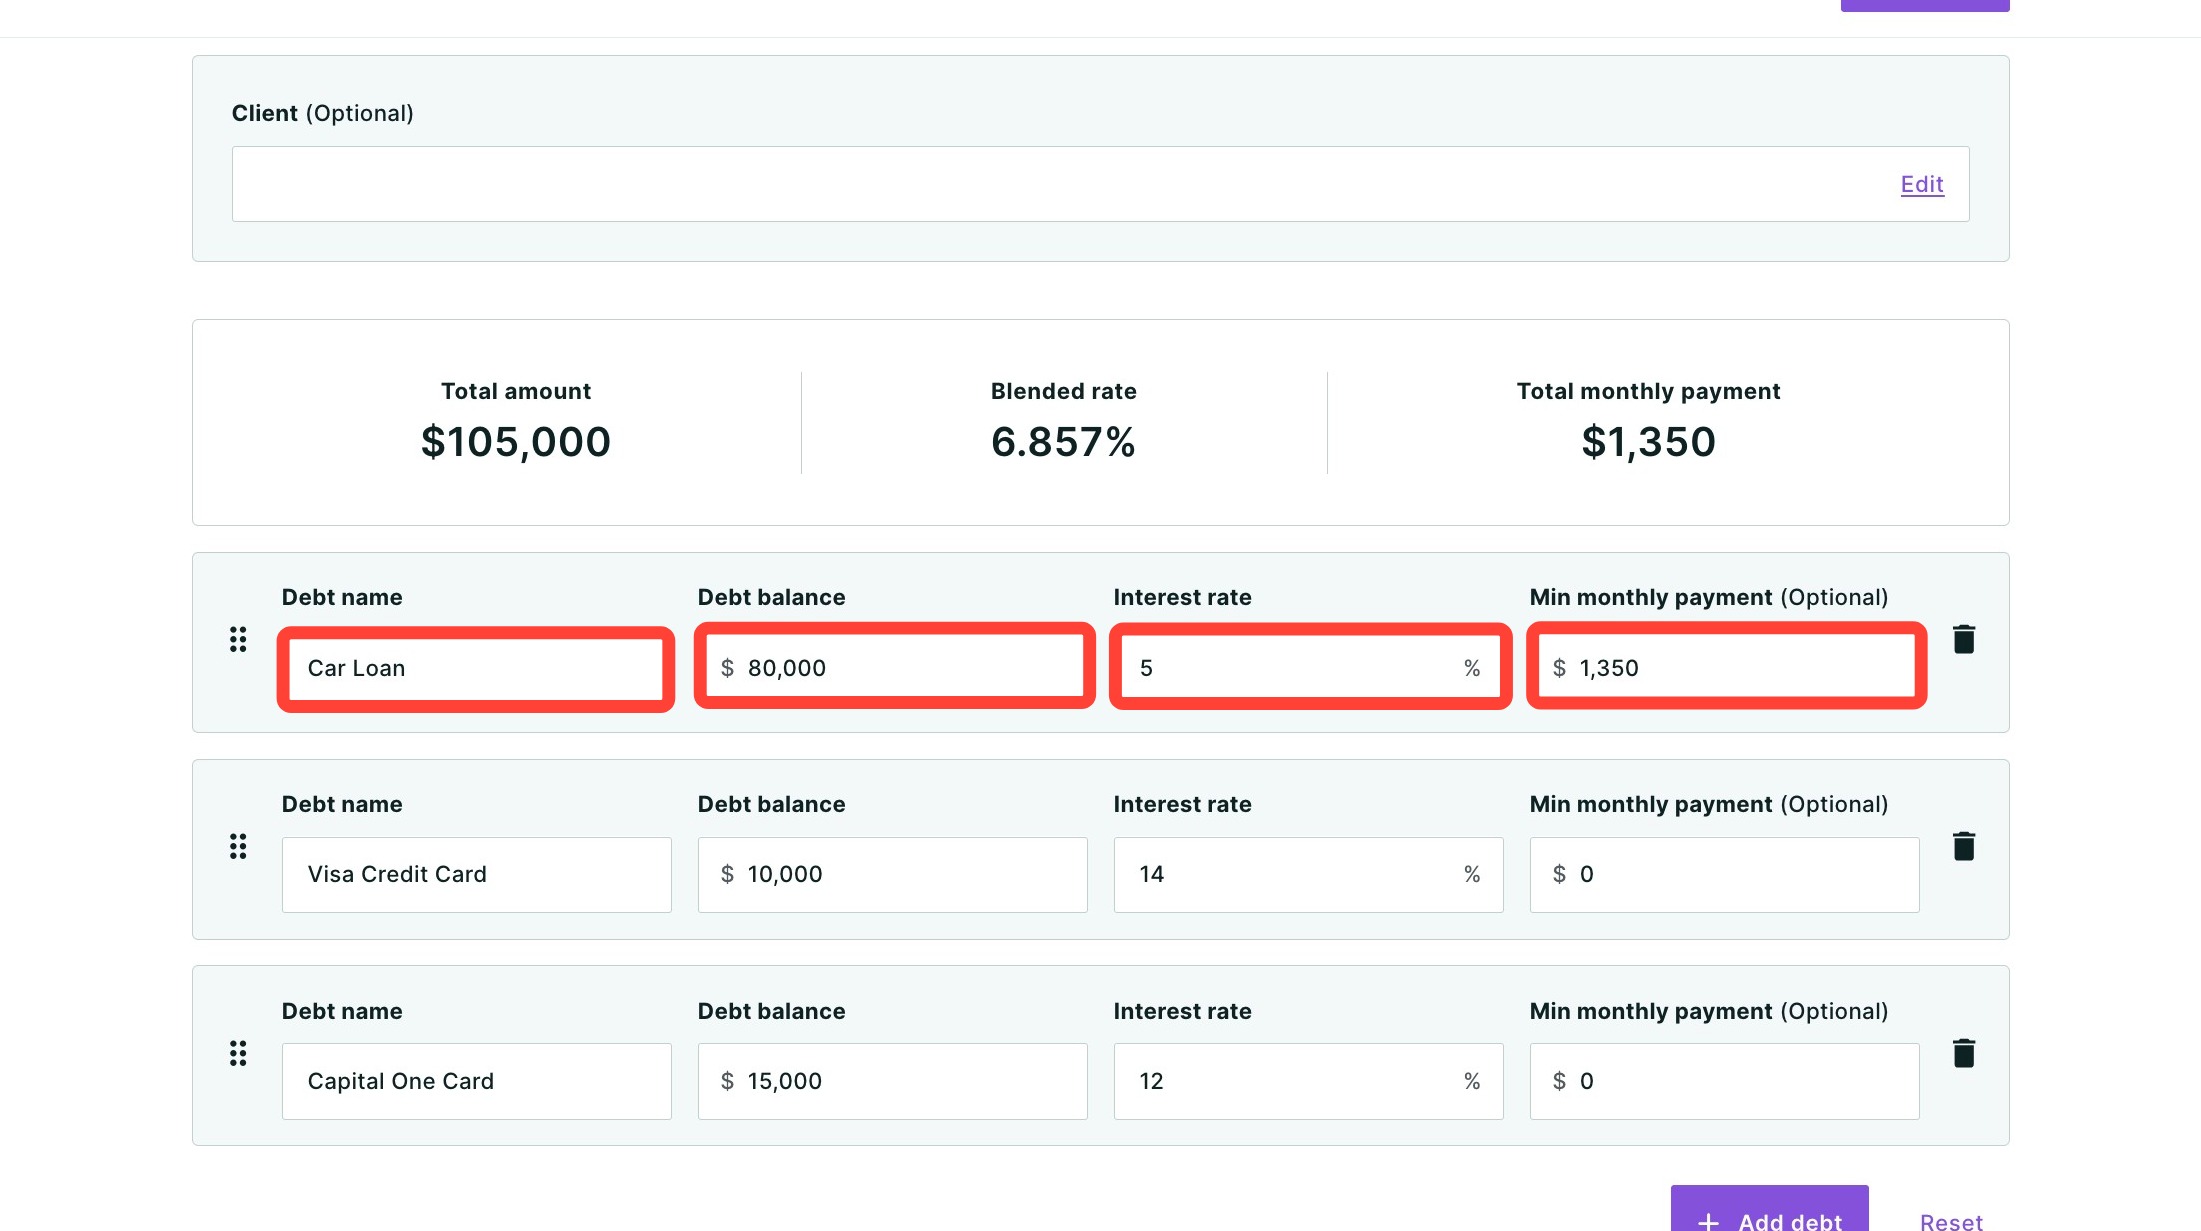
6. Review the summary at the top of the table. It will update automatically as you enter data. The table includes:
- Total amount: The combined balance of all debts entered.
- Blended rate: The weighted average interest rate across all debts. Debts with larger balances have a greater influence on this number.
- Total monthly payment: The sum of all minimum monthly payments entered.
Adding, Moving, or Removing Debts
By default, the calculator starts with three debt rows. You can add up to 15 total debts.
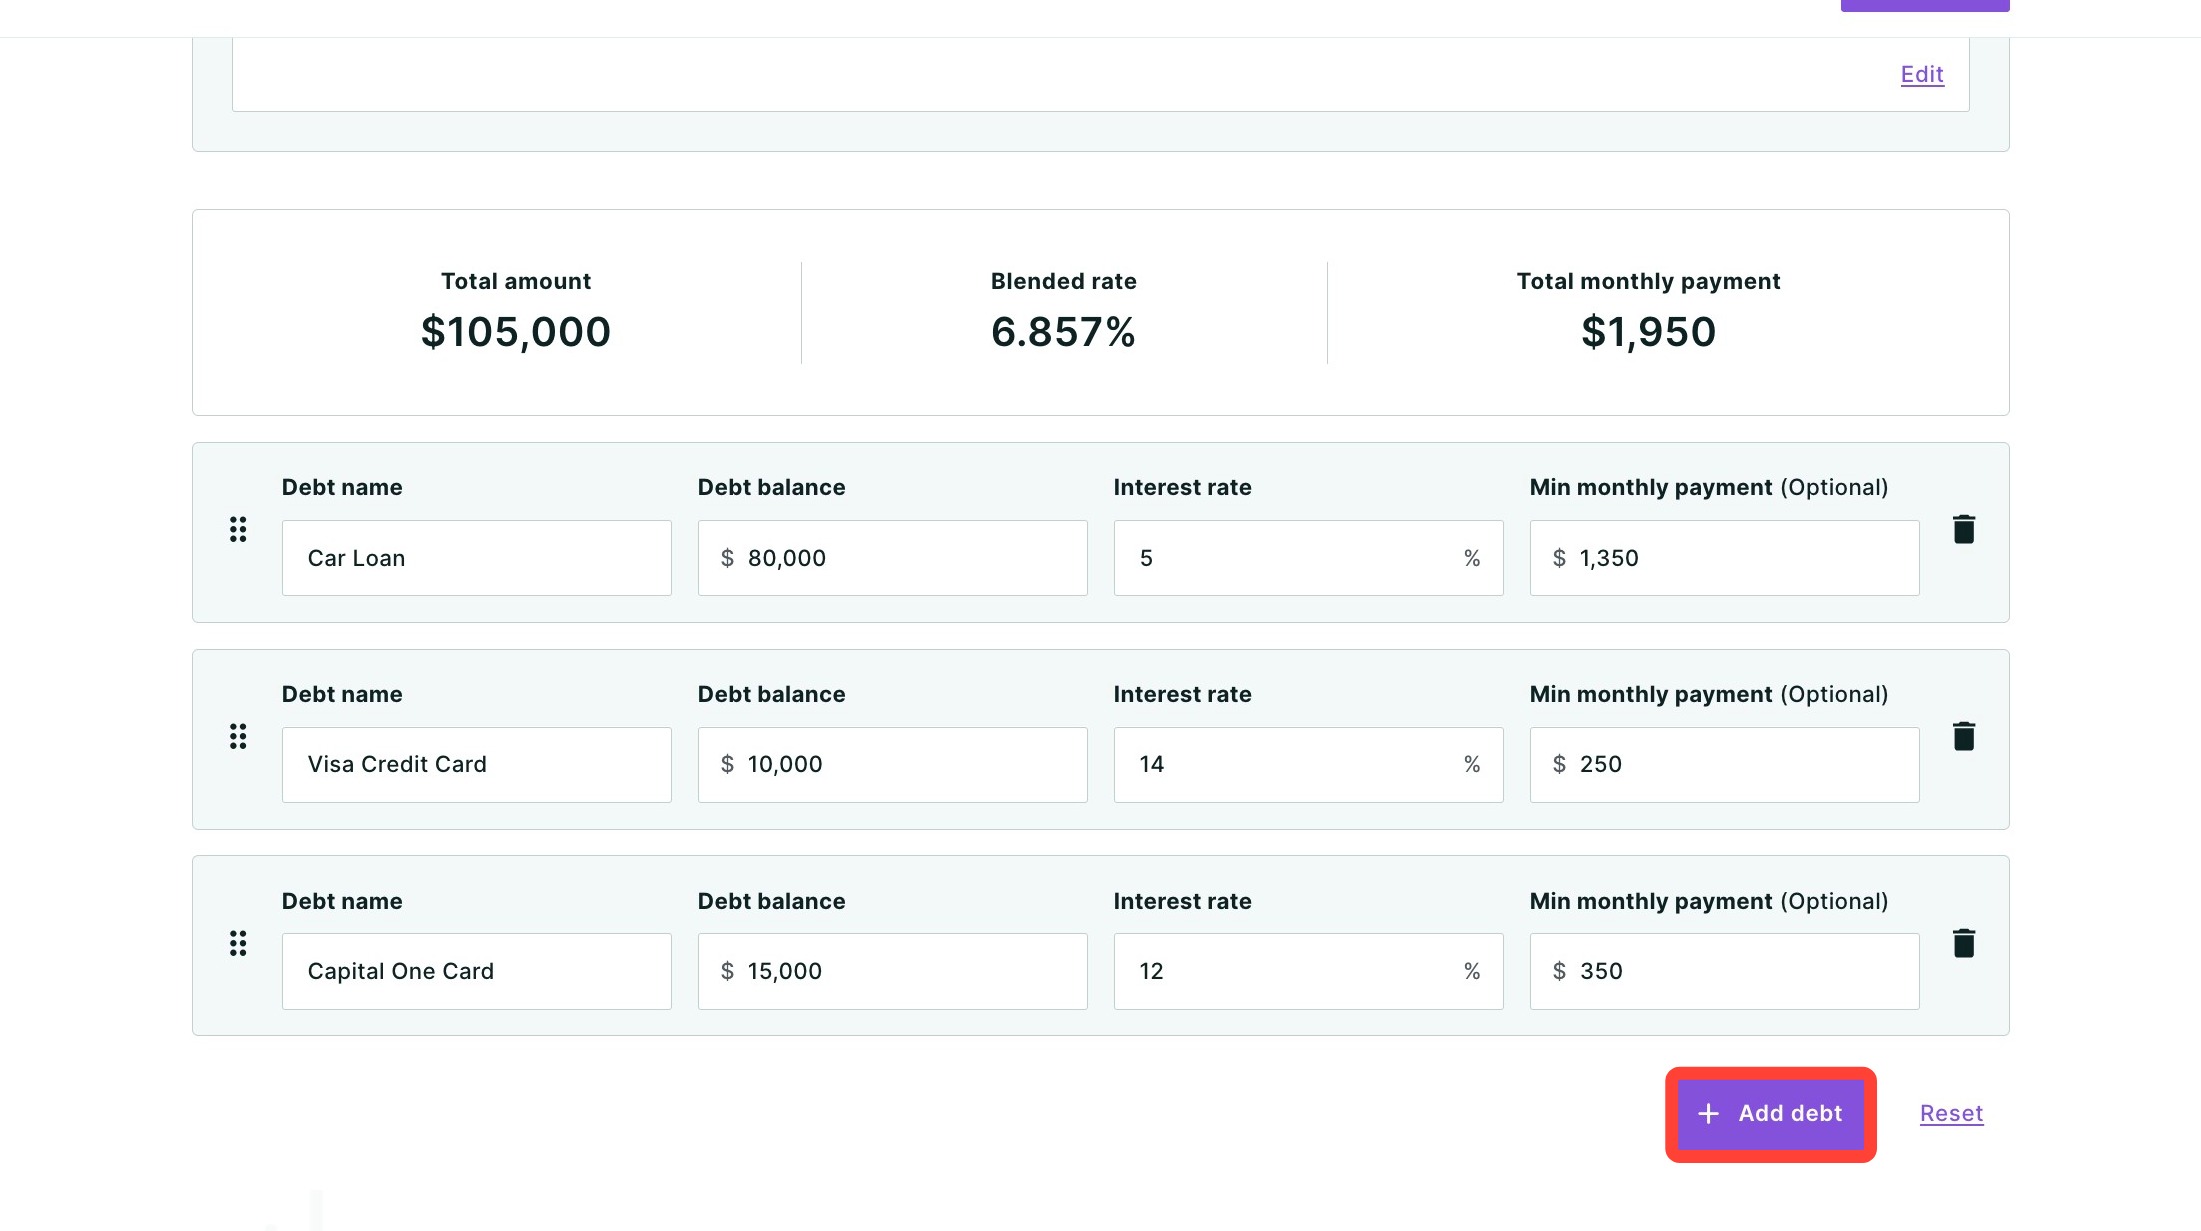
1. To add a debt, click + Add debt at the bottom right of the table.
2. To remove a debt, click the trash can icon on that row.

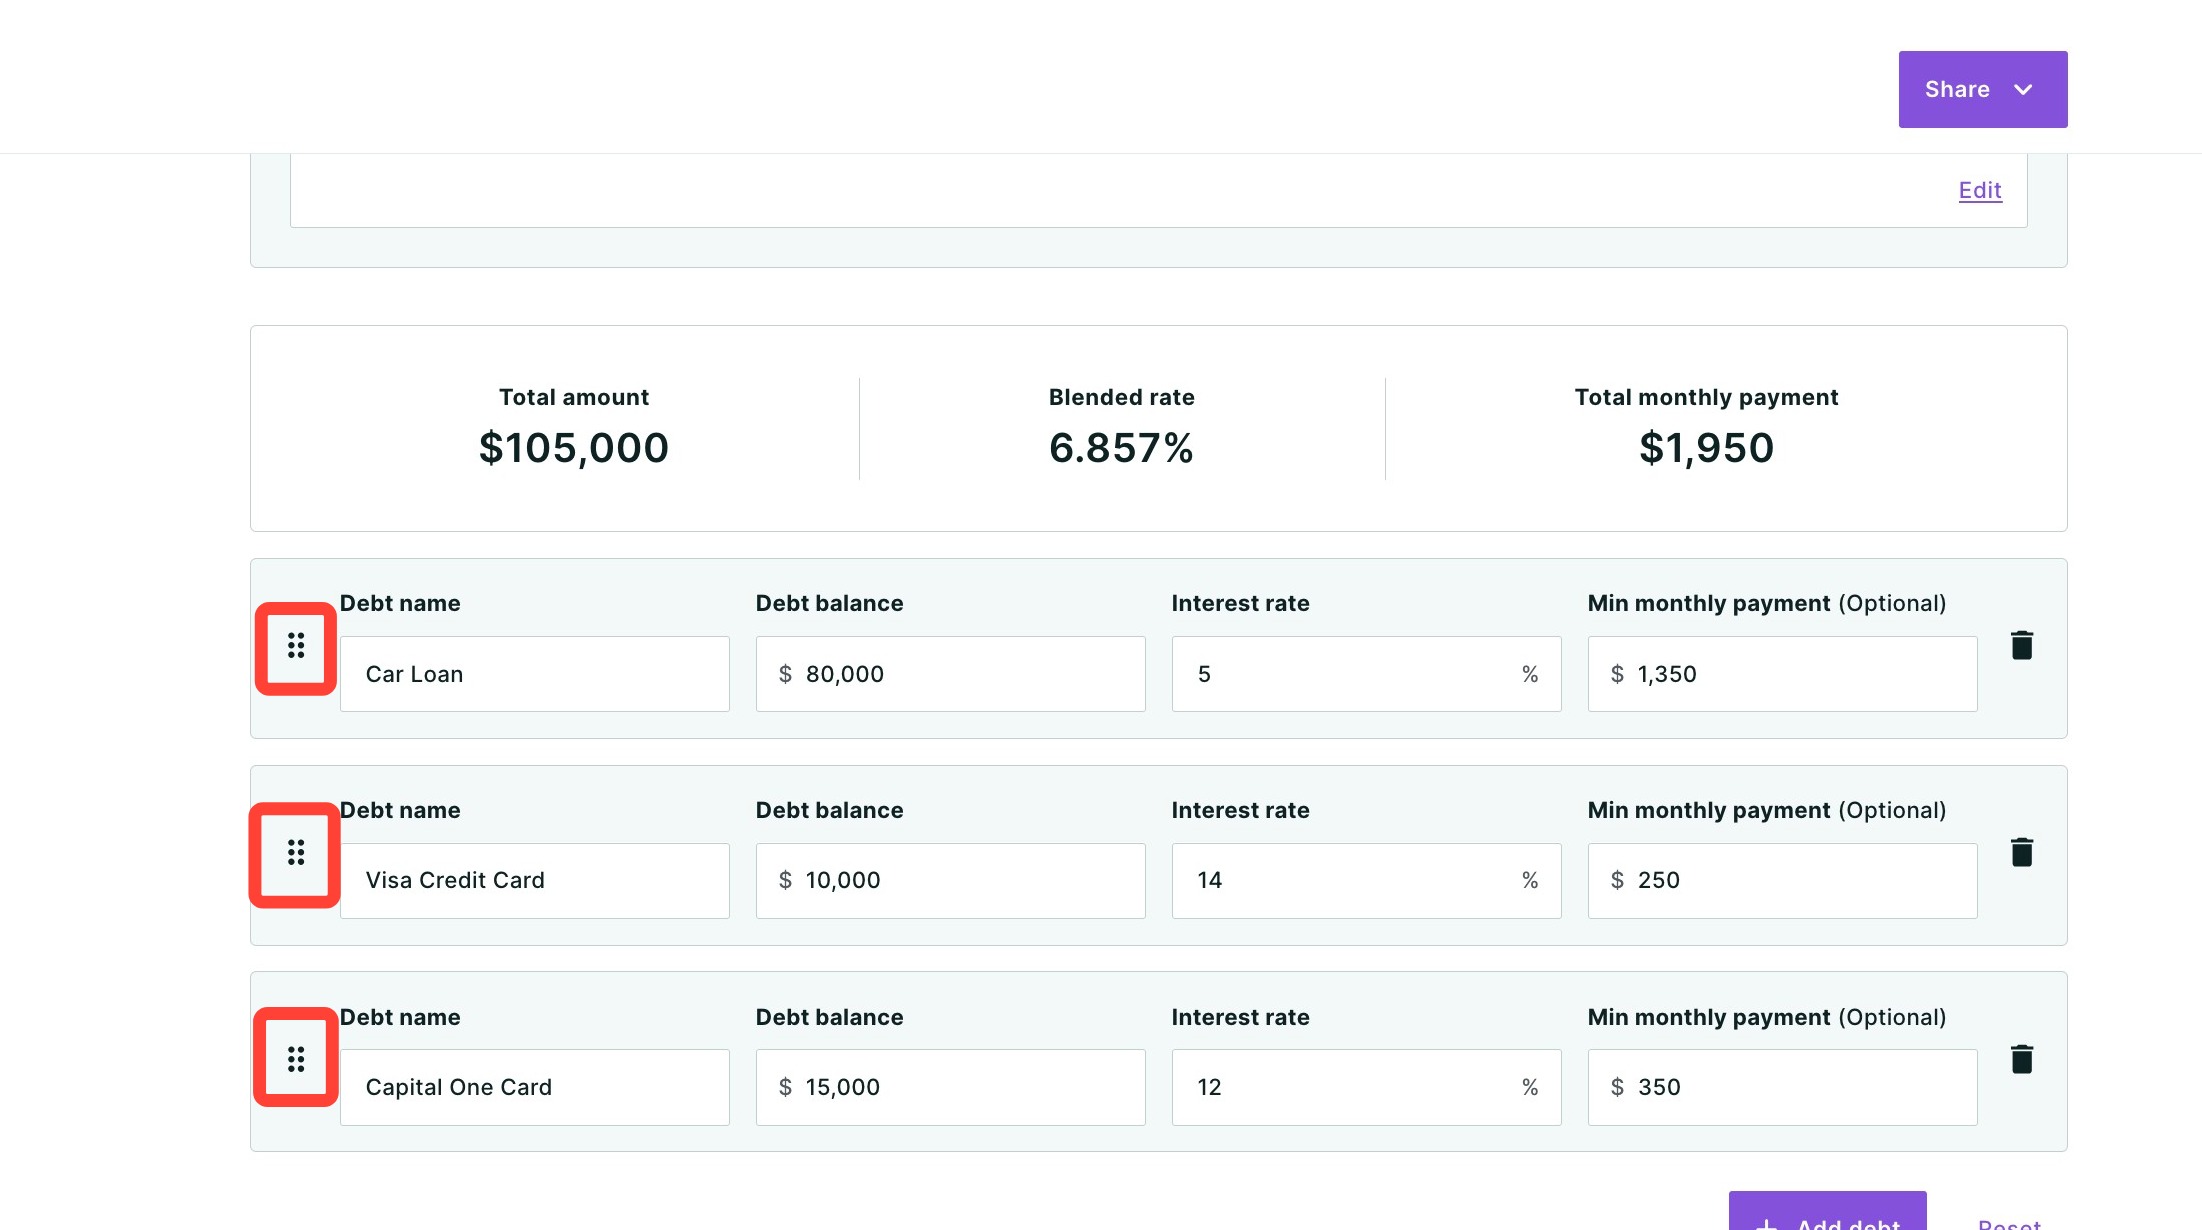
3. To reorder debts, click the grid handle (⠿) on the left side of a row and drag it to the desired position.
- Please note: On mobile devices, use the up and down arrows on each row to reorder debts.
To start over, click Reset at the bottom right of the table to clear all entries.
Sharing the Report
To share the completed report, click Share in the top right-hand corner of the page. A dropdown menu will appear.
- Click Download to download the report as a PDF.
- Click Send a link via email with an optional video recording (not available for some users depending on their company permission settings).
- Click Host a meeting to virtually meet to discuss the report with your client.
- Click Record a Video to provide your client with a clear walkthrough of the report along with your own insights and context.
To learn more about sharing your report, click here.
Need Help?
Have questions or want to learn more? Submit a ticket or call us today!
Related to